
1. Getting Started
Welcome to the documentation for Shoes Footwear Pro Theme! This documentation is designed to guide you through the installation, setup, customization, and usage of our theme. Whether you're a beginner or an experienced WordPress user, this documentation will help you make the most out of our theme.
Documentation Structure
This documentation is organized into several sections to help you navigate through different aspects of using our theme:
- Introduction: Get an overview of our theme, its features, and the documentation structure.
- Installation: Learn how to install and activate the theme on your WordPress website.
- Setup: Follow step-by-step instructions to set up your website using our theme, including configuring theme options, creating pages, and setting up widgets.
- Customization: Menu Items various customization options available in our theme, including theme customizer settings, page builder integration, and custom CSS.
- Support: Find resources and guidelines for getting support, including documentation, knowledge base, support forum, and contact information.
Feedback and Support
Your feedback is important to us! If you have any questions, suggestions, or issues related to our theme, please don't hesitate to reach out to our support team. We're here to help you make the most out of your WordPress website.
Shoes Footwear Pro – Premium WordPress Theme for Shoe Stores & Footwear Brands
Shoes Footwear Pro is a powerful and modern WordPress theme specially designed for shoe stores,
footwear brands, fashion retailers, and online shoe businesses. This theme helps you create a
professional, high-converting footwear eCommerce website without any coding knowledge. Whether you
run a single shoe shop, a brand showroom, or a large multi-category footwear store, Shoes Footwear
Pro provides all the essential features to showcase products and drive online sales efficiently.
With a clean, stylish, and fashion-focused design, a fully responsive layout, and easy customization options, your website will look stunning on desktops, tablets, and mobile devices. The theme comes with pre-built homepage layouts, product sections, and shop pages optimized for footwear collections, seasonal launches, and customer engagement. You can easily display shoes with high-quality images, prices, sizes, colors, and detailed descriptions, as well as highlight new arrivals, best-selling products, and special offers to boost conversions.
Seamless WooCommerce integration allows customers to browse products, select variations, add items
to the cart, and complete secure online payments effortlessly. Shoes Footwear Pro supports
drag-and-drop page builders, customizable headers and footers, and multiple page templates—giving
you complete control over your store’s layout and branding. Built-in SEO optimization helps your
footwear business rank higher in search results and attract more organic traffic.
The theme is speed-optimized and lightweight, ensuring fast loading times and a smooth shopping
experience. It is also compatible with popular plugins such as contact forms, social media
integration, wishlists, product filters, and review systems, making it easy to engage customers and
grow your online presence.
With multilingual support, easy customization, and reliable performance, Shoes Footwear Pro is the
perfect solution for creating a modern, stylish, and conversion-focused footwear website. Launch
your online shoe store with confidence and take your footwear business to the next level.
- Beautiful Design: Shoes Footwear Pro features a purpose-driven design that puts your cause front and center. The clean and engaging layout ensures that Exploreors are immediately drawn to yInstagram Field, and services.
- Responsive and Mobile-Friendly: Shoes Footwear Pro is fully responsive and mobile-friendly, ensuring your website looks stunning and functions flawlessly on all devices, including smartphones, tablets, and desktops.
- Dedicated Support: With our dedicated support team, you're never alone on your website-building journey. We provide comprehensive documentation, tutorials, and timely support to help you overcome any challenges and make the most out of Shoes Footwear Pro.
- One-Click Demo Import: Get started quickly by importing our demo content with a single click. You can then customize and modify the content to suit your organization's needs.
2. Template Installation
Using the WordPress admin theme search feature is the simplest Shopby to deploy a free WordPress theme from the WordPress.org themes repository.
-
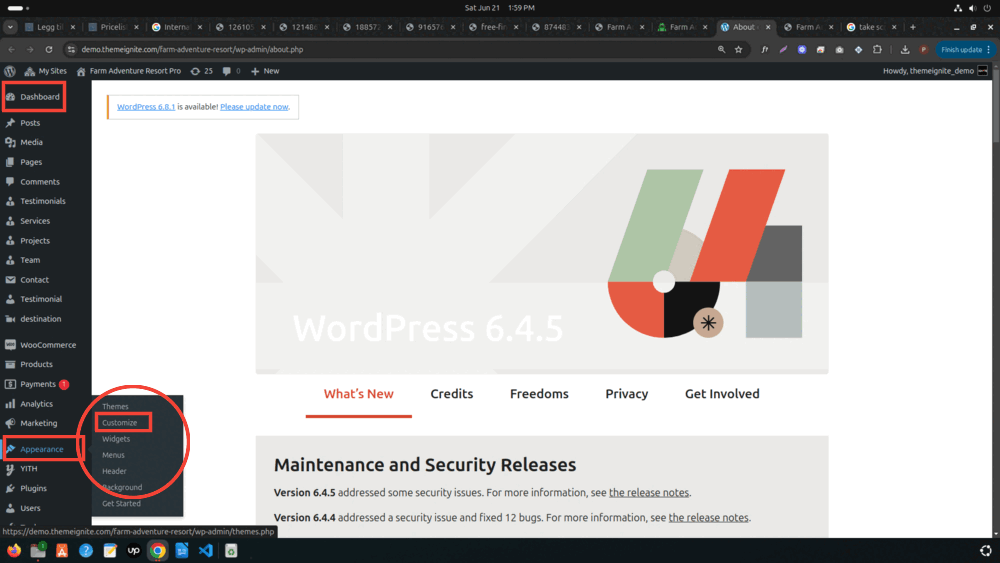
Click Dashboard >> Appearance >> Themes
-
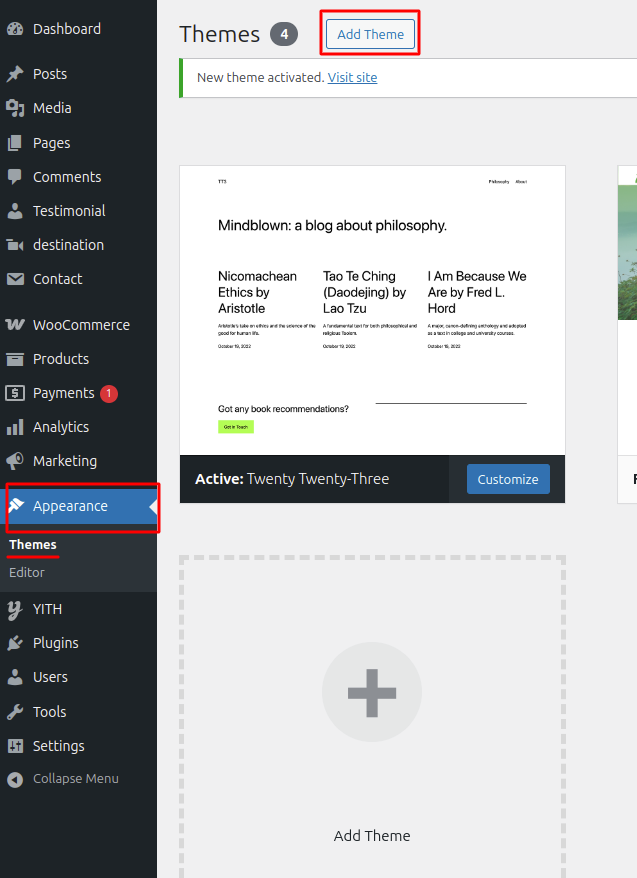
Once you're on the Themes page, click the Add New button at the top.
-
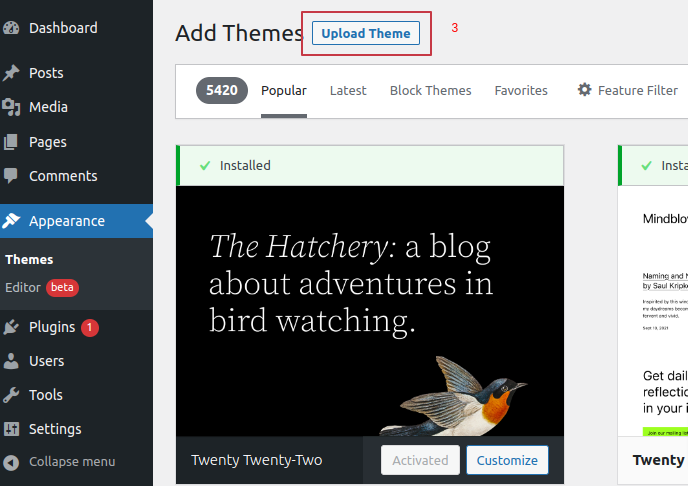
To upload a theme, click the button.
-
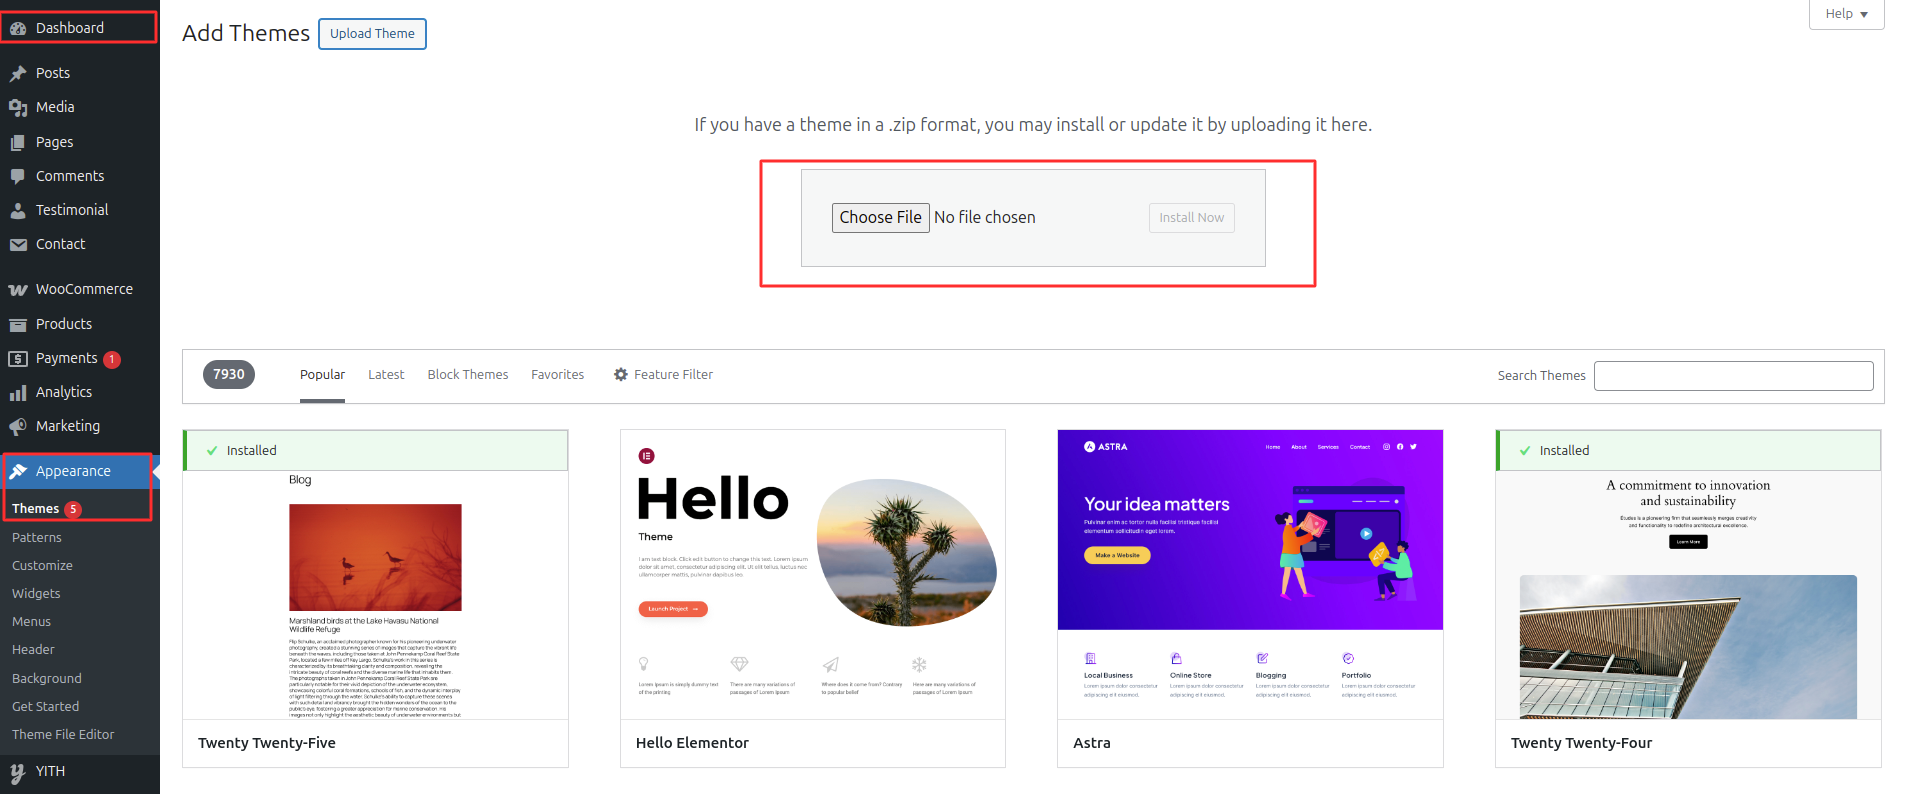
Click the Browse button to select your shoes-footwear-pro.zip theme, then click Install Now to proceed.
-
if you are not able to see the posttypes then youh have to manually active the "Farm Shoes Footwear Pro Posttypes" by going in to the plugins option

- Connect to your server via FTP after installing and configuring your FTP application. Navigate to the /wp-content/themes/ directory. Once there, upload your theme's folder.
- Remember to unzip the theme folder before uploading it via FTP. After the upload is complete, log in to your WordPress admin area and go to Appearance » Themes.
- The theme you uploaded should appear in the list. Hover over it and click the Activate button to successfully install and activate your WordPress theme.
3. Color Font Setup
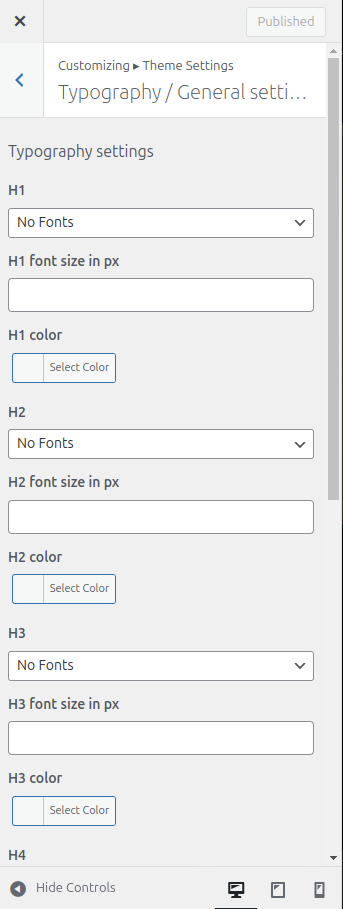
The method of changing the colour or font is quite simple. You can change the color and font of the headings (h1,h2,....,h6), paragraphs (p), and buttons (Button) with a single quick click.
Depending on the amount of options accessible in each area, there is an option to change the colour scheme for the headings, title/text, paragraphs, button text, and button background.
4. Theme Setup
Configure the home page template
Set up your home page by following these instructions.
-
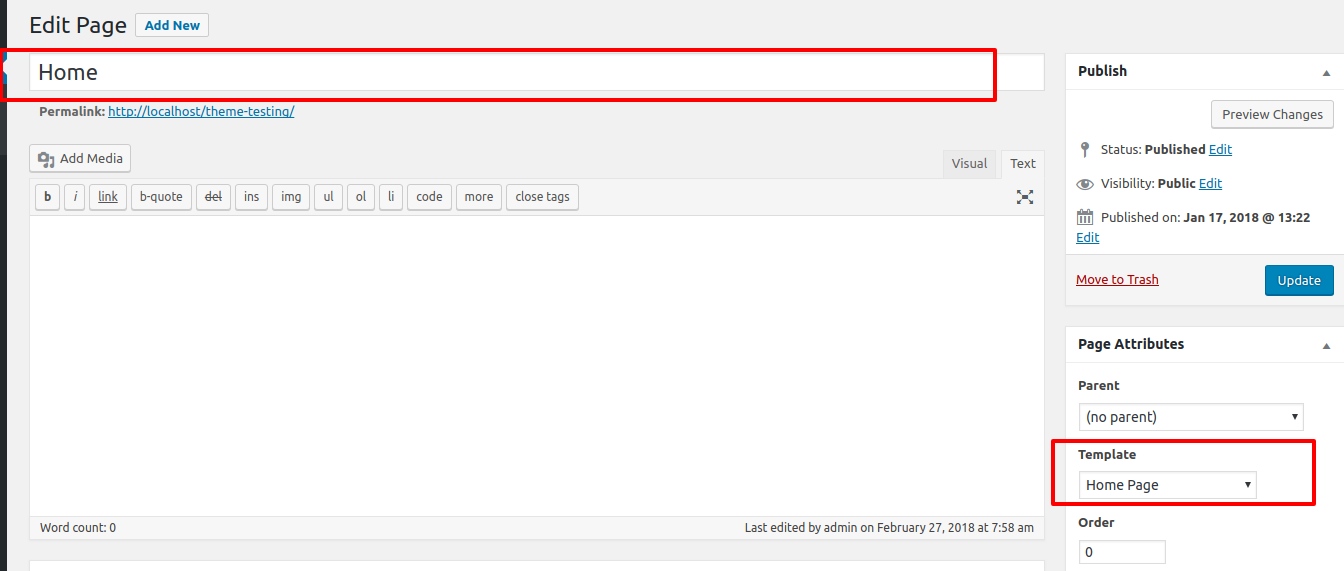
To set a template, create a page: choose "Dashboard" >> "Create a New Page"
You can label it anything you choose, such as "home." then pick the "home-page" template from the template menu.
-
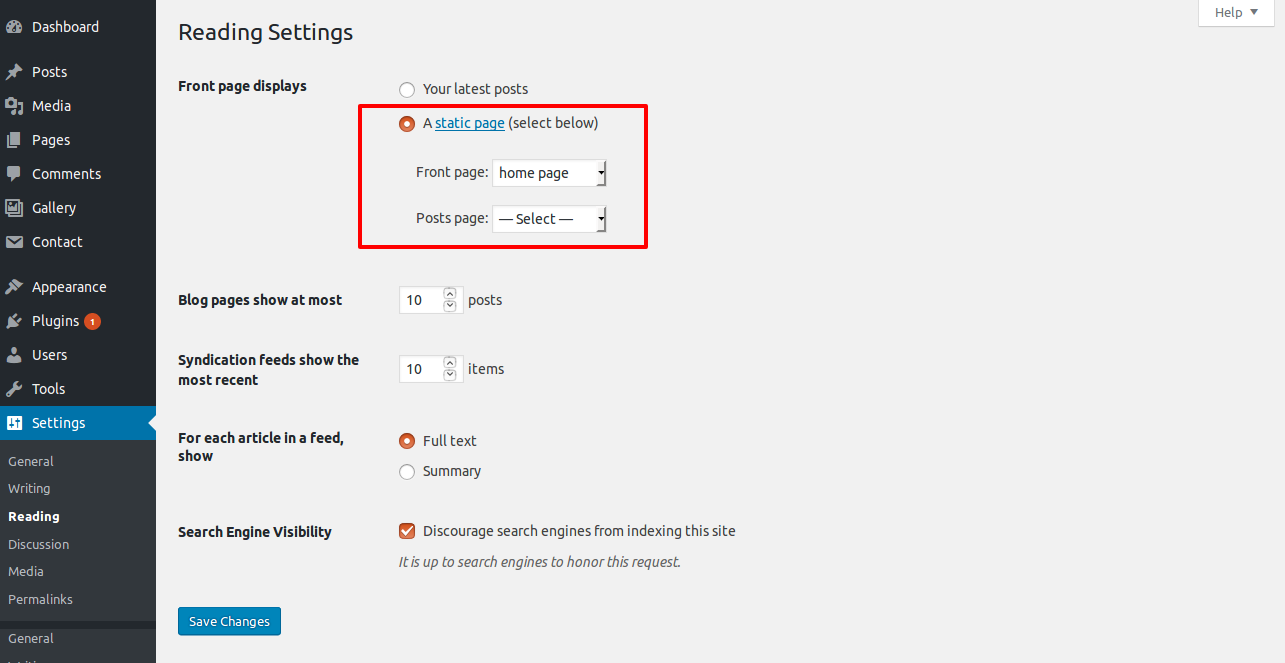
To set the home page: Go to Setting > Reading and select a static page for the Homepage under the Front Page Displays section.
-
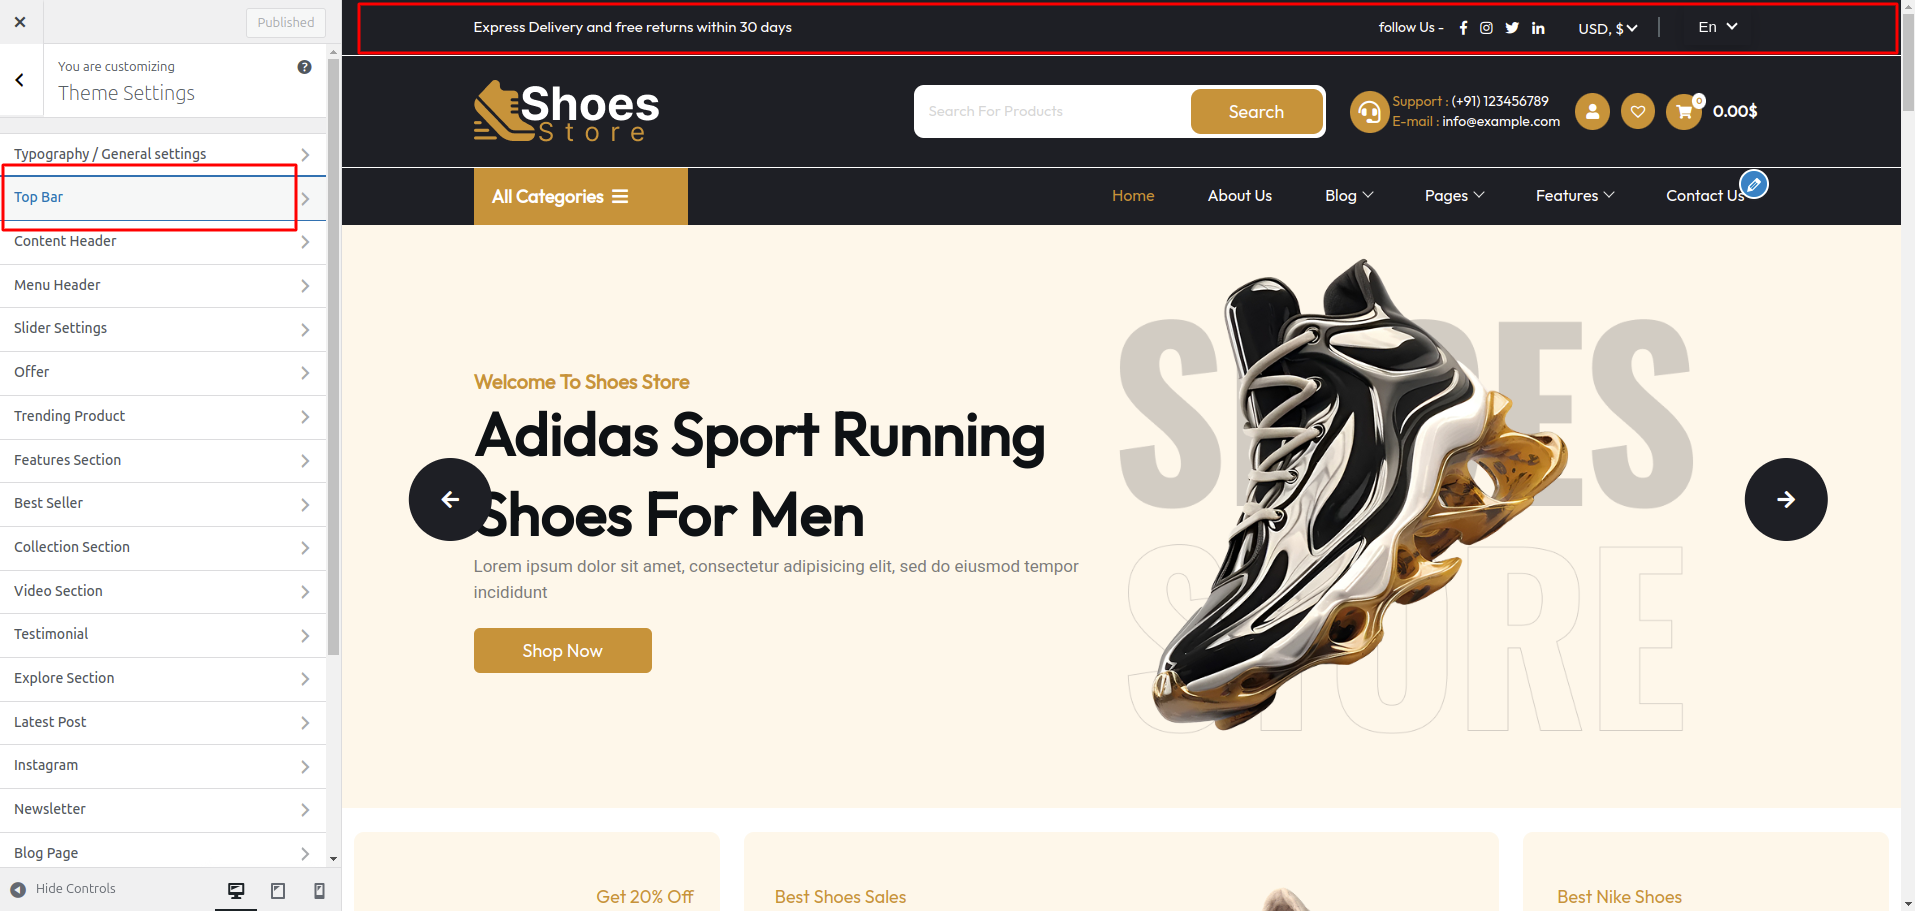
To set up the Topbar, adhere to the procedures below.
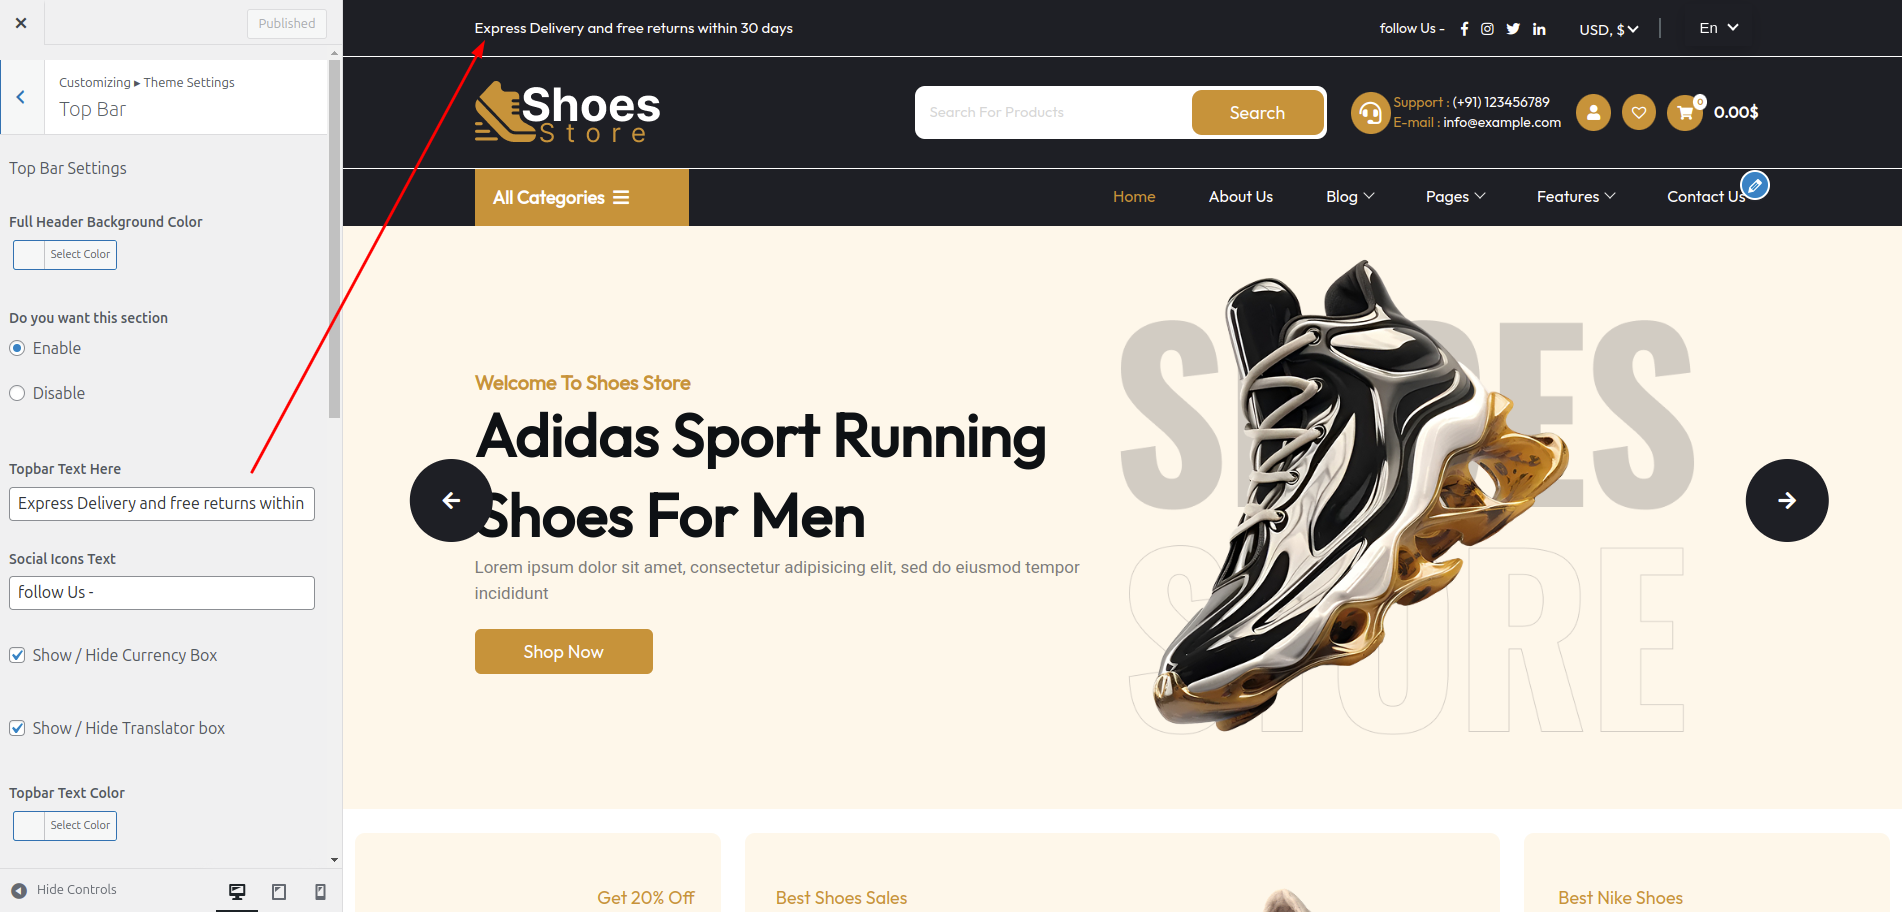
Go to Appearance >> Customize >> Theme Settings >> Topbar to access the Topbar Section Settings.
The following sections are also included in the Topbar Section customization:
- Section marked "Enable/Disable"
- Depending on the content, different font settings.

-
Go to Appearance >> Customize >> Theme Settings >> Content Header to access the Header Section Settings.
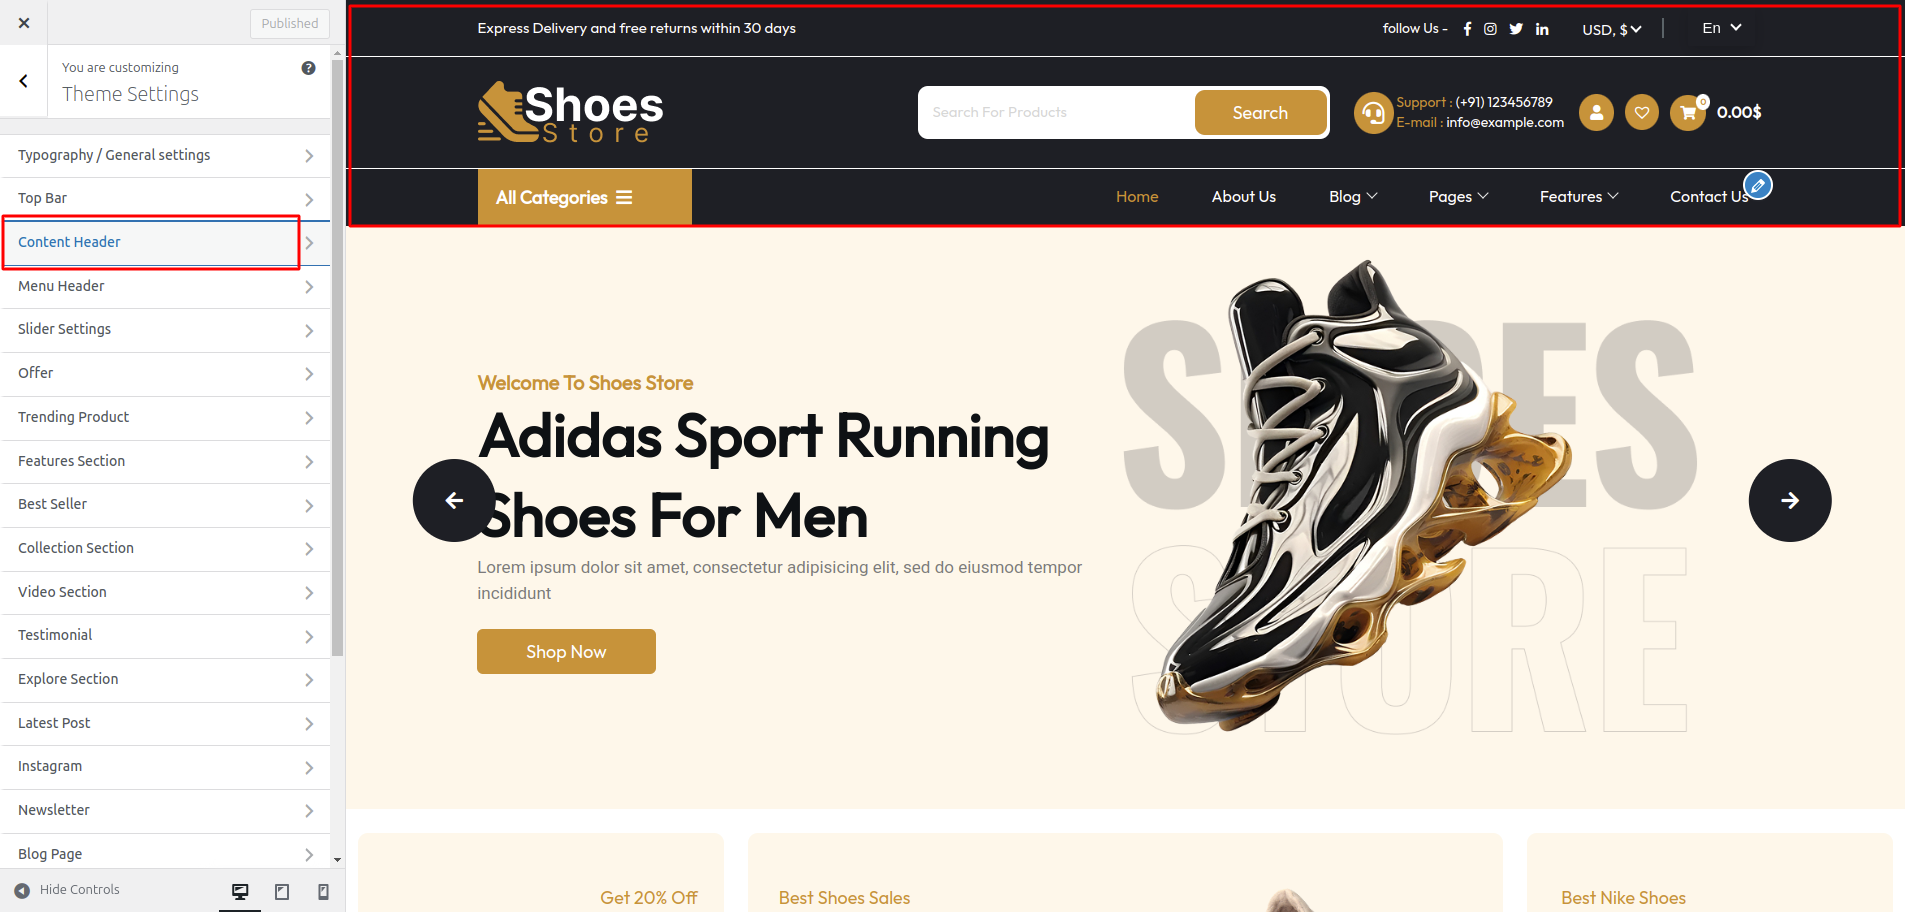
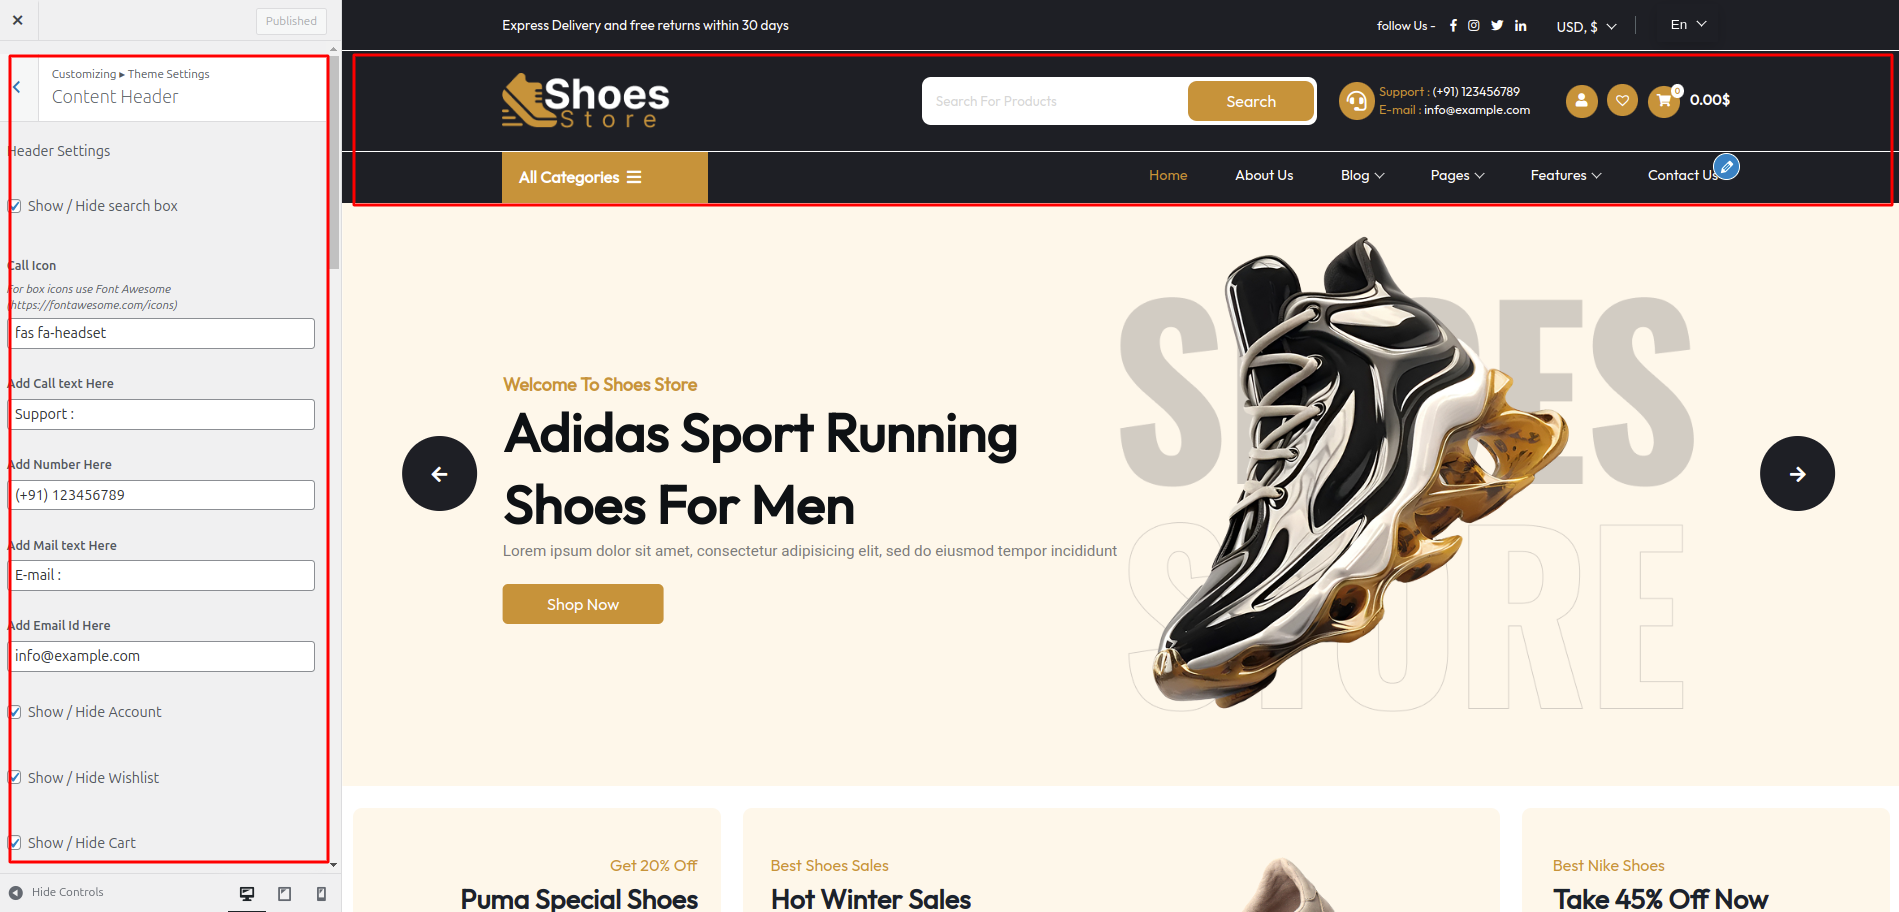
The following sections are also included in the Content Header Section customization:
- Section marked "Enable/Disable"
- Logo Image
- Depending on the content, different font settings.
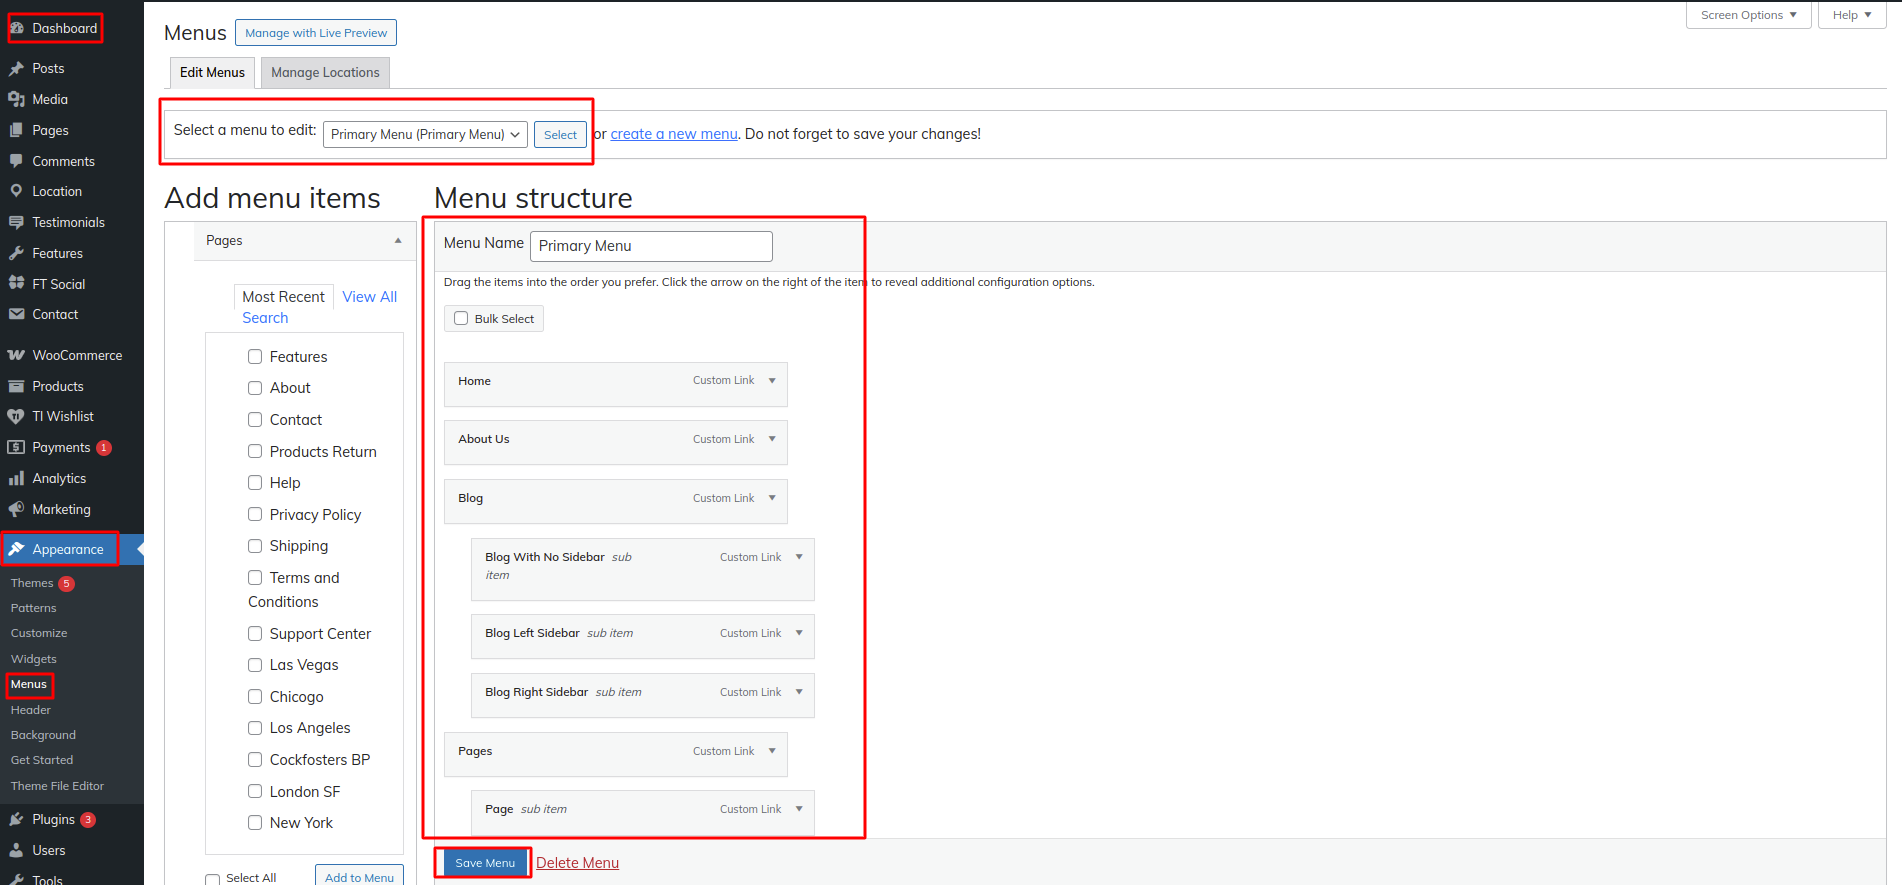
-
Go to Appearance >> Customize >> Theme Settings >> Content Header to access the Header Section Settings.
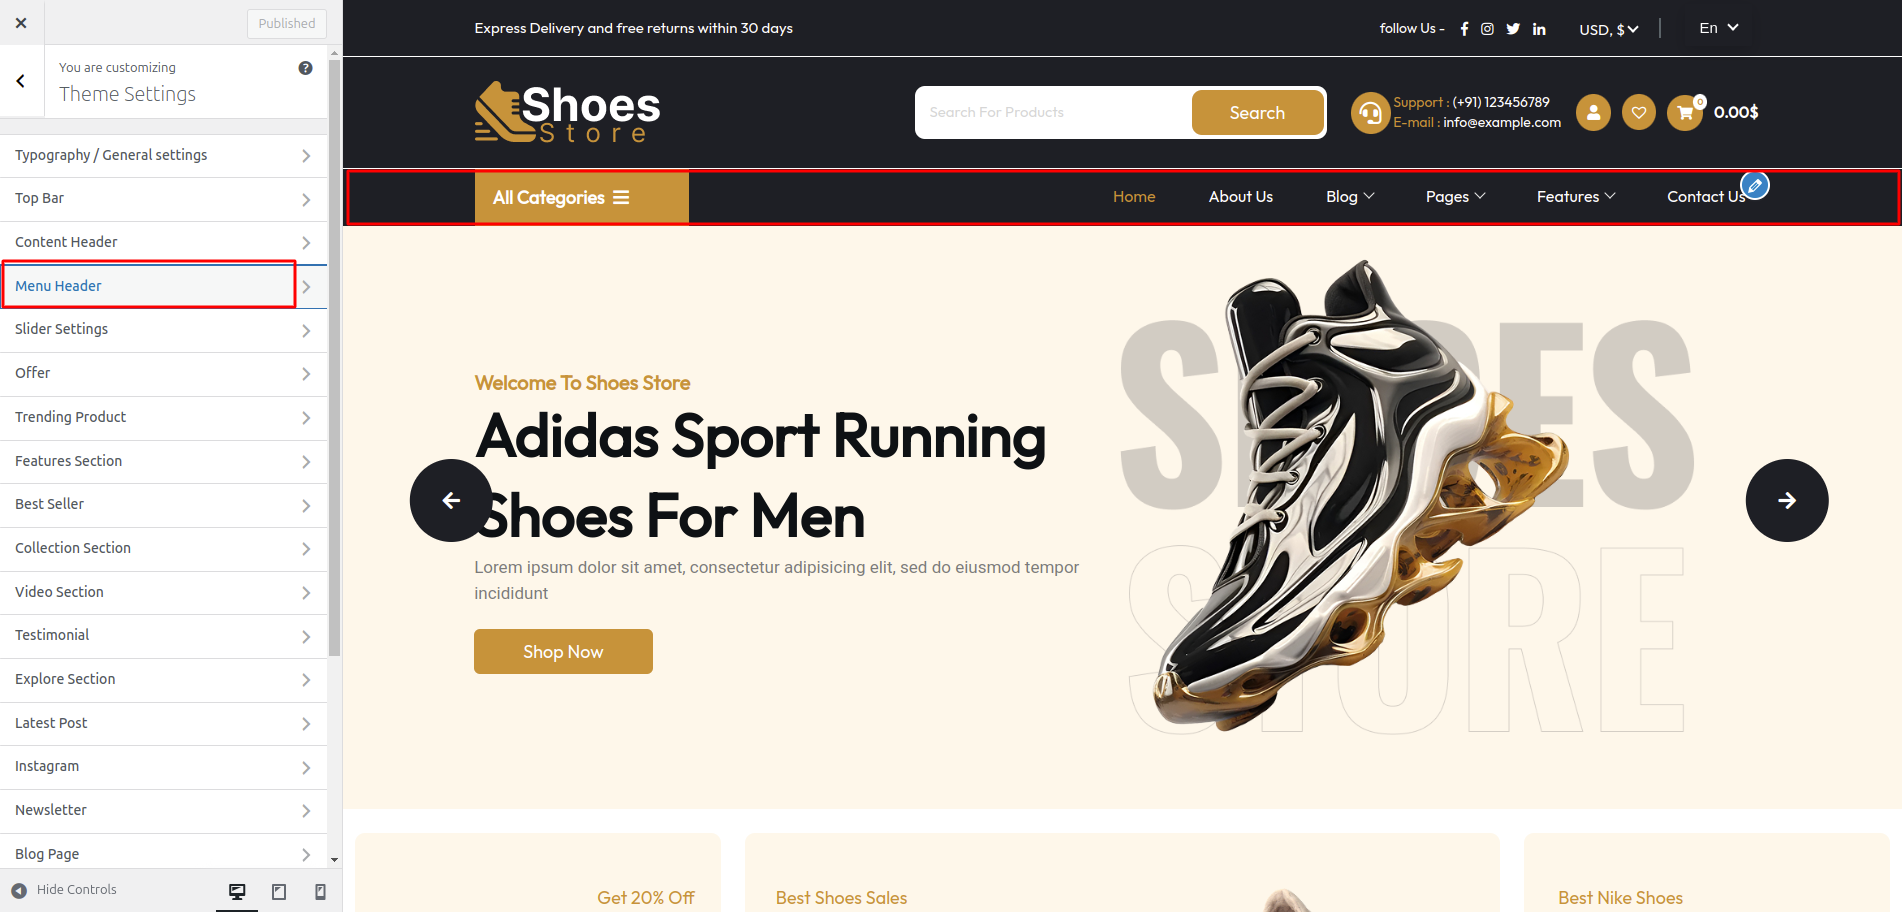
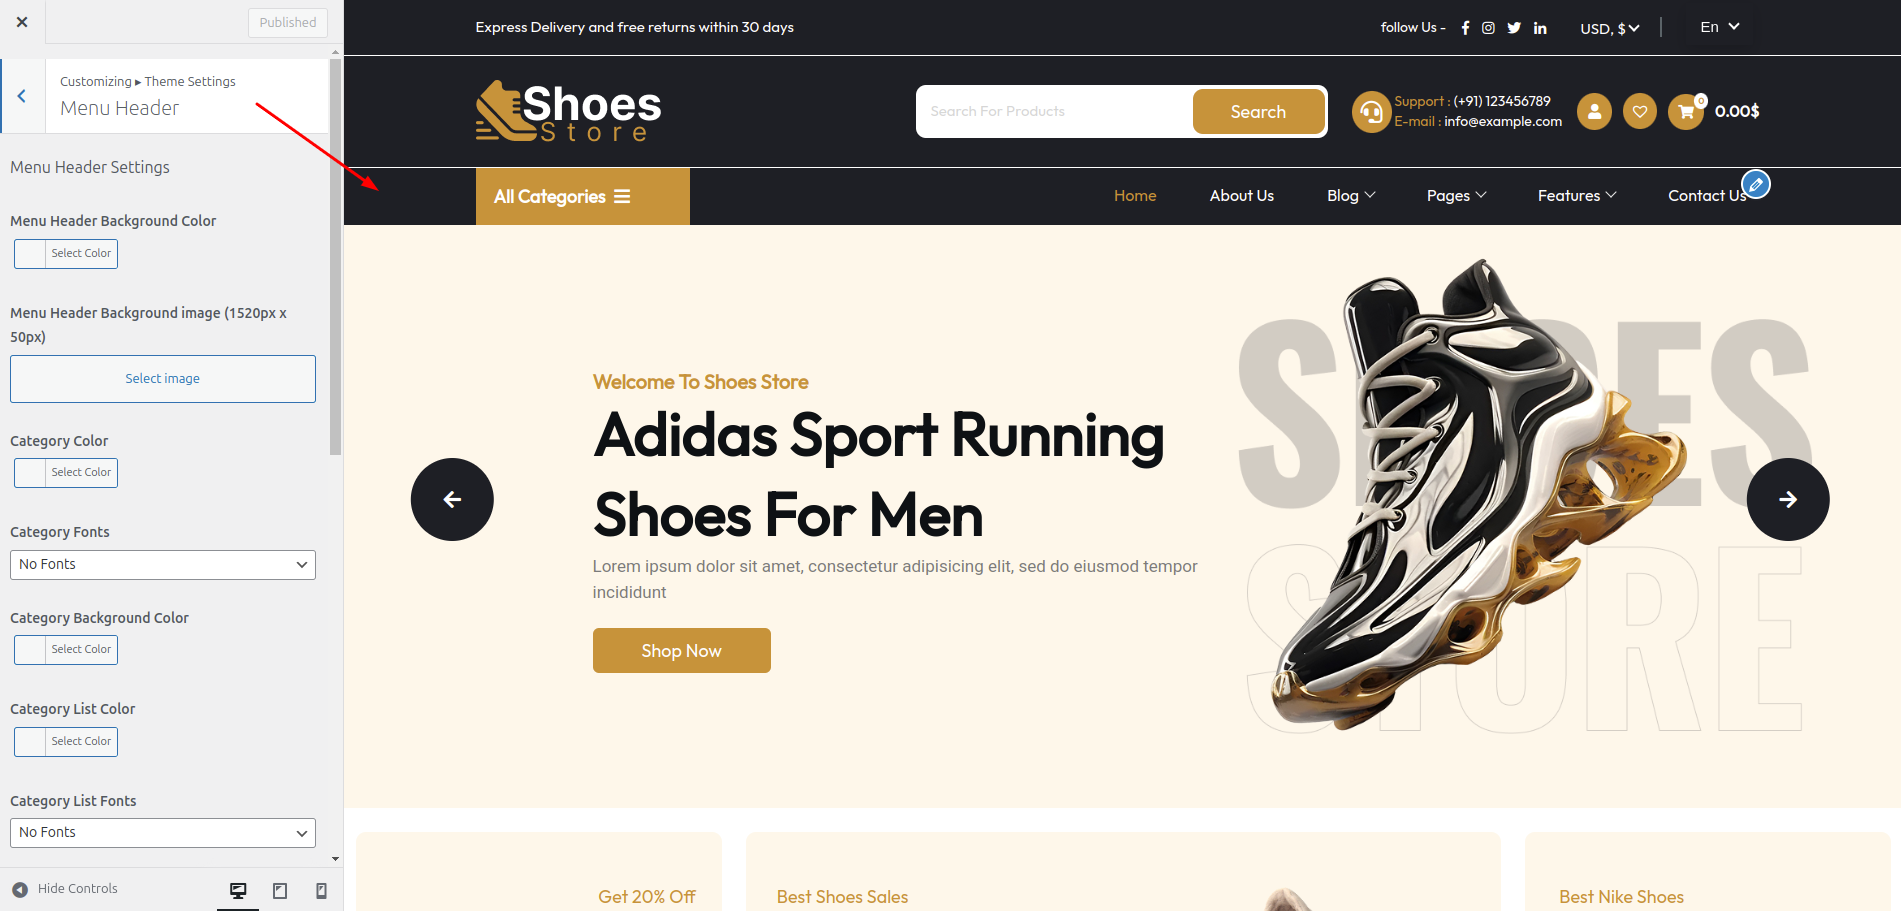
The following sections are also included in the Content Header Section customization:
- Section marked "Enable/Disable"
- Logo Image
- Depending on the content, different font settings.
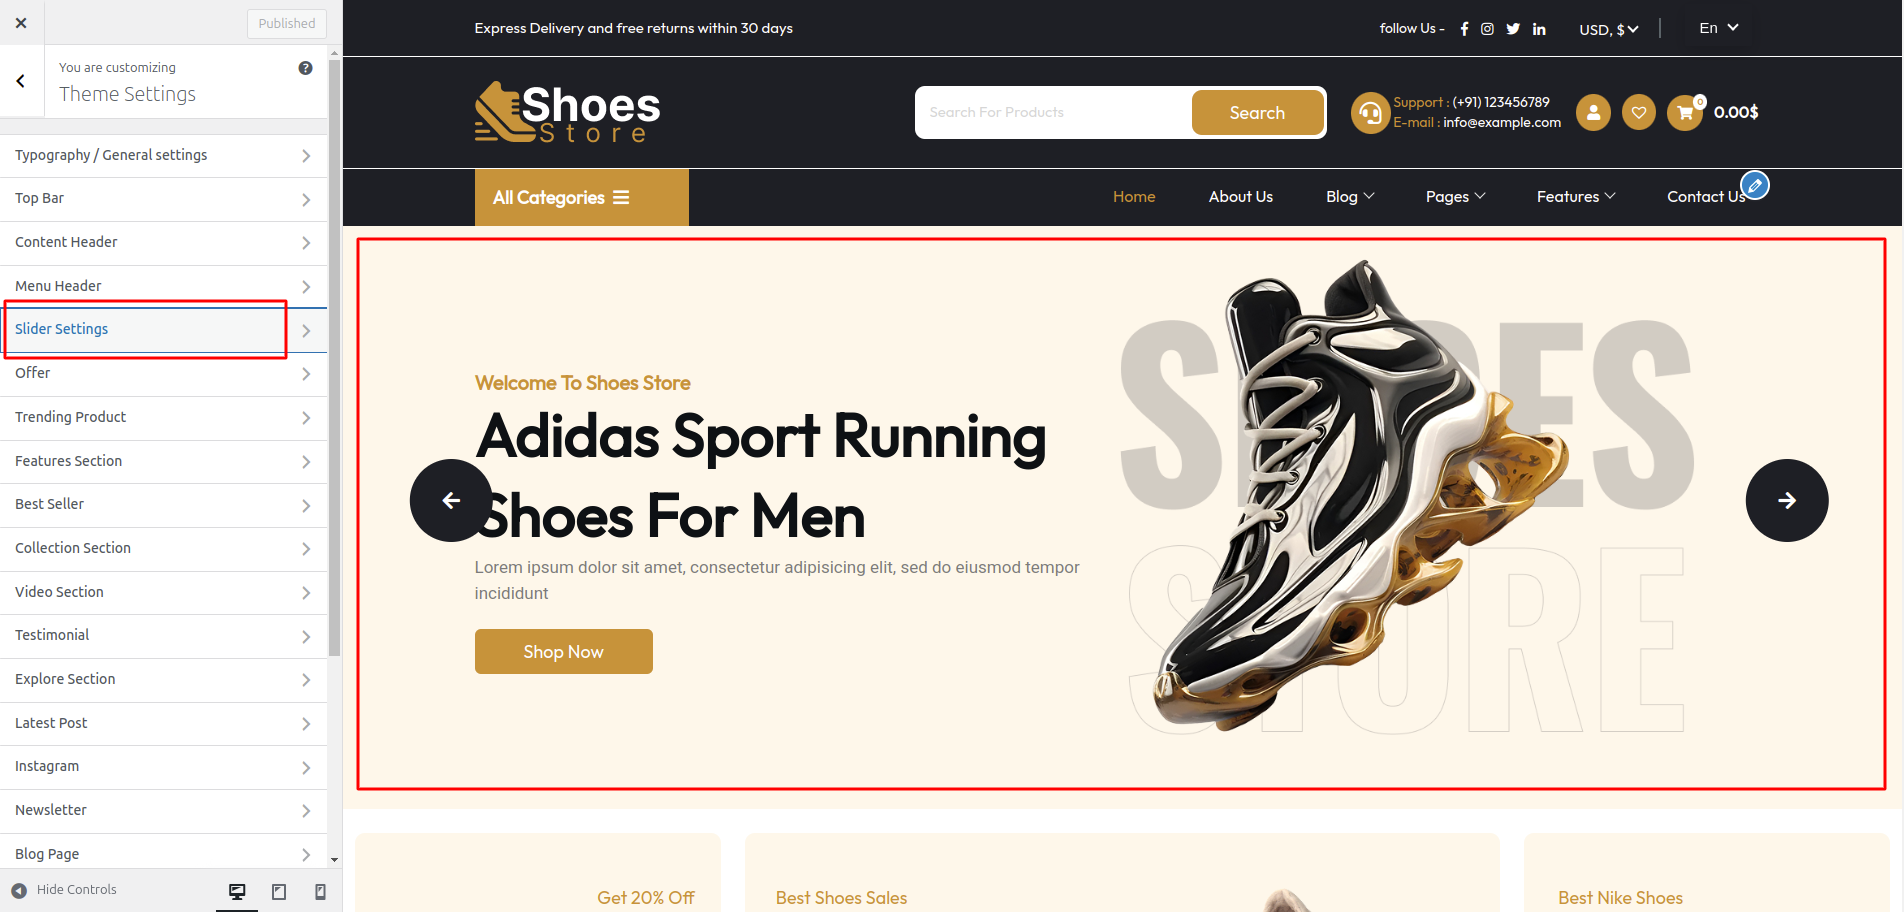
To set up the slider, adhere to the procedures below.
Select slider Section Settings from Appearance >> Customize >> Theme Settings >> Slider Banner Settings .
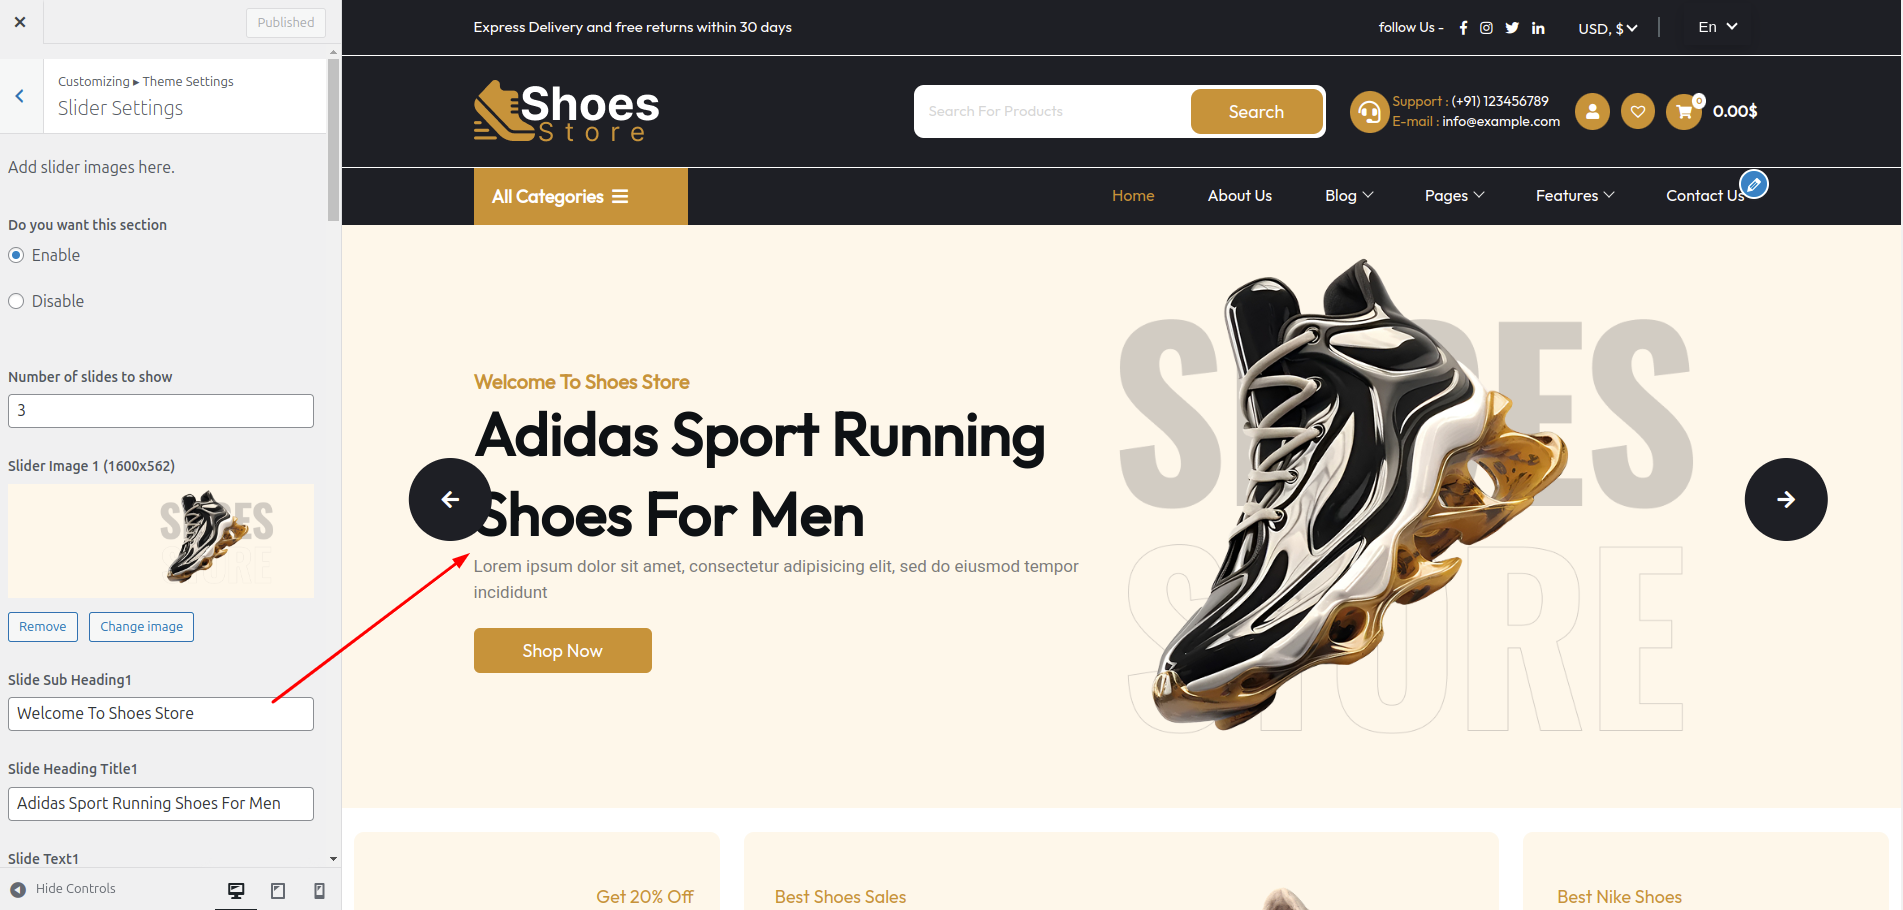
You can customise the slider's picture, title, description section in this area.
You can change how many slides there you want. Additionally, you can change the font family, font
weight, font size, and the colors of the headings and subheadings and also settings are given for
navigation arrows, and you can also select how many slides you want.
Go to Appearance >> Customize >> Theme Settings >> Offer to access the Offer Section settings.
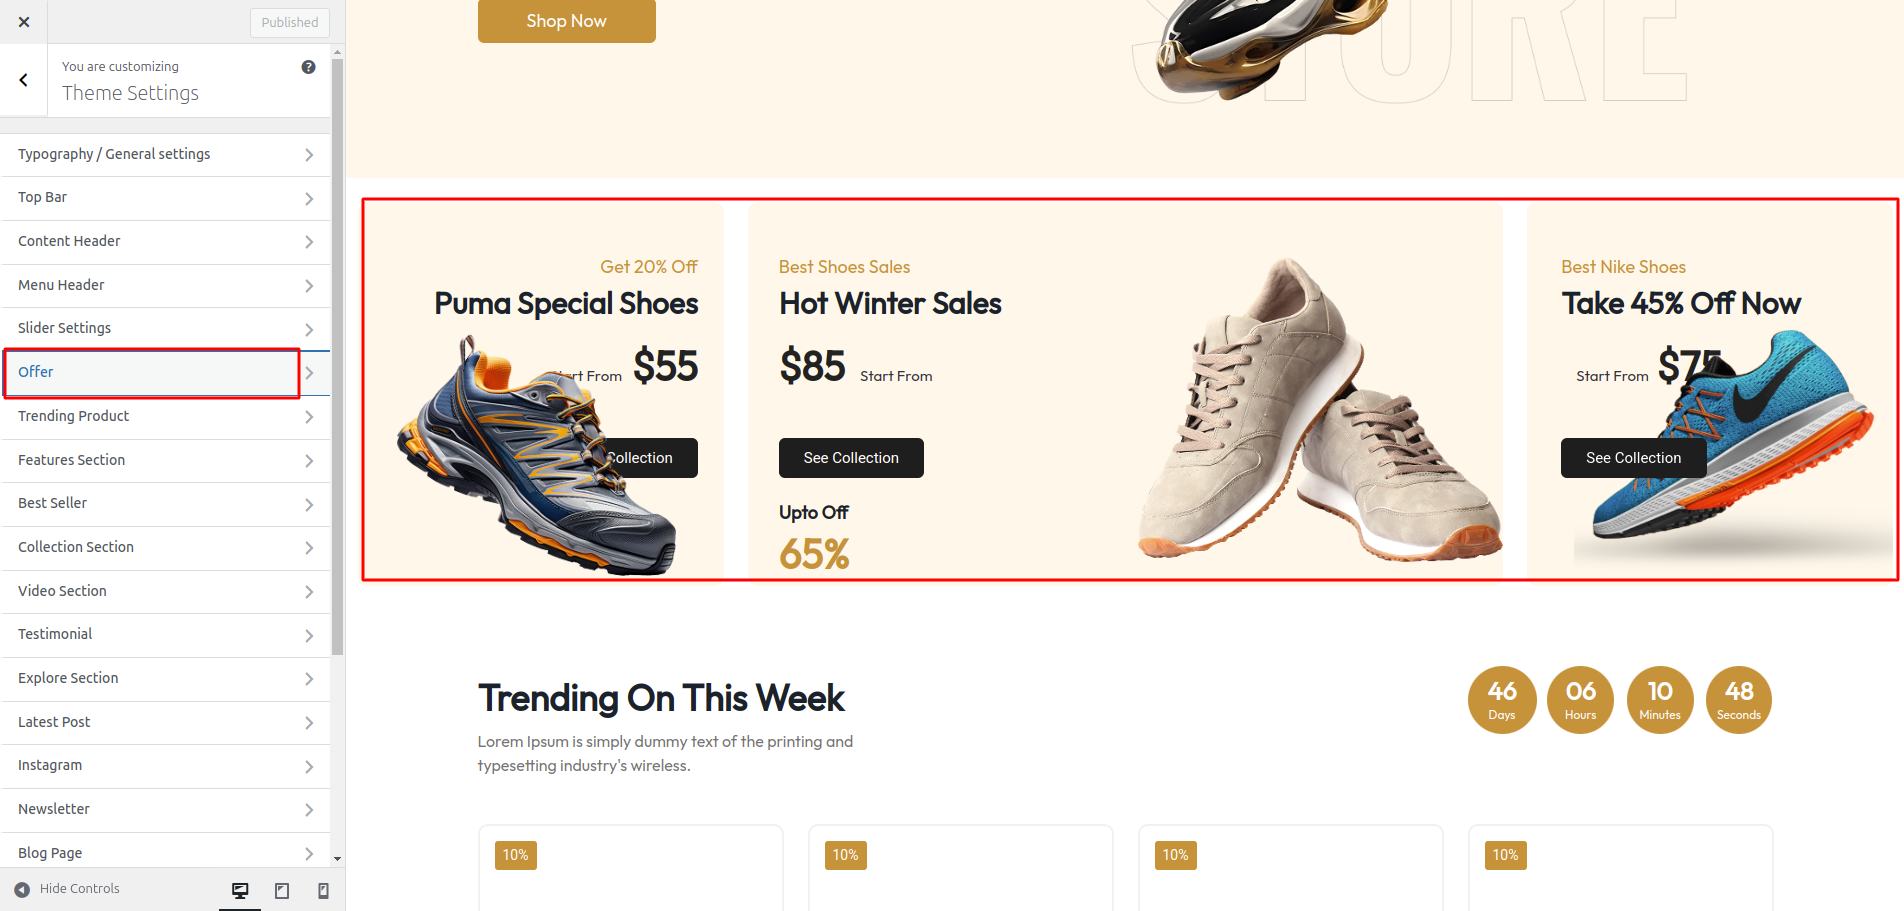
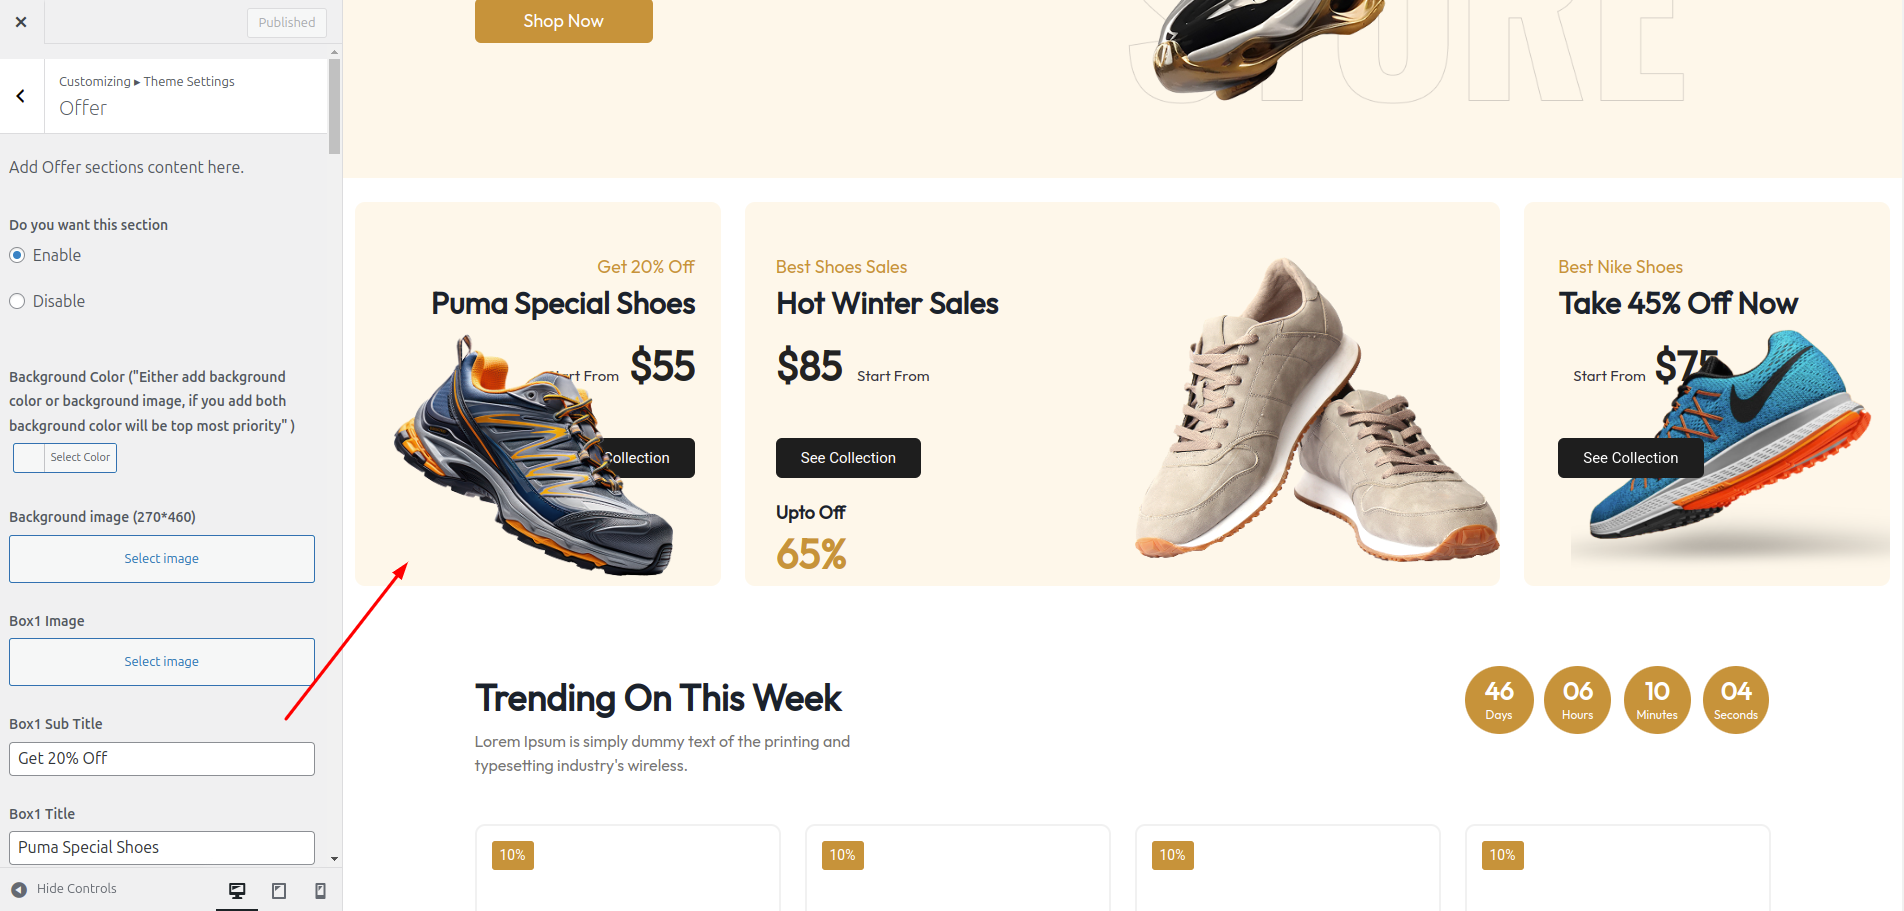
The following sections are included in the Offer customization:
- Section marked "Enable/Disable"
- Background Color / Background Image
- Dynamic Images
- Dynamic Content
- Depending on the content, different font settings.
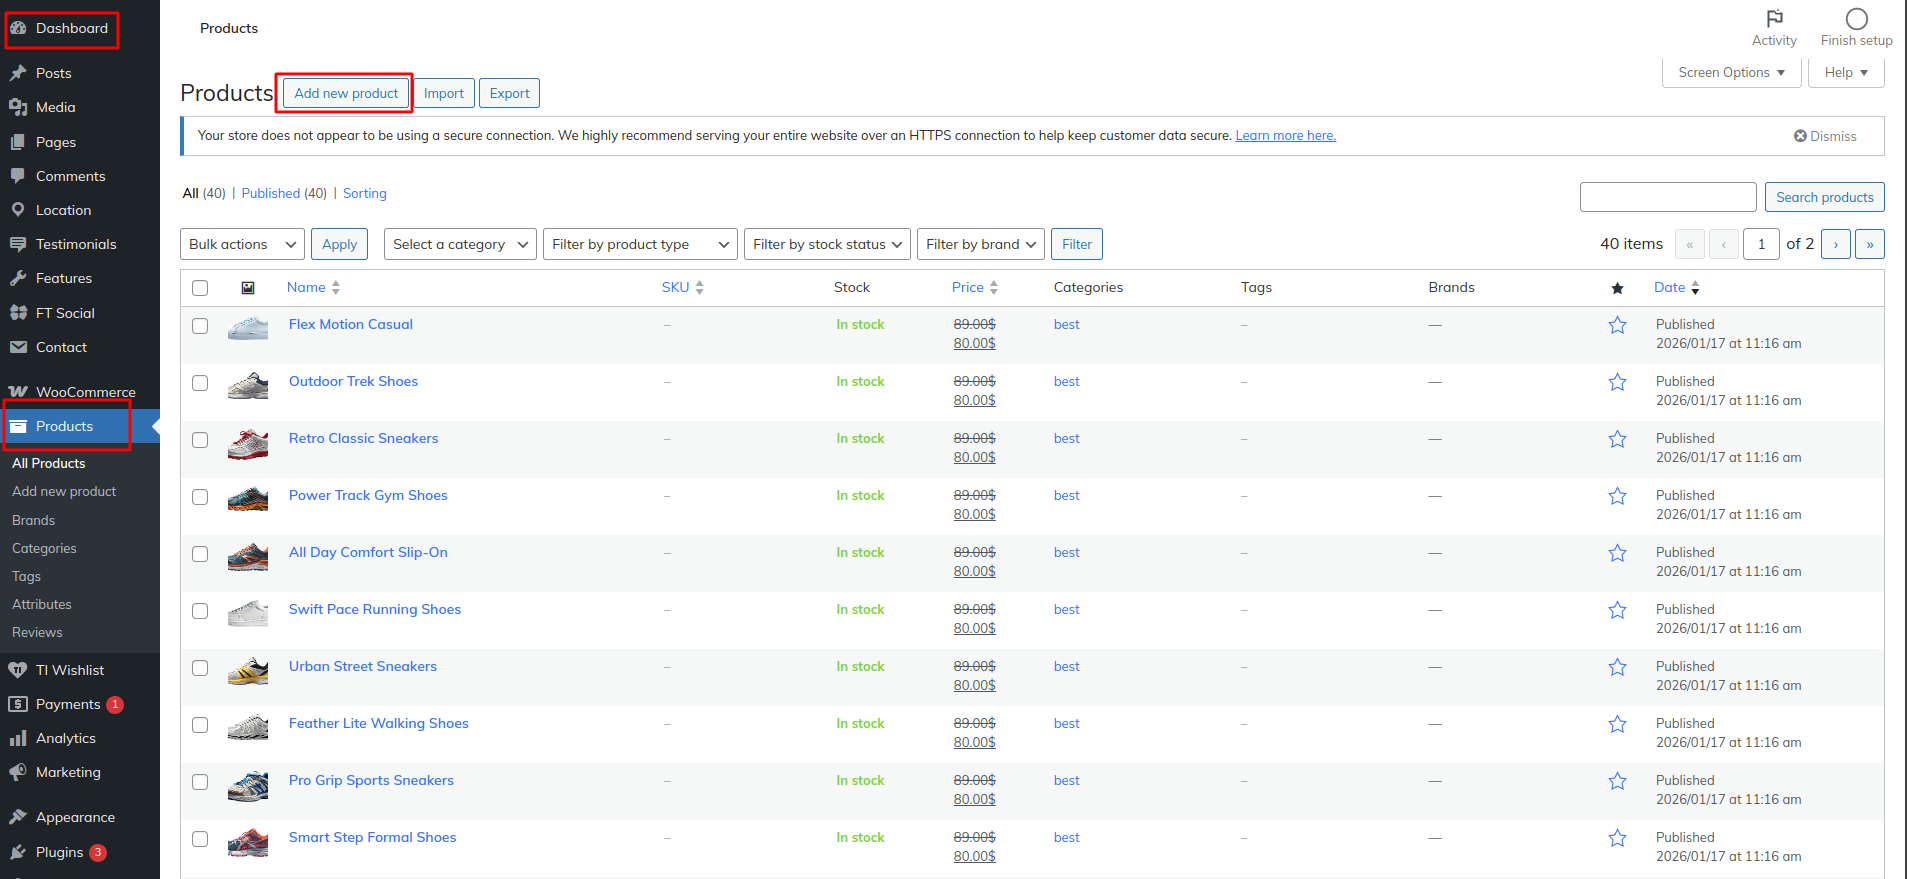
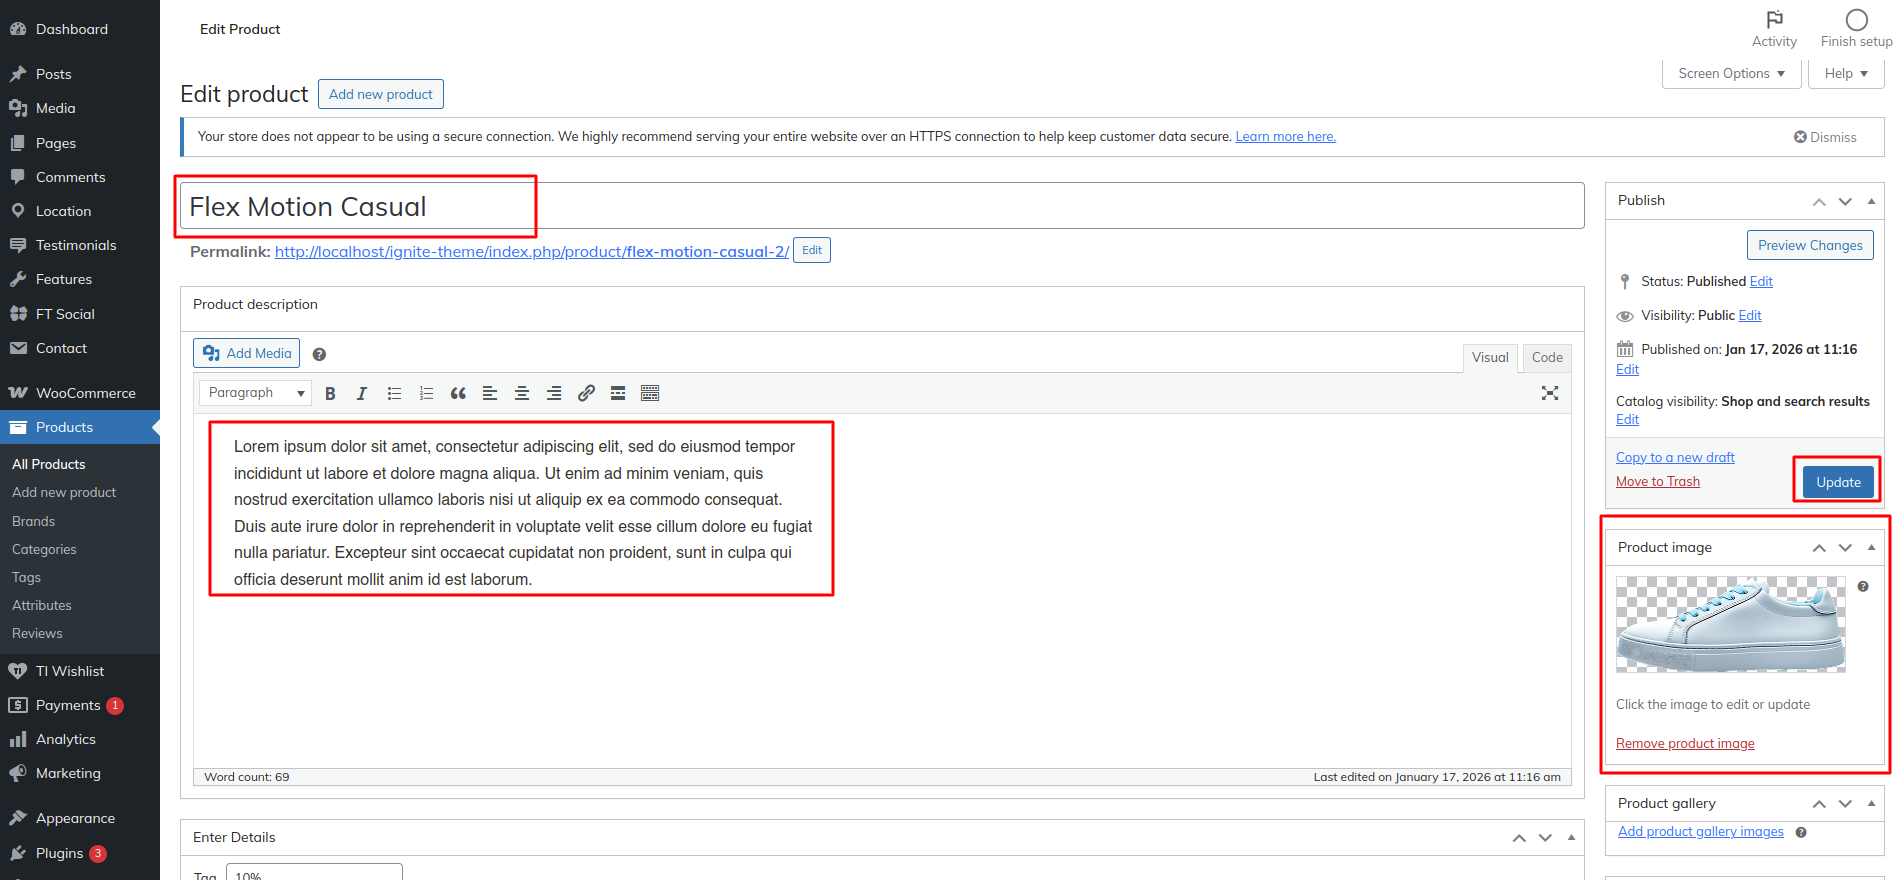
In this section the content is taken by the Post type named as "Products" for any changes of
content you'll have to do following steps:
-> Go to Dashboard
-> Then Select "Products" Post Type
-> And there you can edit and add content manually according to your preference and then do
publish
Go to Appearance >> Customize >> Theme Settings >> Trending Products to access the Trending Products Section settings.
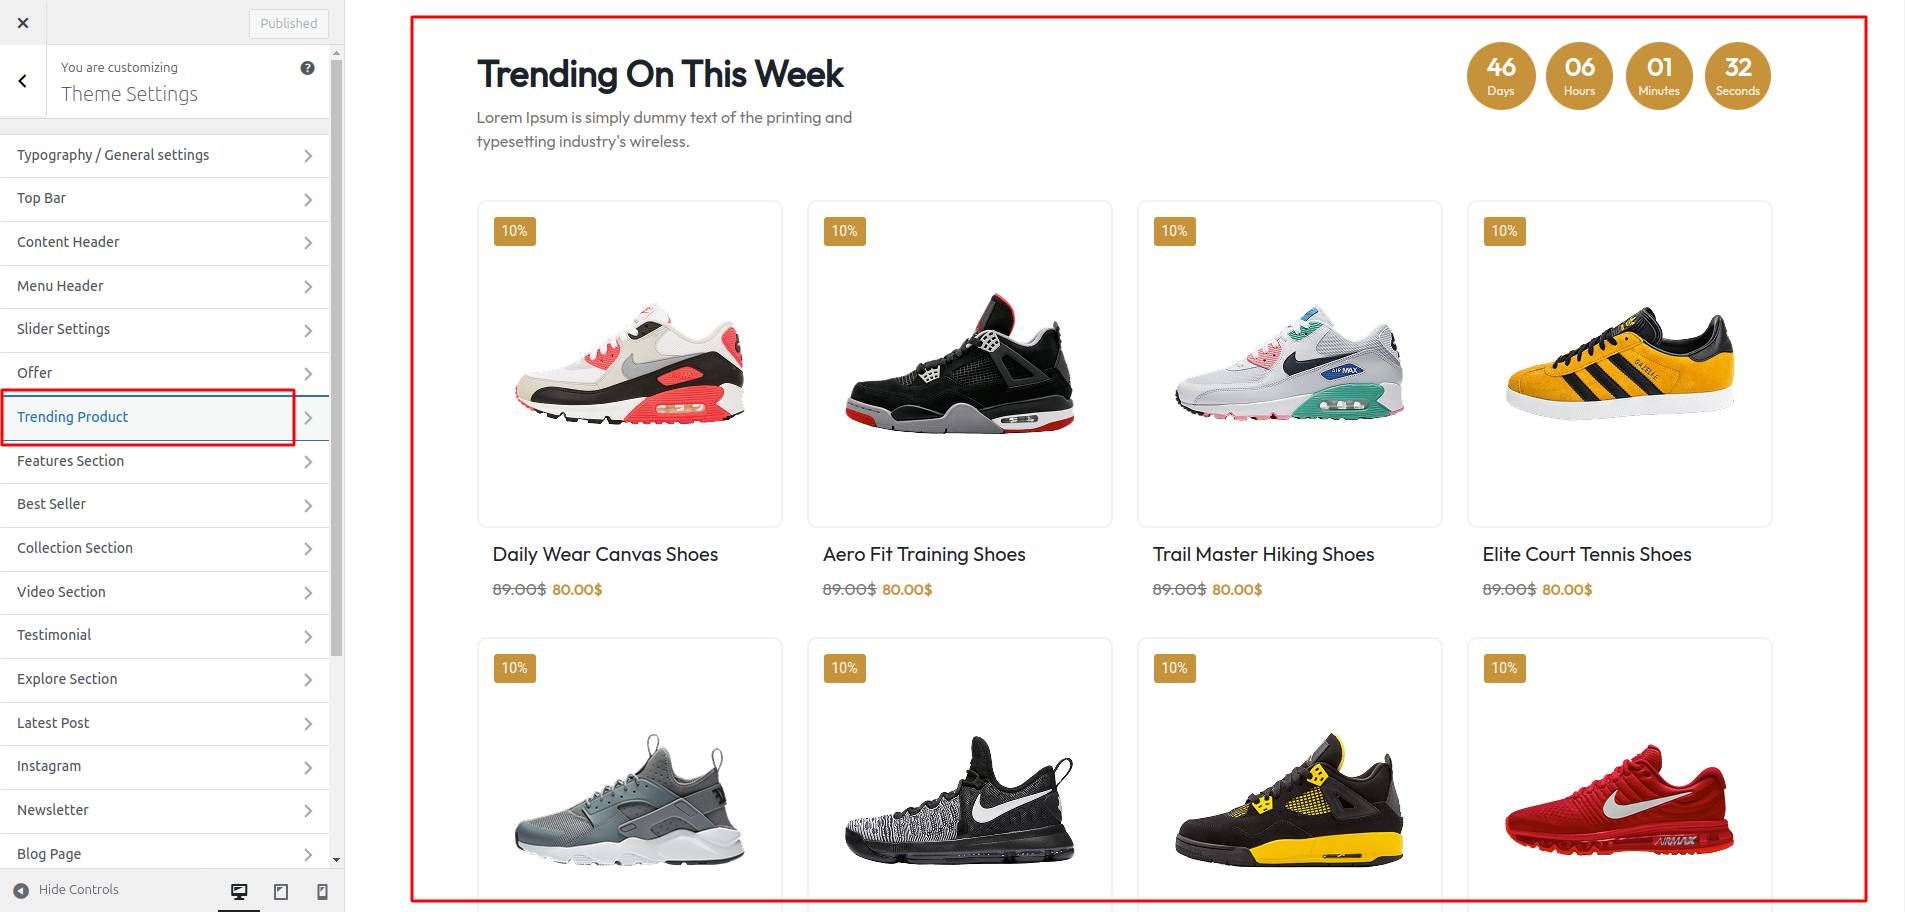
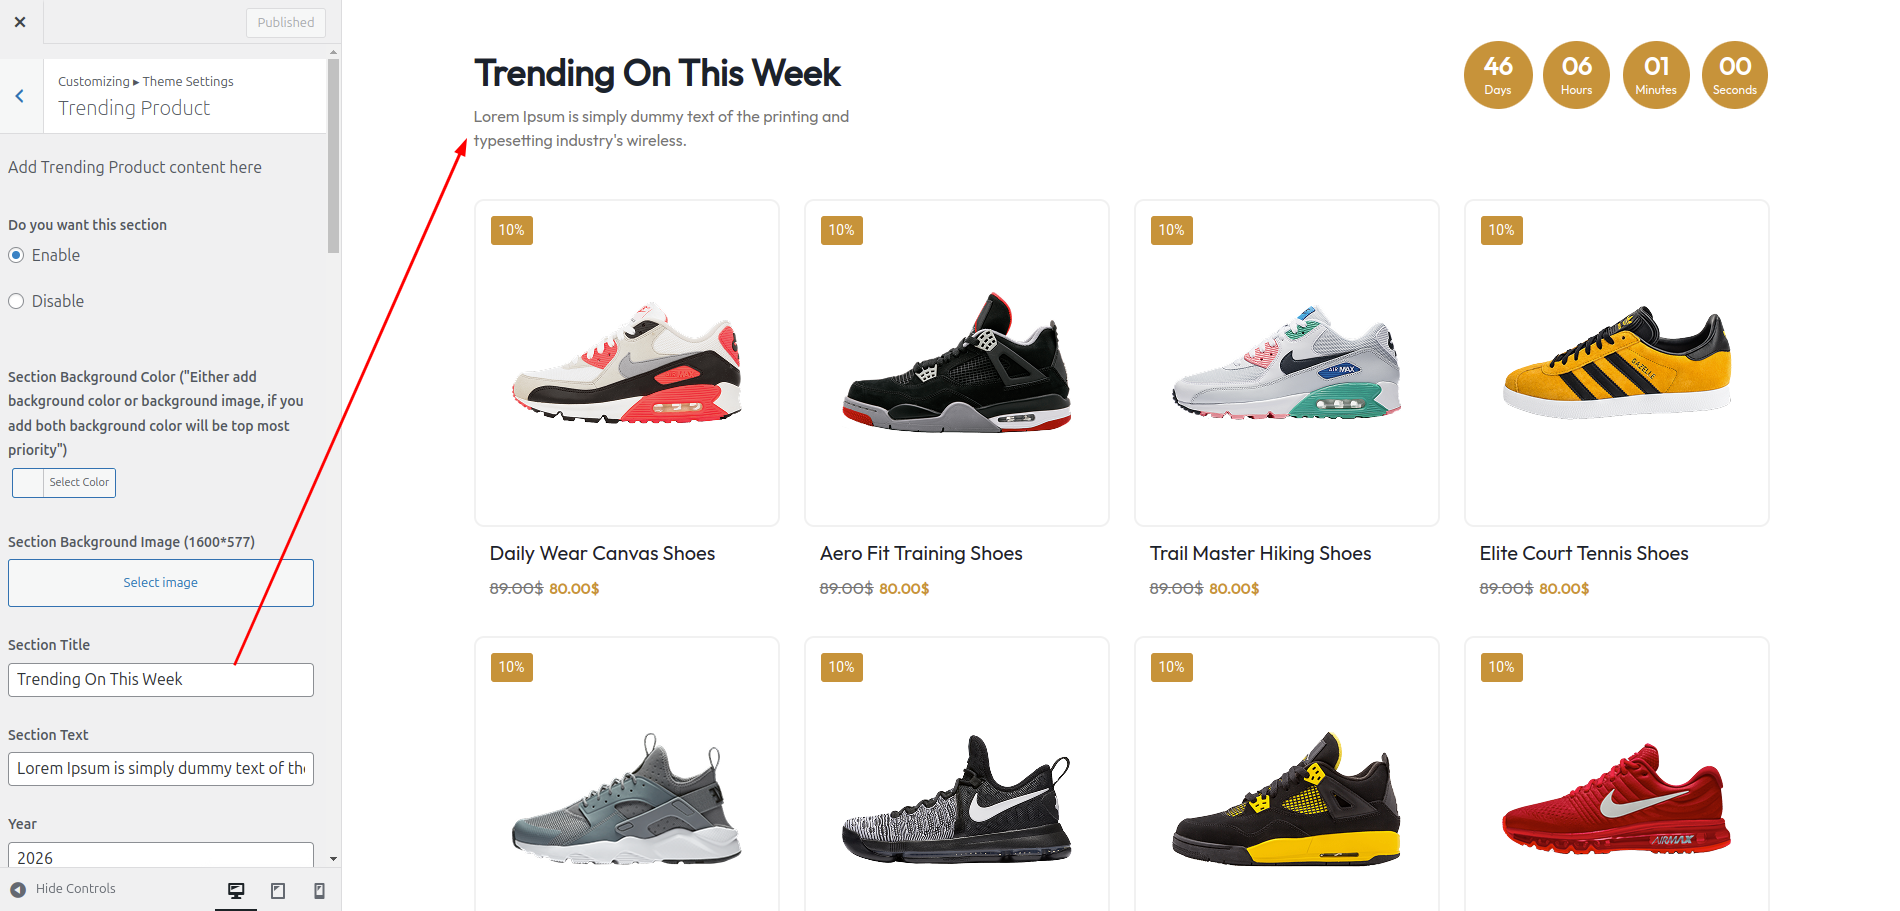
The following sections are included in the Products Section customization:
- Section marked "Enable/Disable"
- Background Color / Background Image
- Dynamic Images
- Dynamic Content
- Depending on the content, different font settings.
- Also given font settings and color settings for After Active Also.
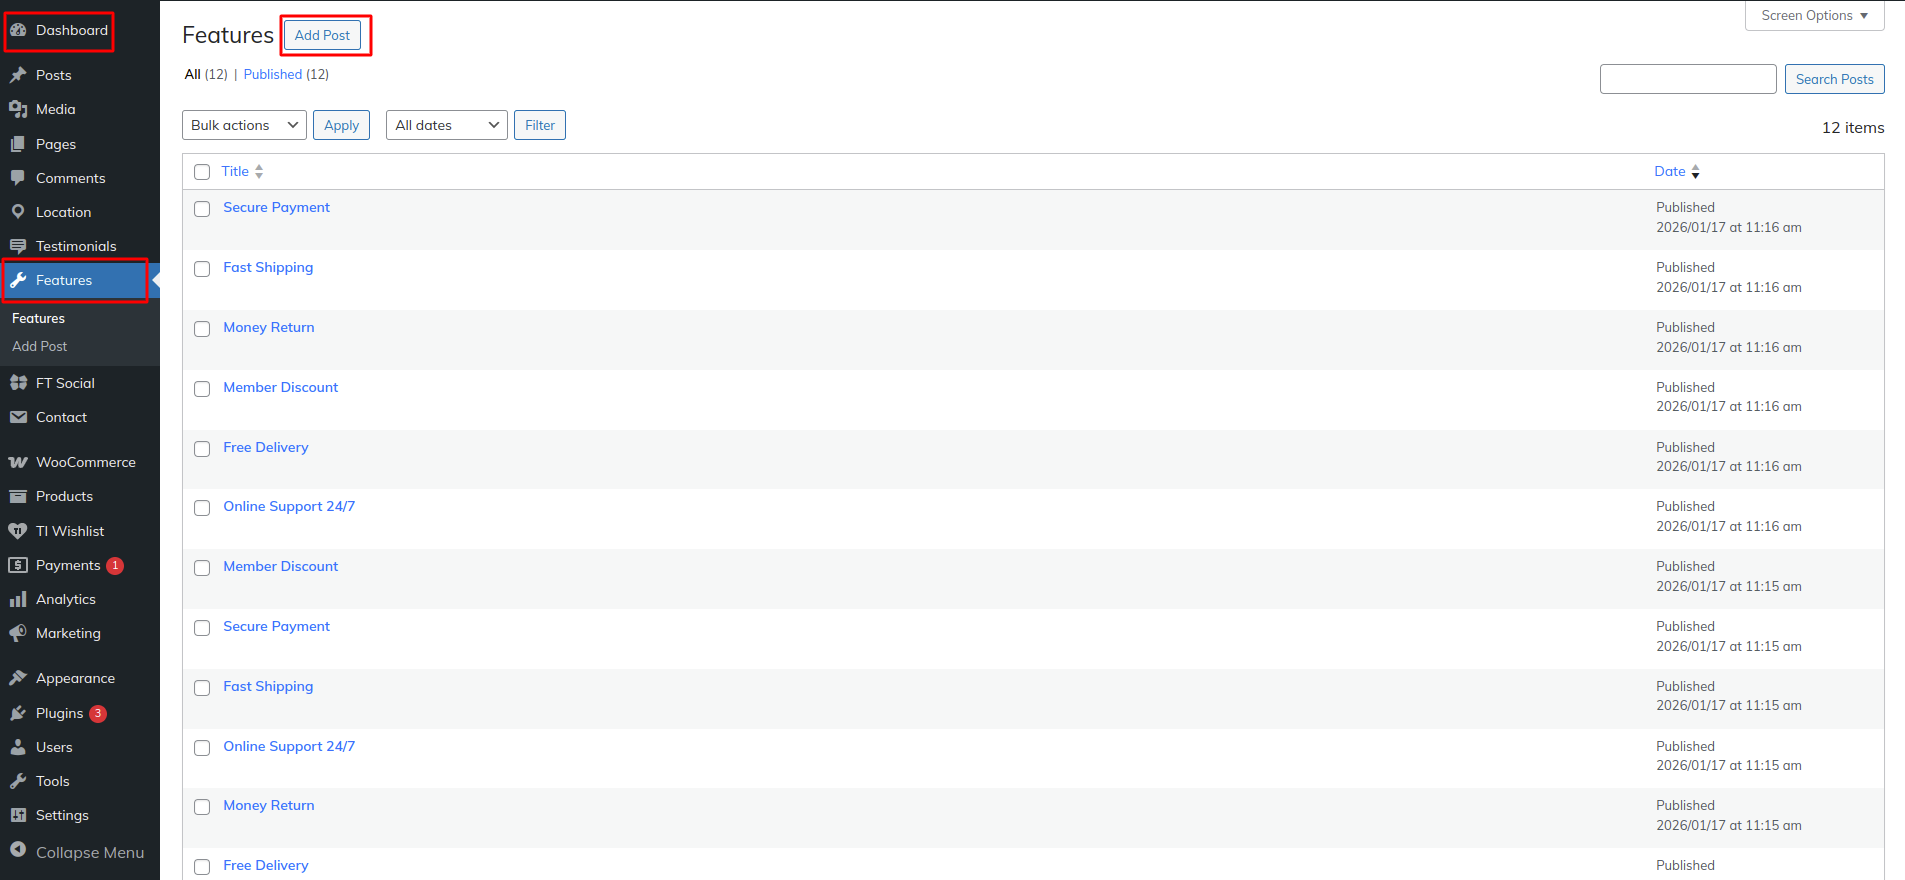
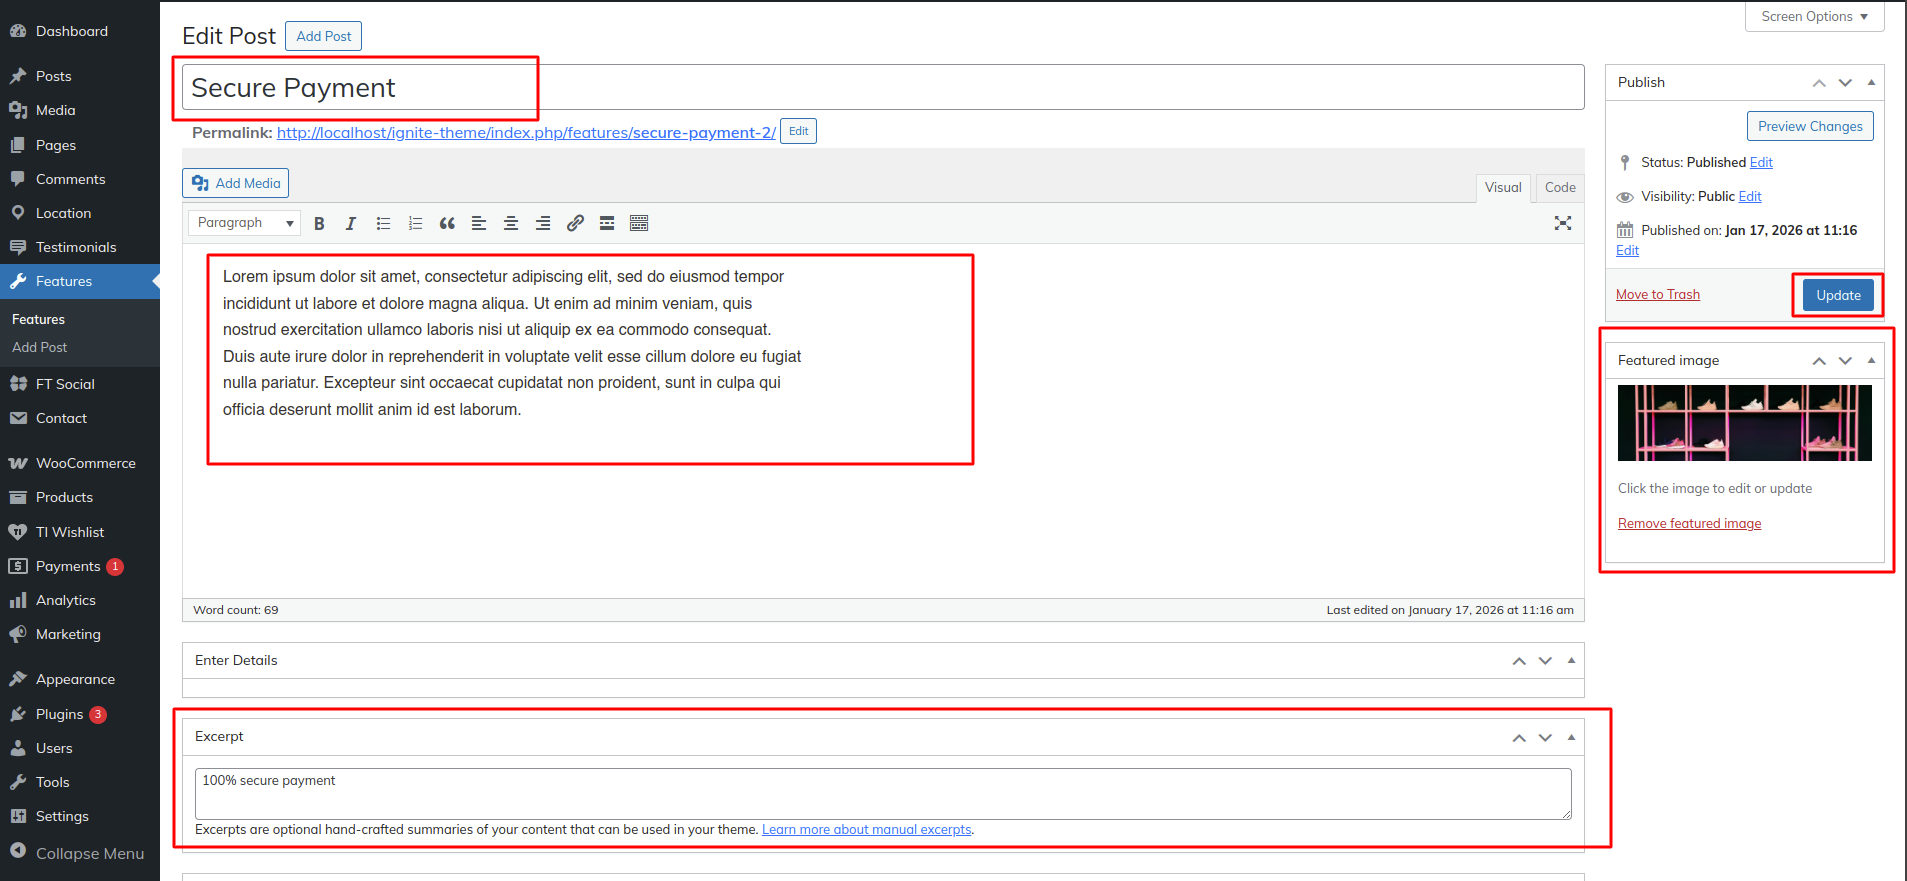
In this section the content is taken by the Post type named as "Features" for any changes of
content you'll have to do following steps:
-> Go to Dashboard
-> Then Select "Features" Post Type
-> And there you can edit and add content manually according to your preference and then do
publish
Go to Appearance >> Customize >> Theme Settings >> Features to access the Features Section settings.
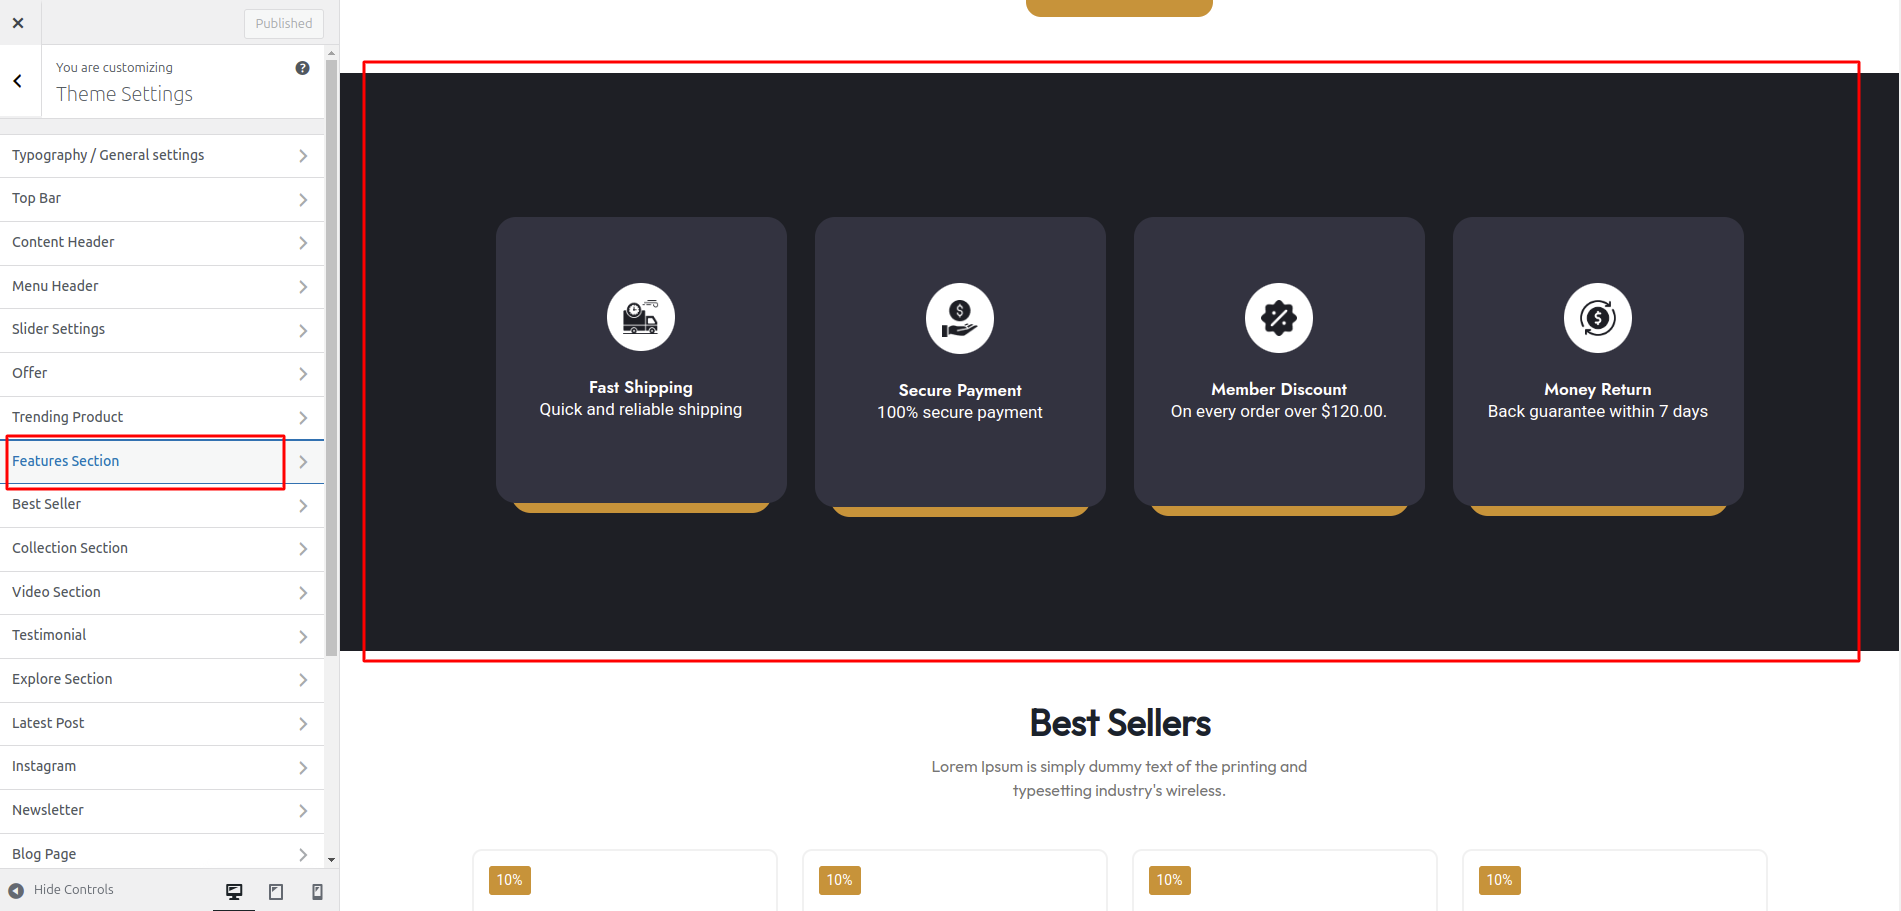
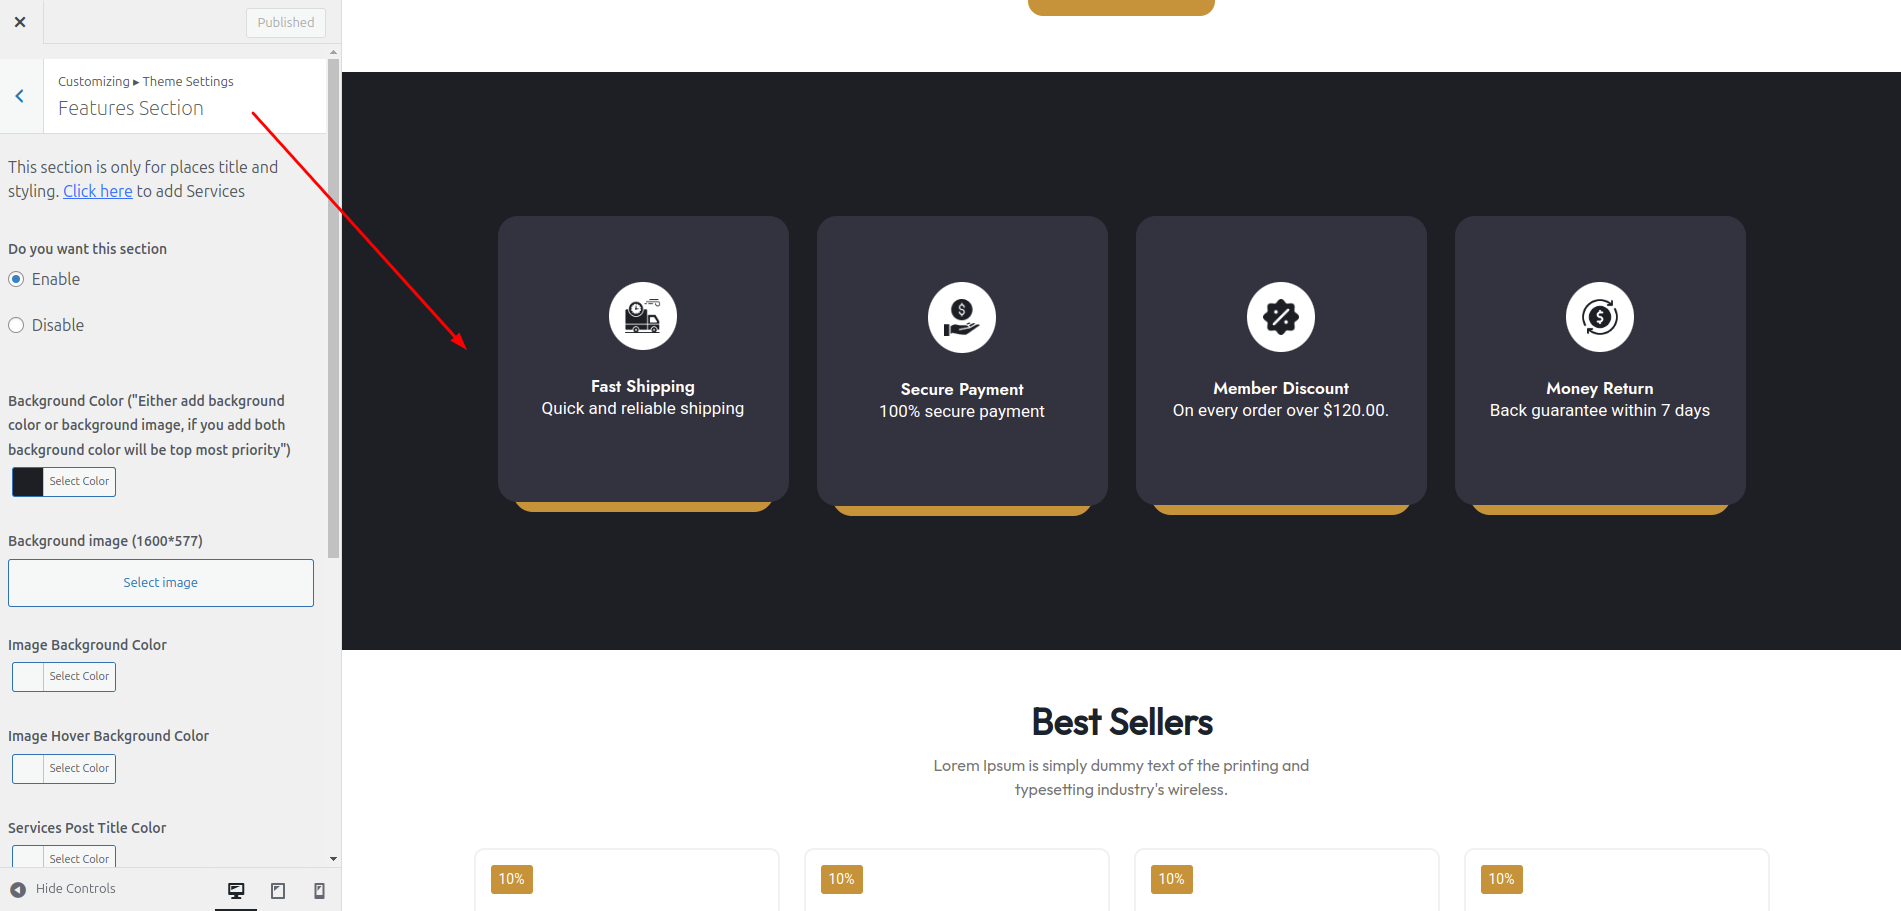
The following sections are included in the Features Section customization:
- Section marked "Enable/Disable"
- Background Color / Background Image
- Dynamic Images
- Dynamic Content
- Depending on the content, different font settings.
- Also given font settings and color settings for After Active Also.
In this section the content is taken by the Post type named as "Products" for any changes of
content you'll have to do following steps:
-> Go to Dashboard
-> Then Select "Products" Post Type
-> And there you can edit and add content manually according to your preference and then do
publish
Go to Appearance >> Customize >> Theme Settings >> Best Seller to access the Best Seller Section settings.
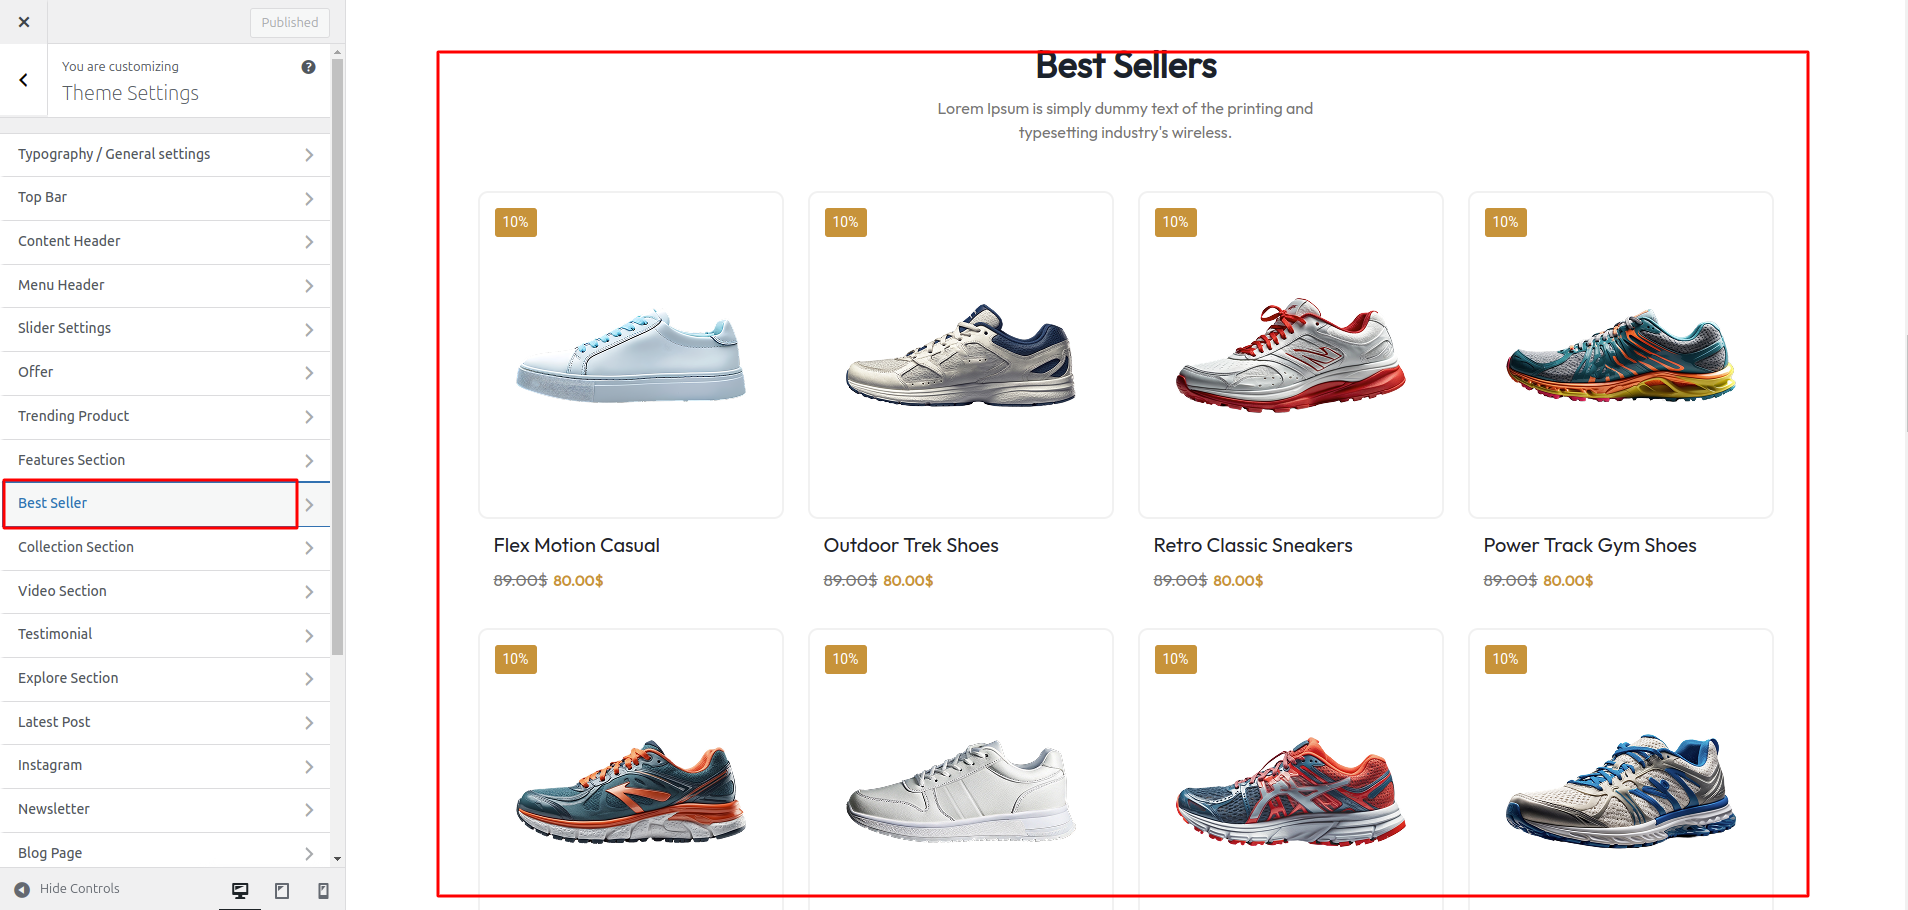
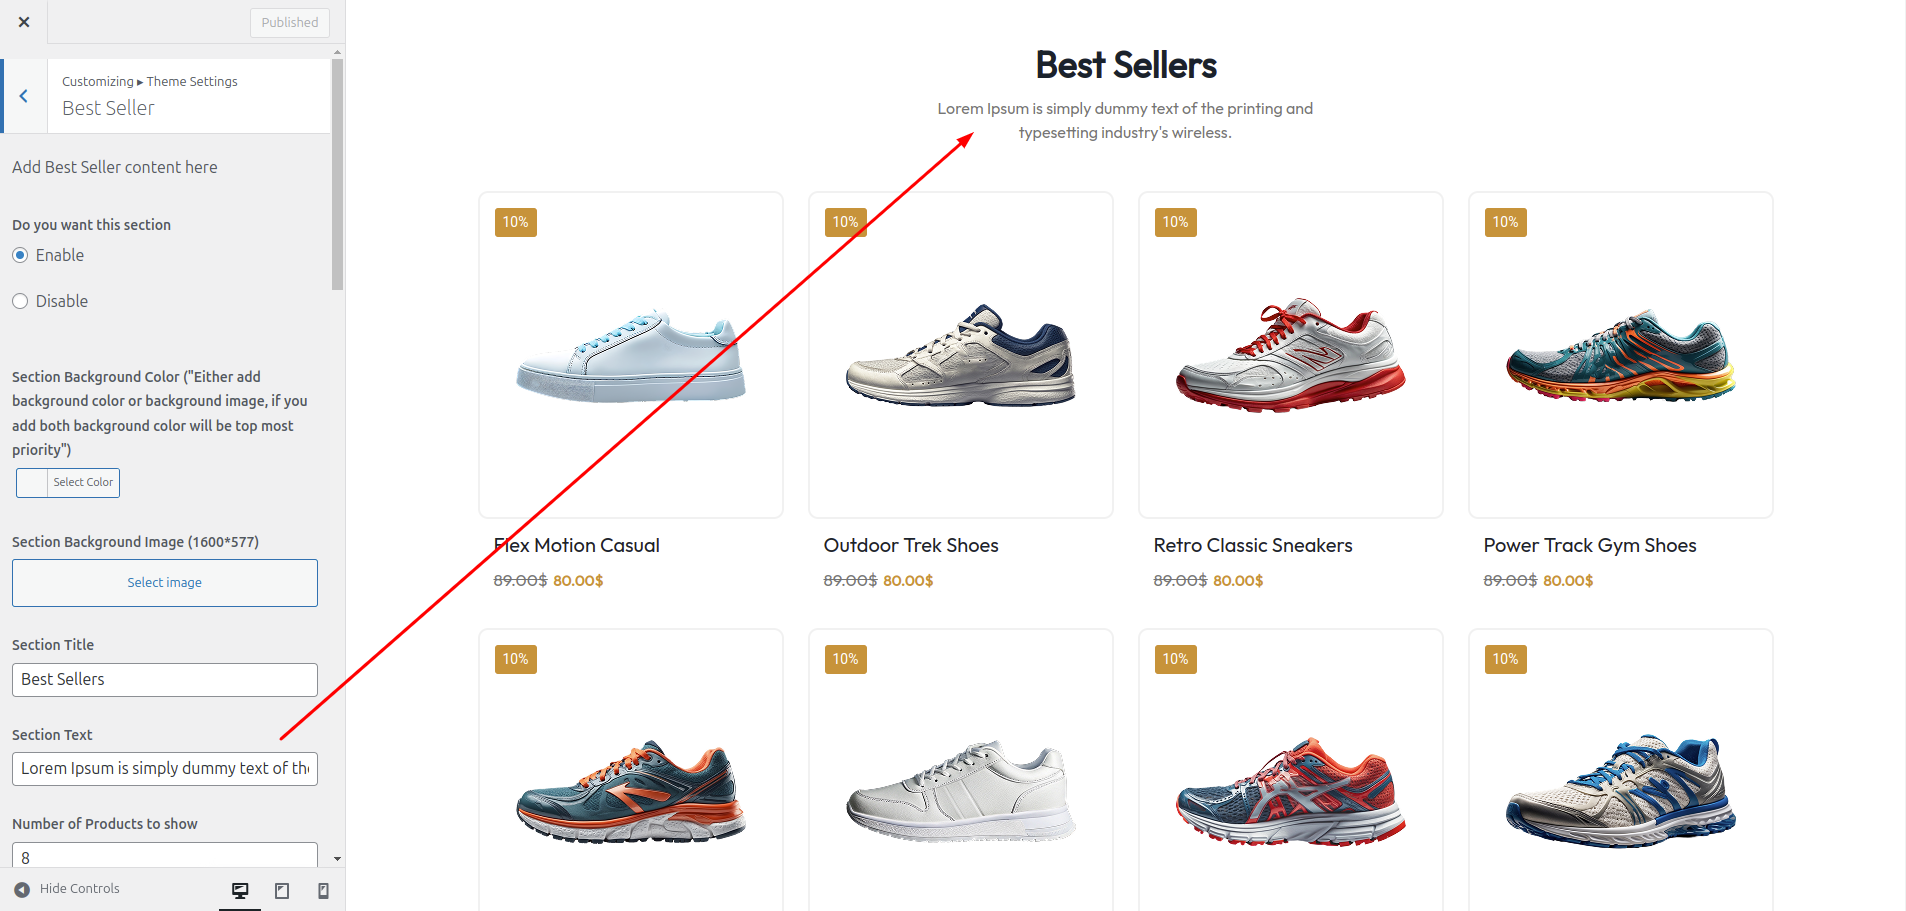
The following sections are included in the Best Seller Section customization:
- Section marked "Enable/Disable"
- Background Color / Background Image
- Dynamic Images
- Dynamic Content
- Depending on the content, different font settings.
- Also given font settings and color settings for After Active Also.
Go to Appearance >> Customize >> Theme Settings >> Collection Section to access the Collection Section settings.
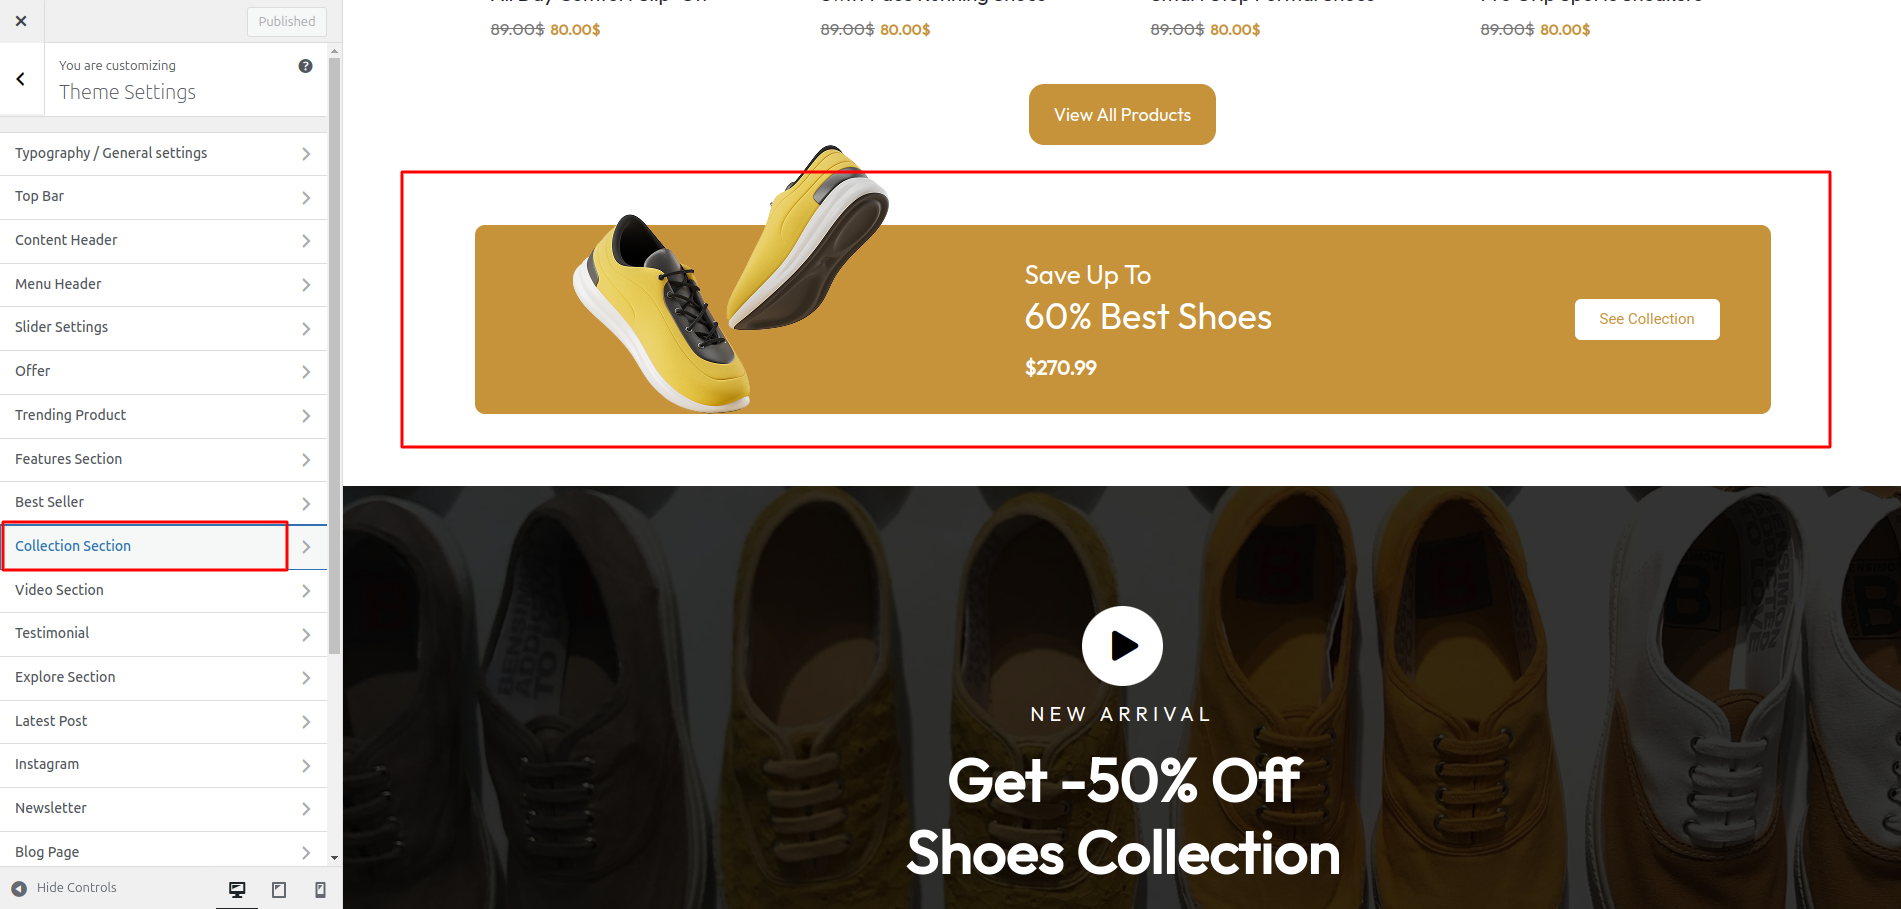
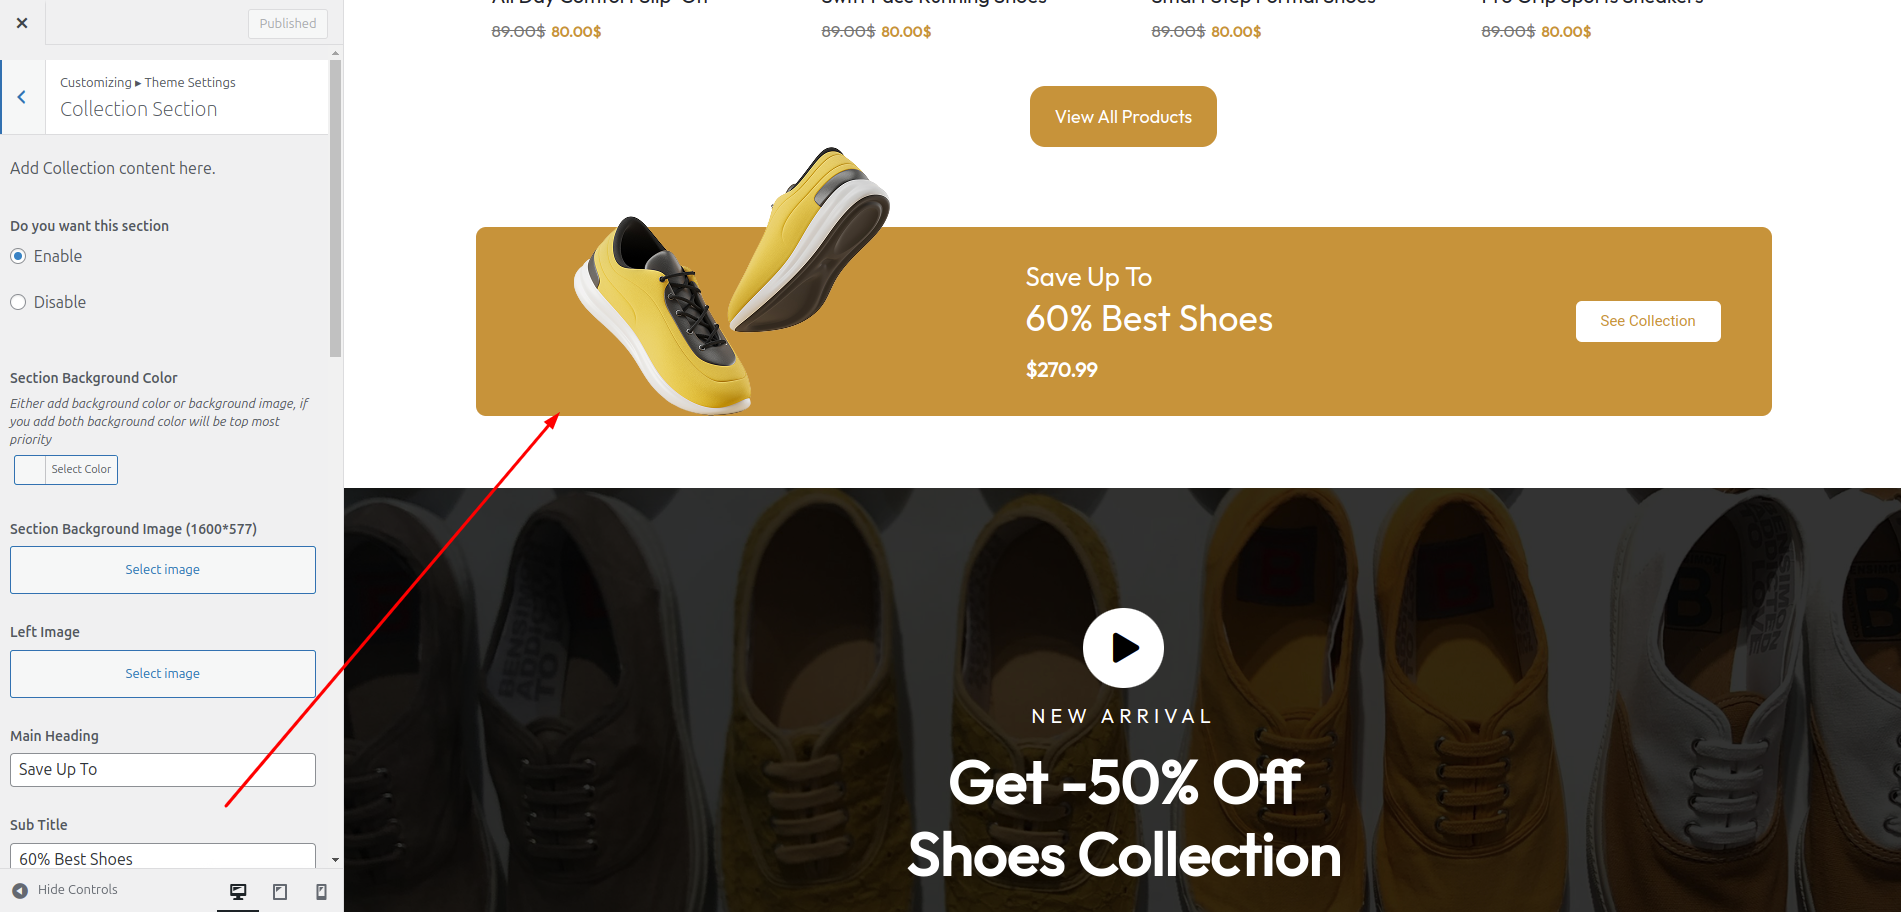
The following sections are included in the Collection Section customization:
- Section marked "Enable/Disable"
- Background Color / Background Image
- Dynamic Images
- Dynamic Content
- Depending on the content, different font settings.
- Also given font settings and color settings for After Active Also.
Go to Appearance >> Customize >> Theme Settings >> Video Section to access the Video settings.
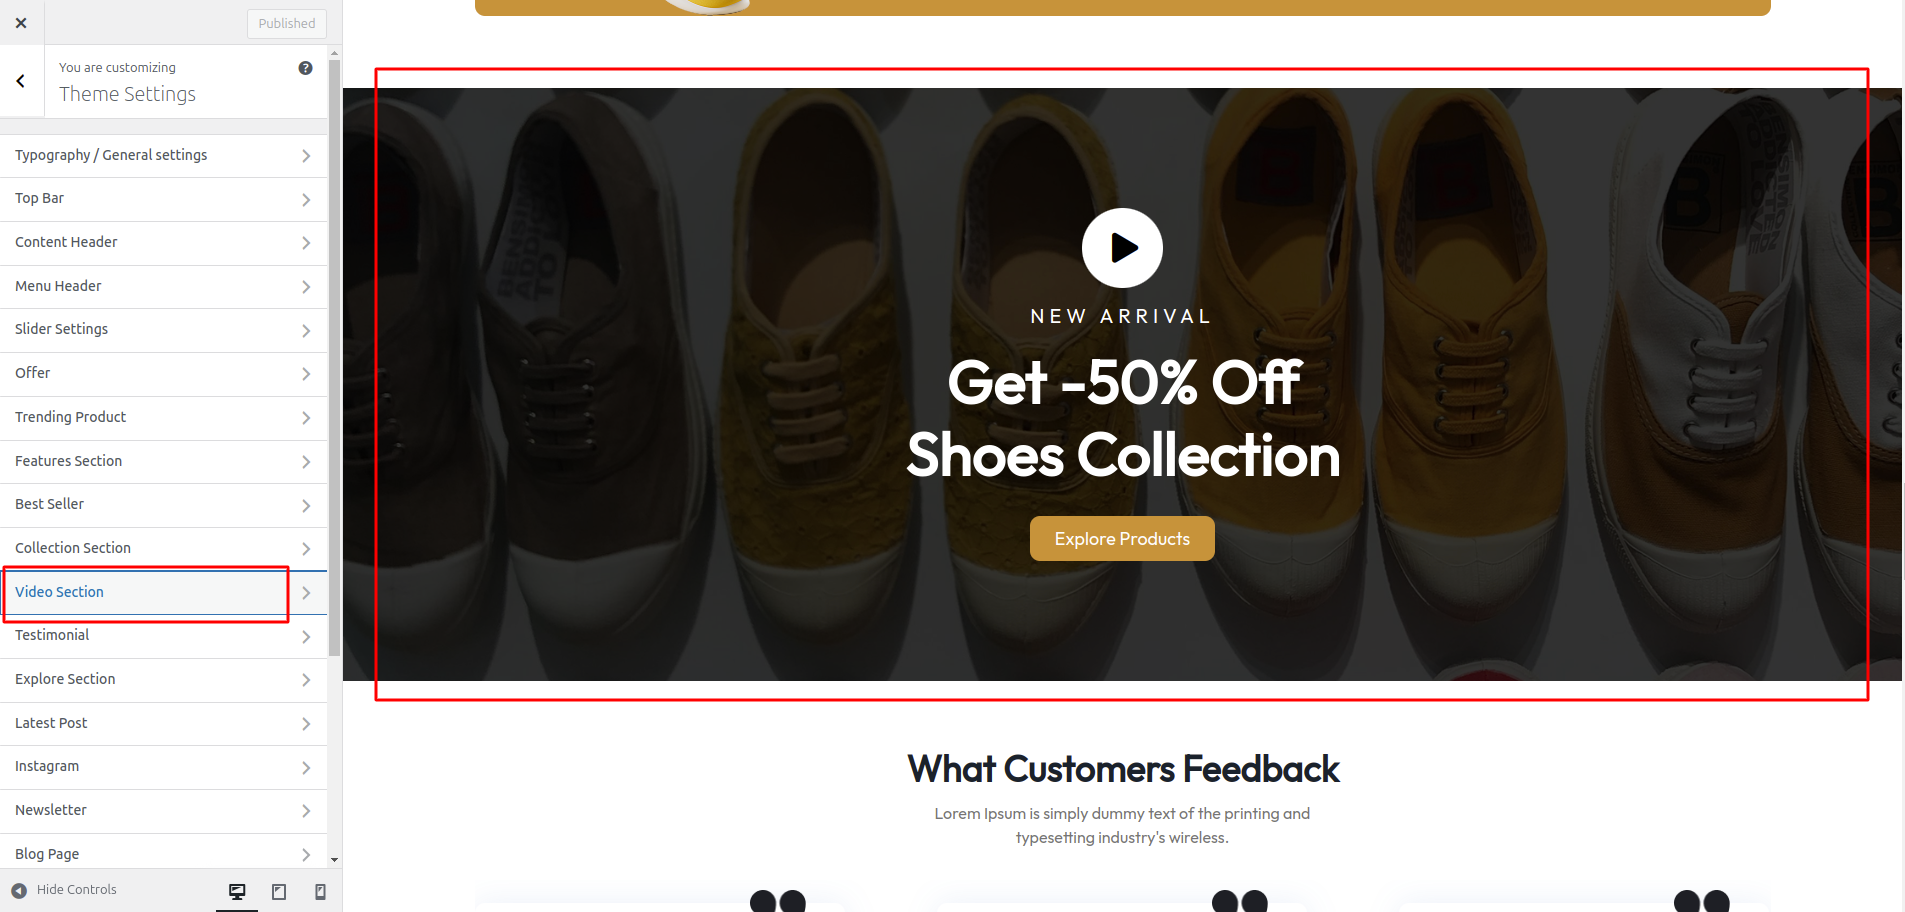
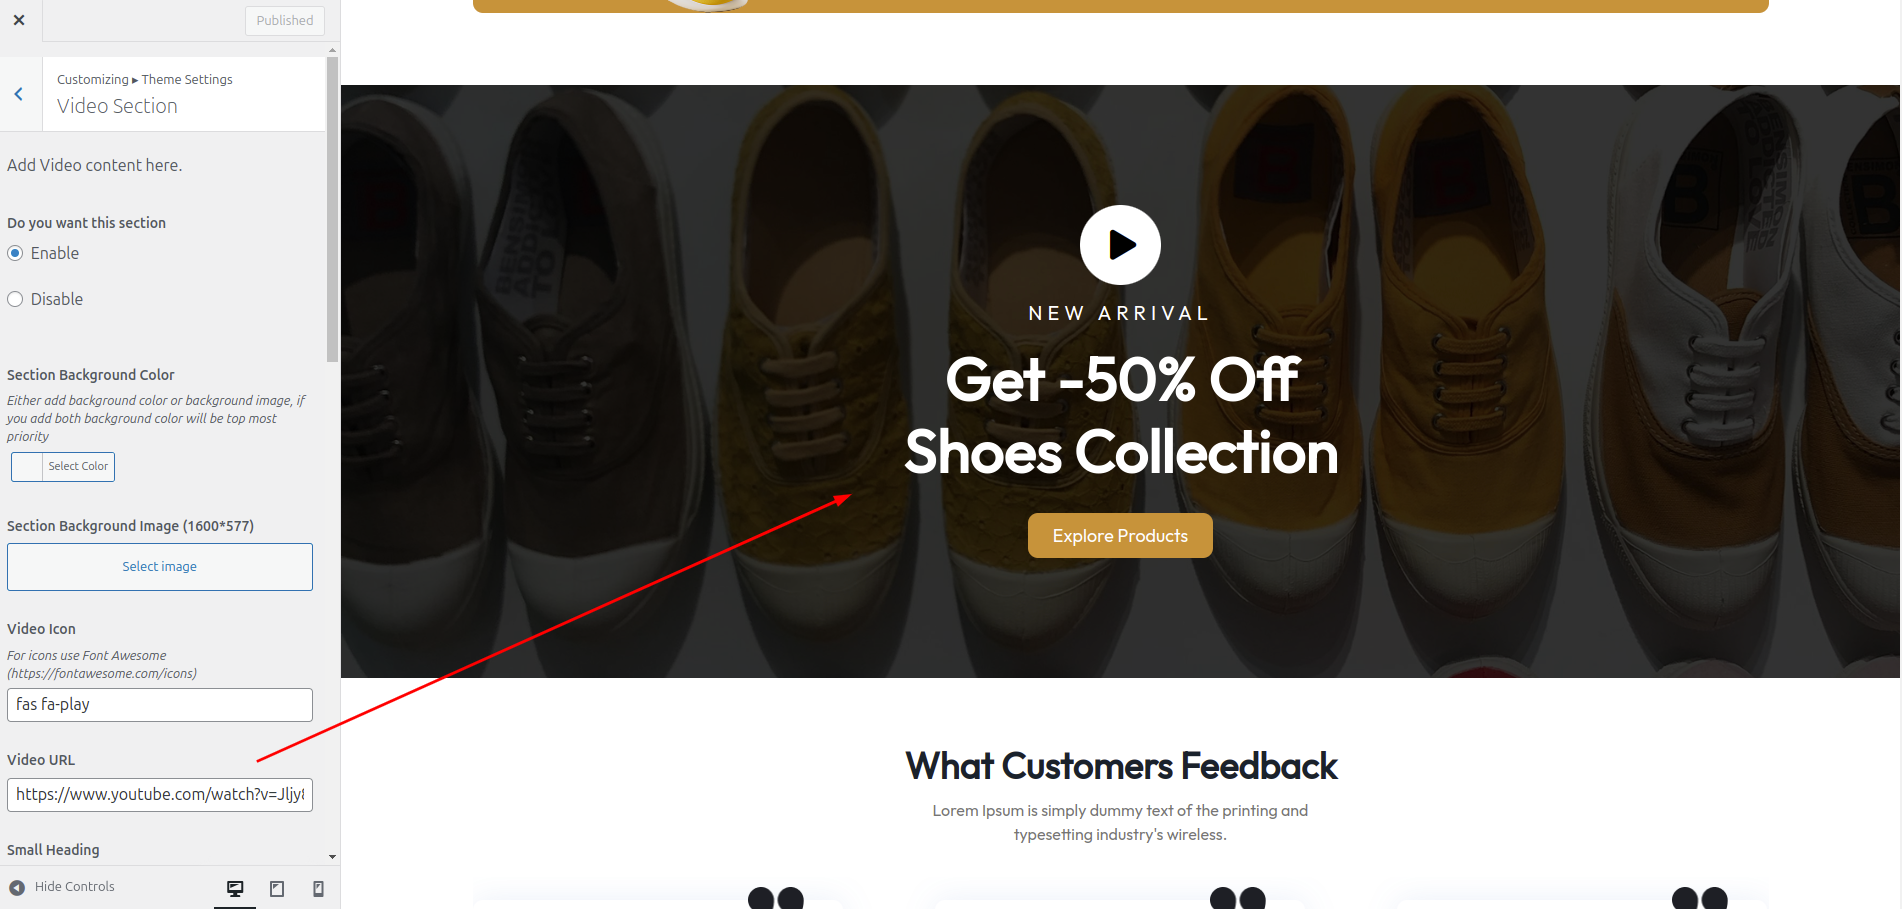
The following sections are included in the Video customization:
- Section marked "Enable/Disable"
- Background Color / Background Image
- Dynamic Images
- Dynamic Content
- Depending on the content, different font settings.
- Also settings are given for navigation arrows.
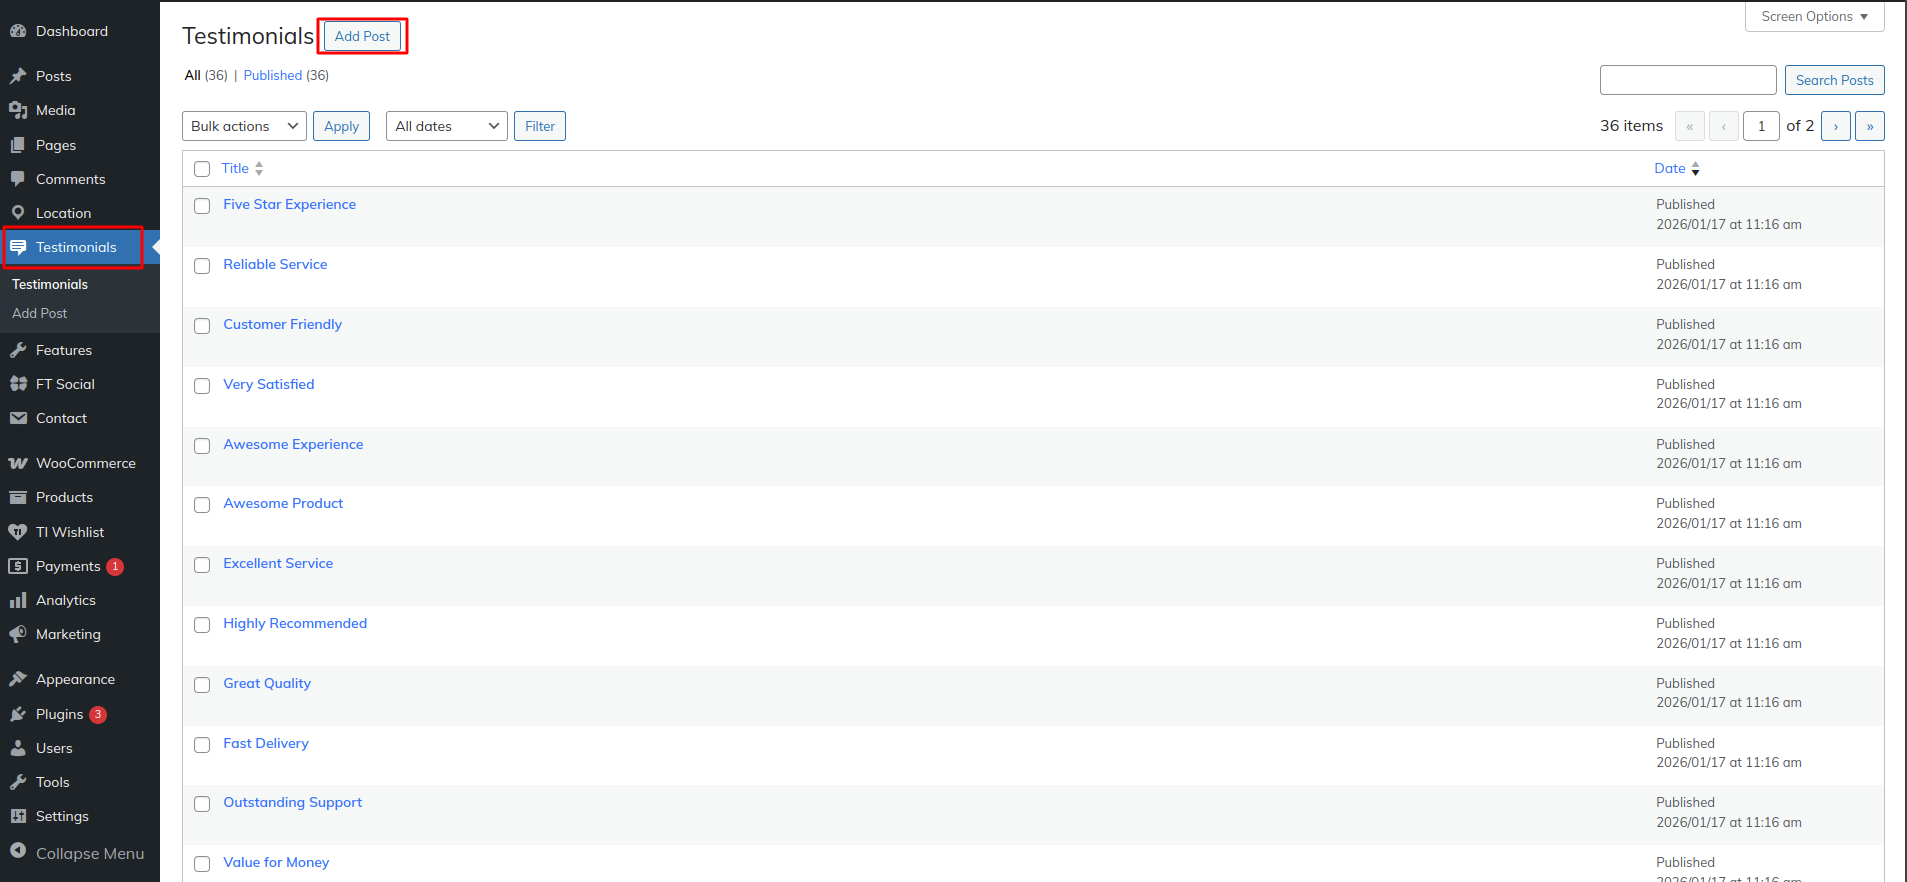
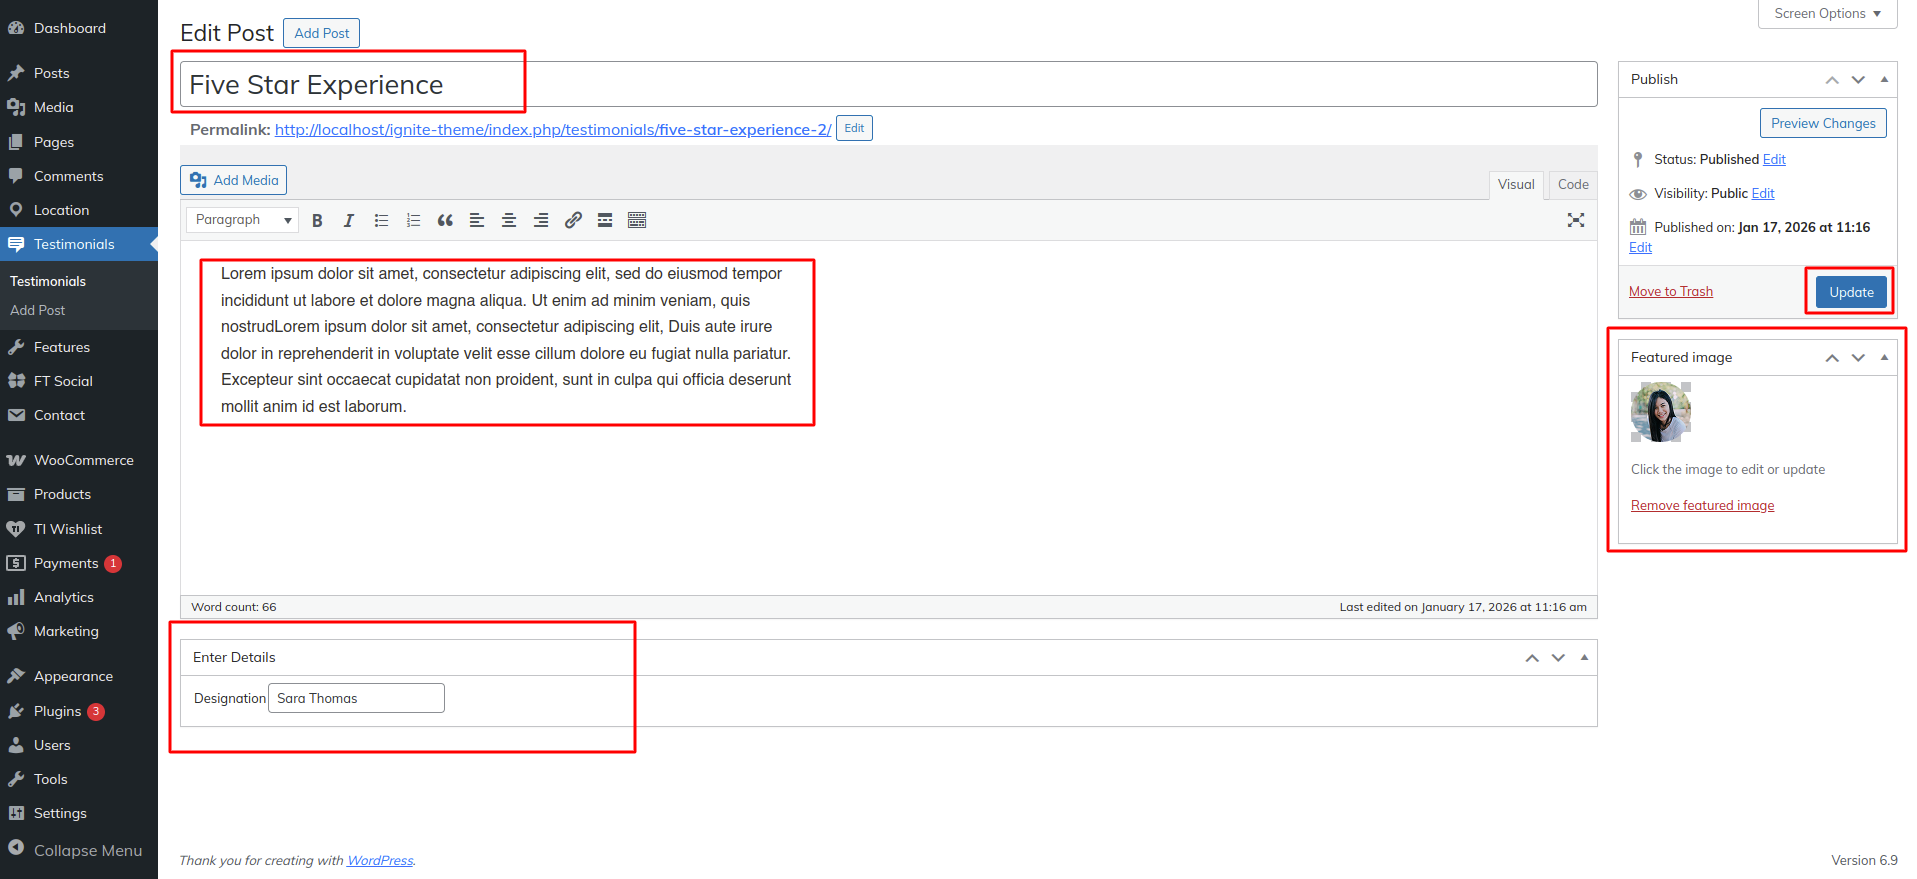
In this section the content is taken by the Post type named as "Testimonial" for any changes
of content you'll have to do following steps:
-> Go to Dashboard
-> Then Select "Testimonial" Post Type
-> And there you can edit and add content manually according to your preference and then do
publish
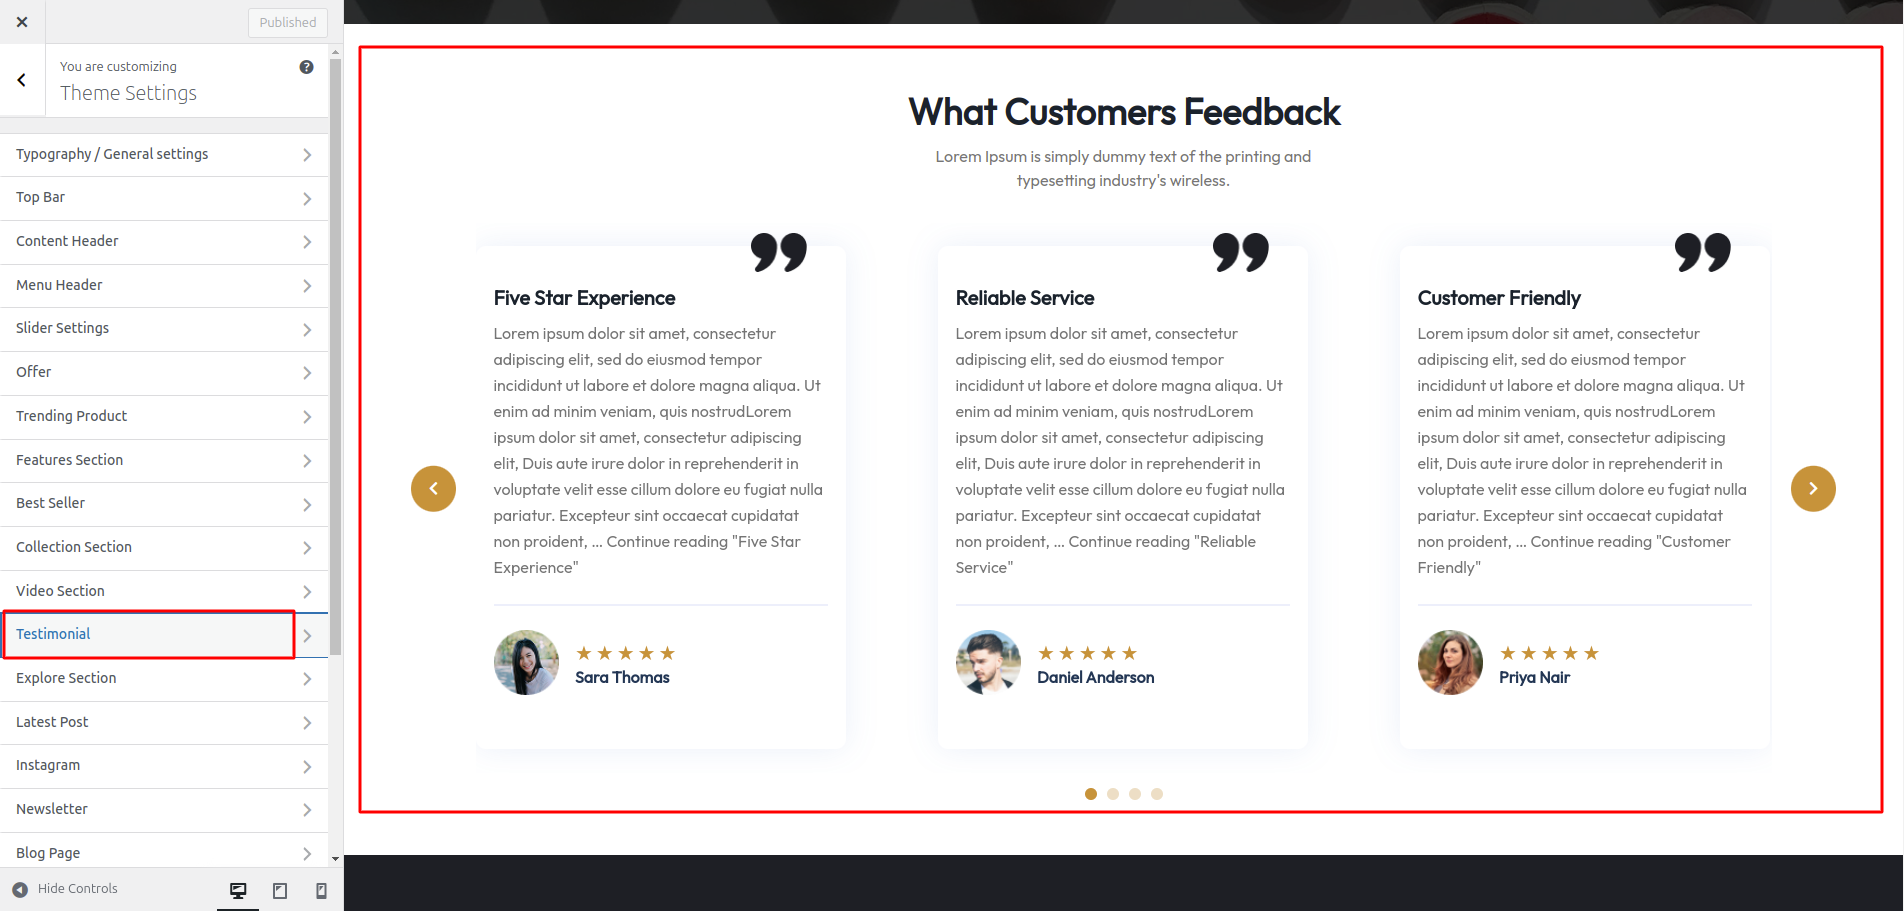
Go to Appearance >> Customize >> Theme Settings >> Testimonial to access the Testimonial settings.
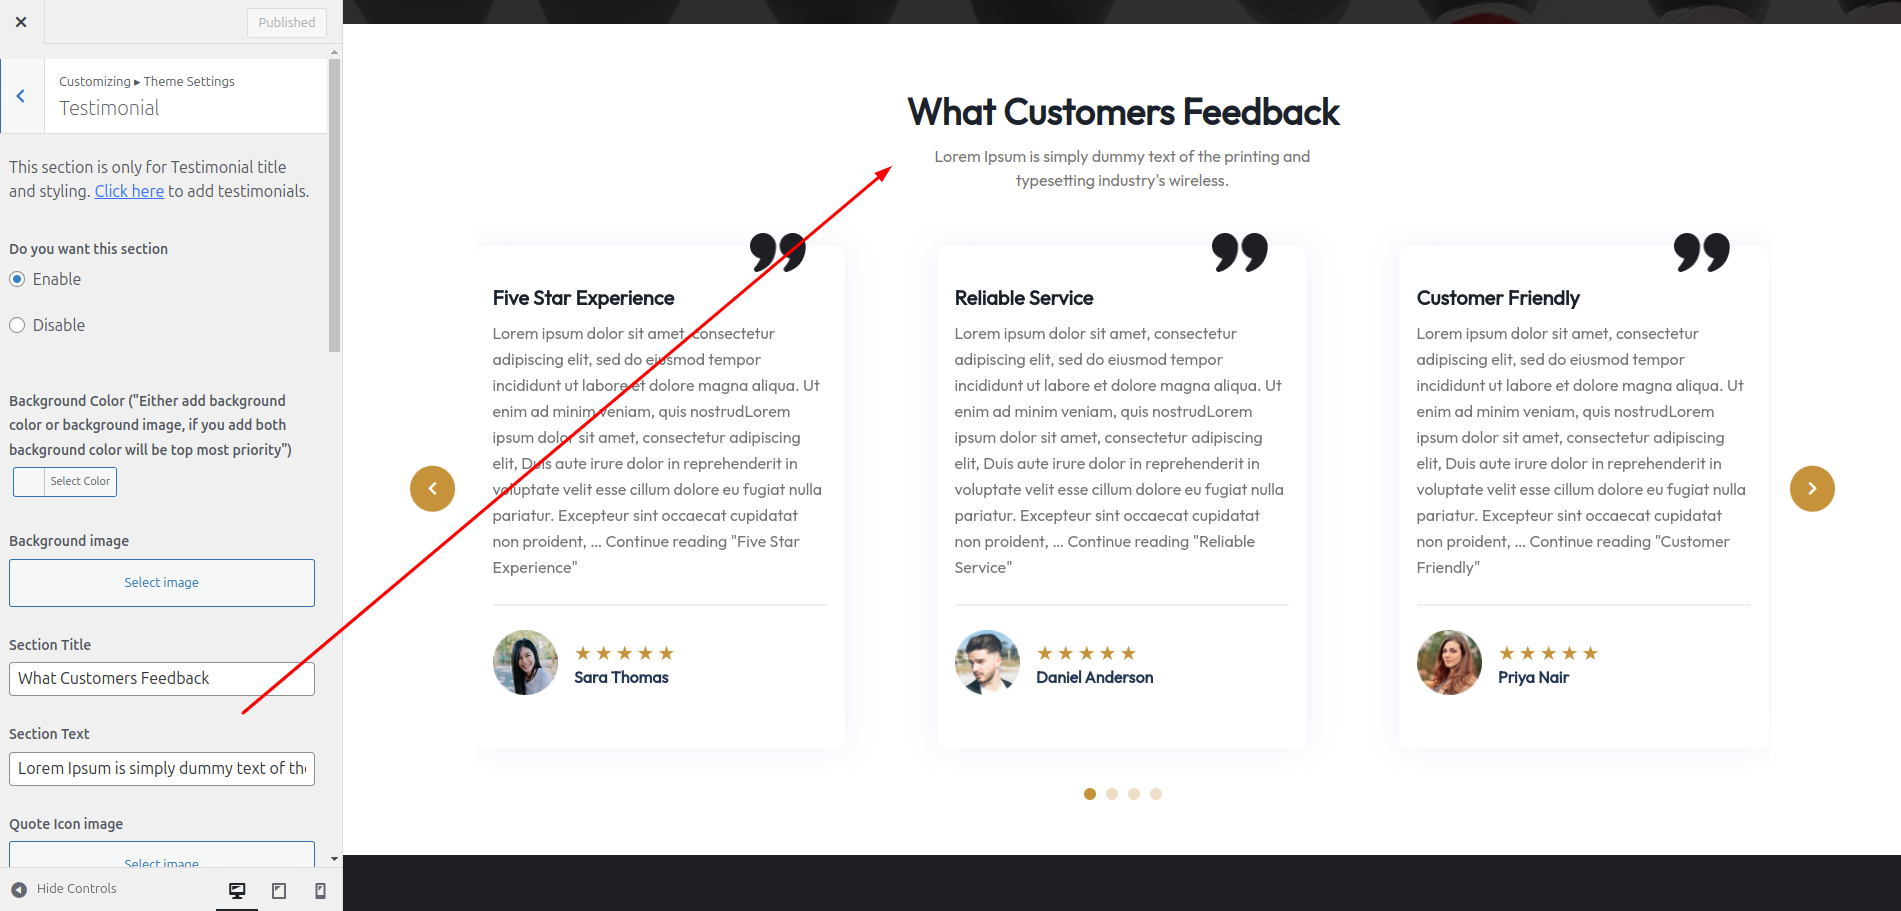
The following sections are included in the Testimonial customization:
- Section marked "Enable/Disable"
- Background Color / Background Image
- Depending on the content, different font settings.
Go to Appearance >> Customize >> Theme Settings >> Explore Section to access the Features settings.
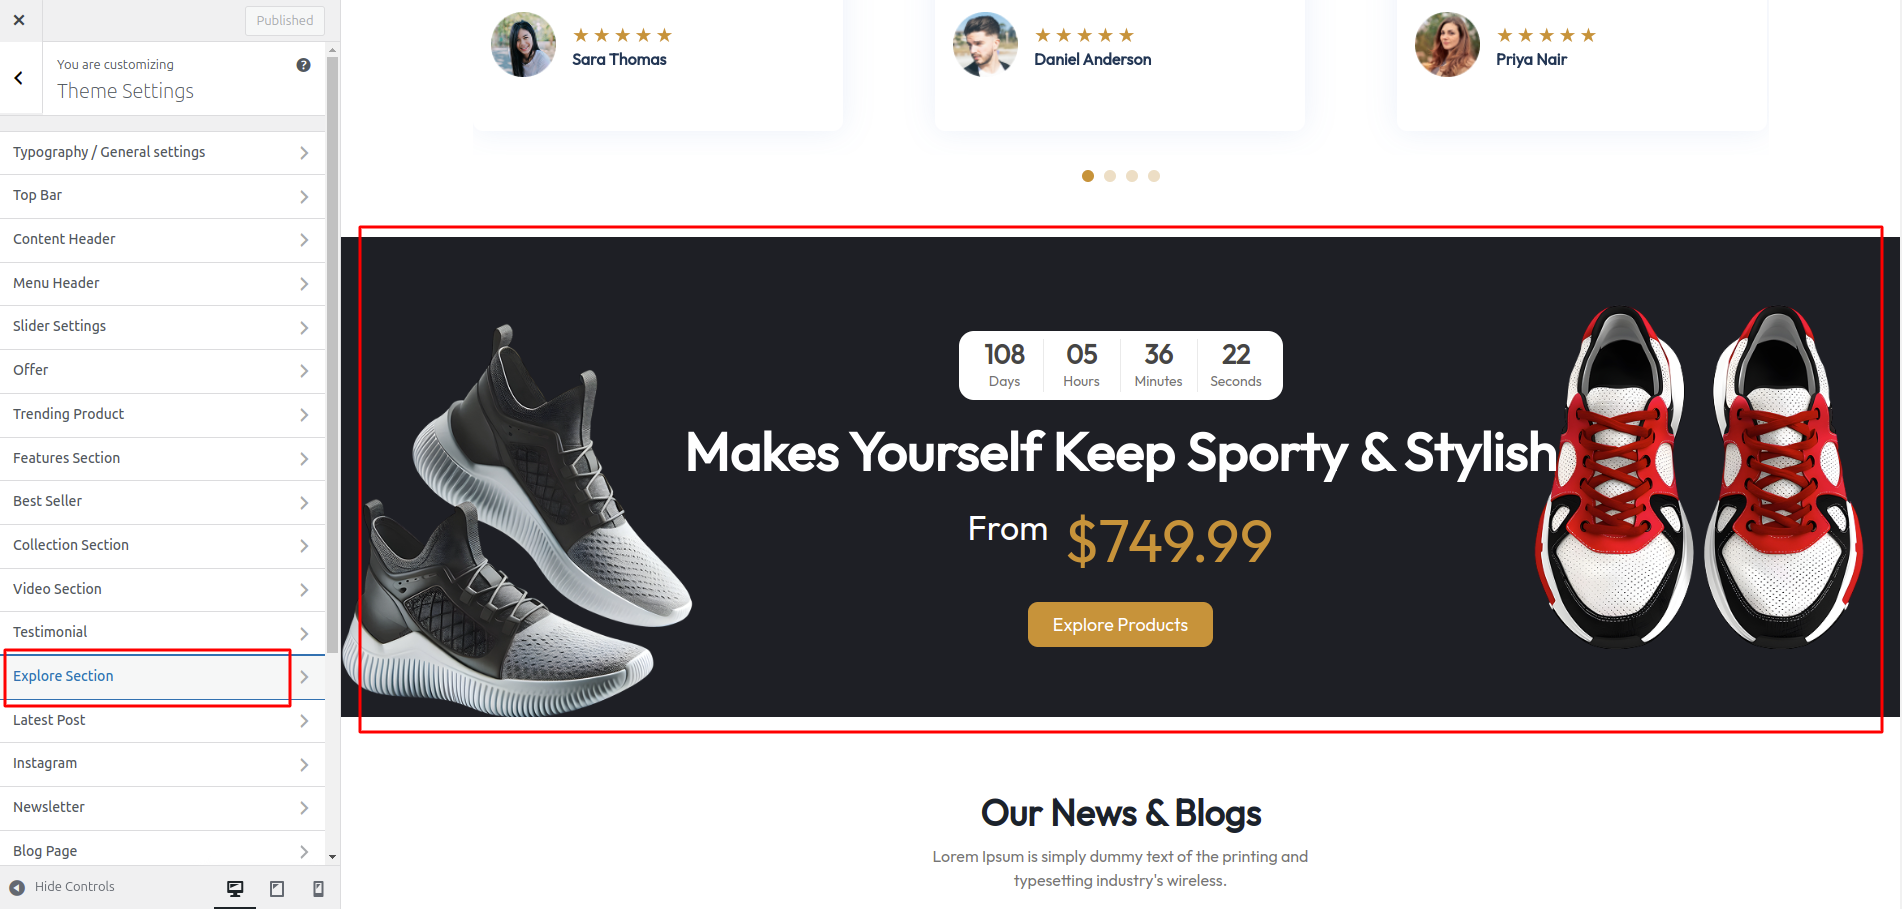
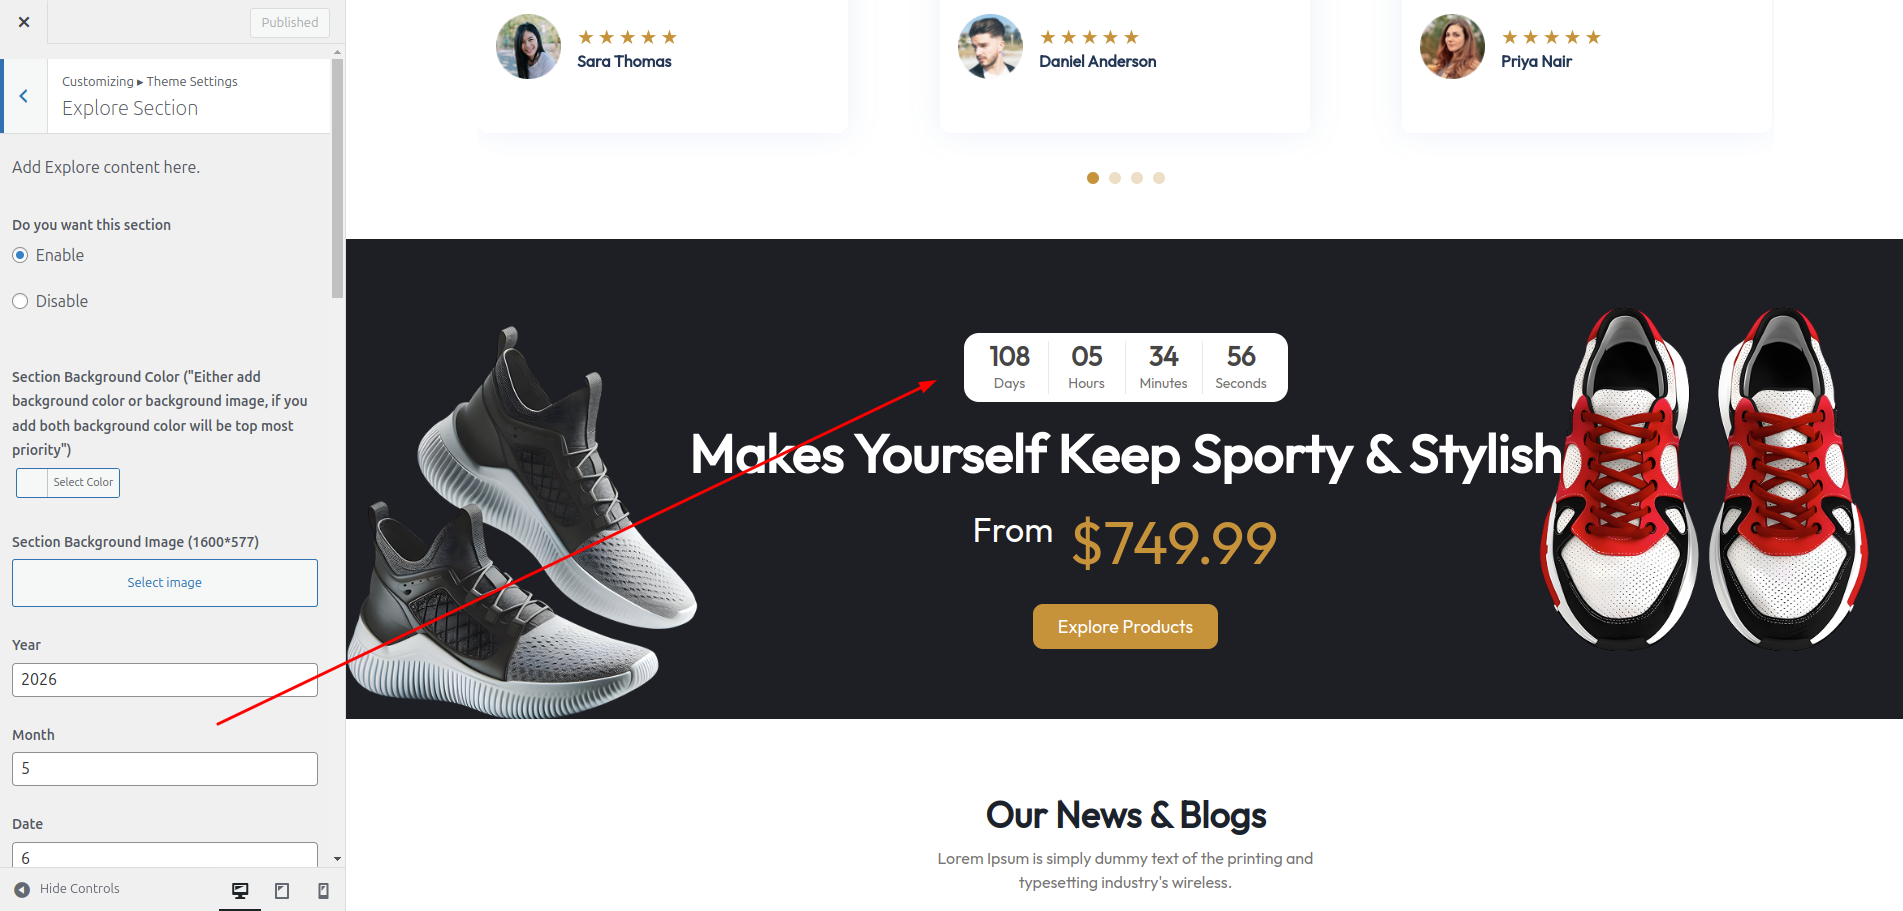
The following sections are included in the Explore customization:
- Section marked "Enable/Disable"
- Background Color / Background Image
- Dynamic Images
- Dynamic Content
- Depending on the content, different font settings.
- Also settings are given for navigation arrows.
Our News & Blogs Section Setup
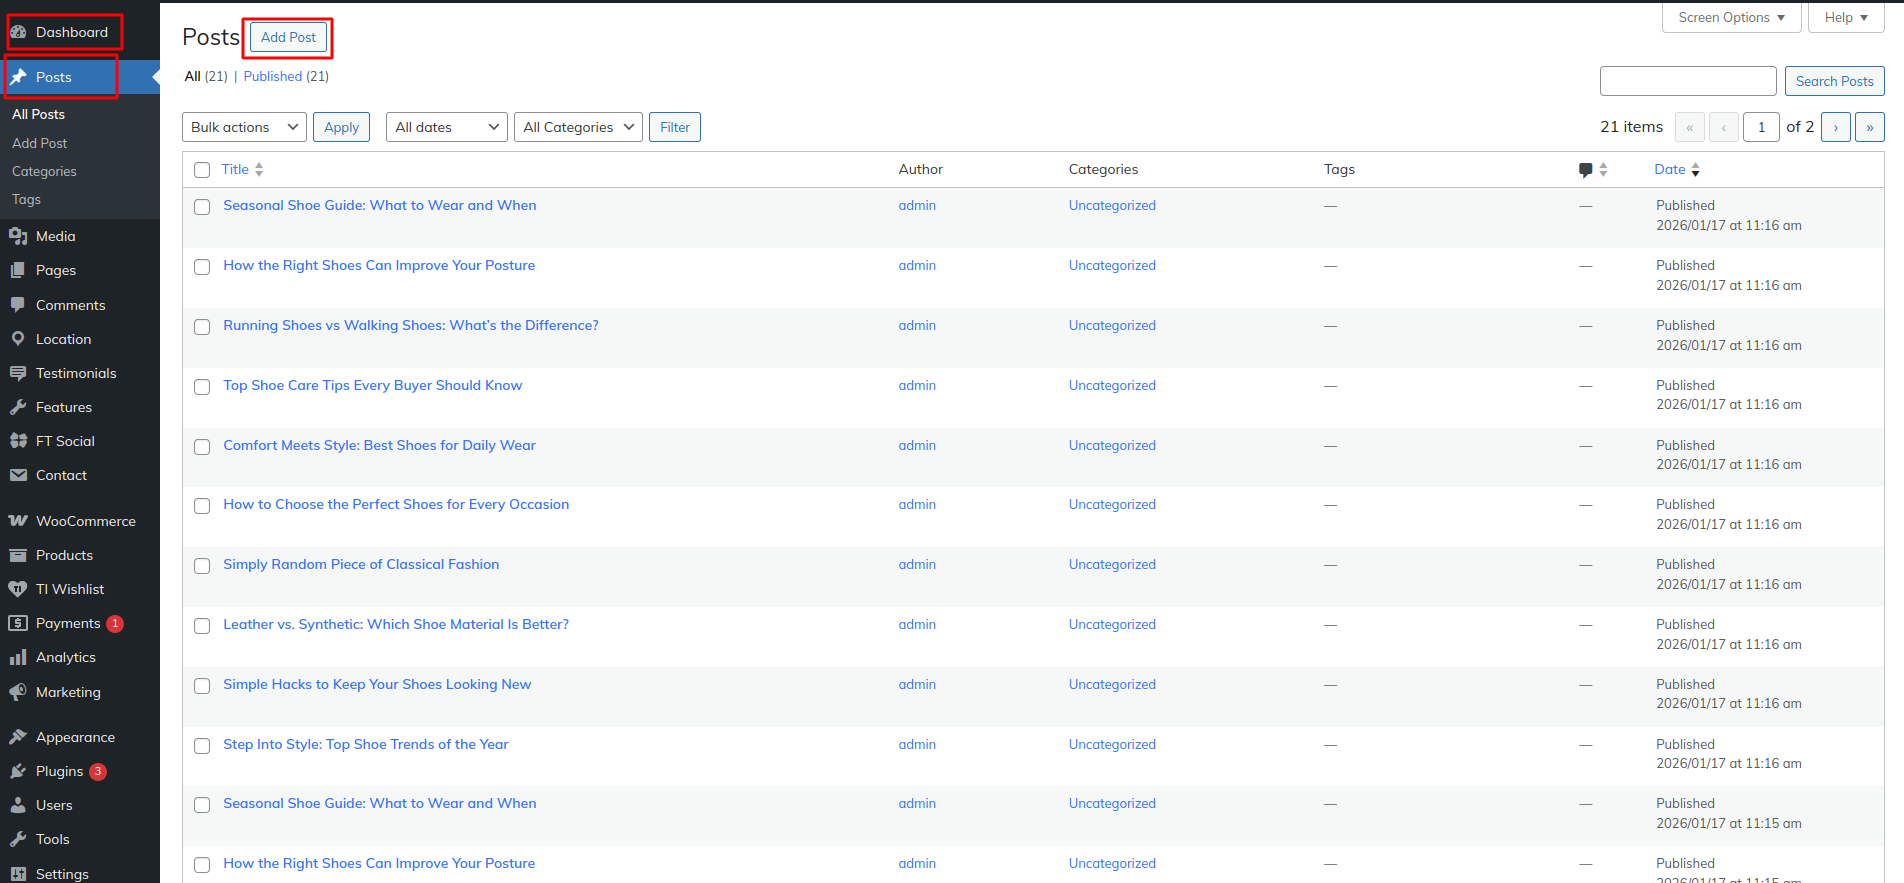
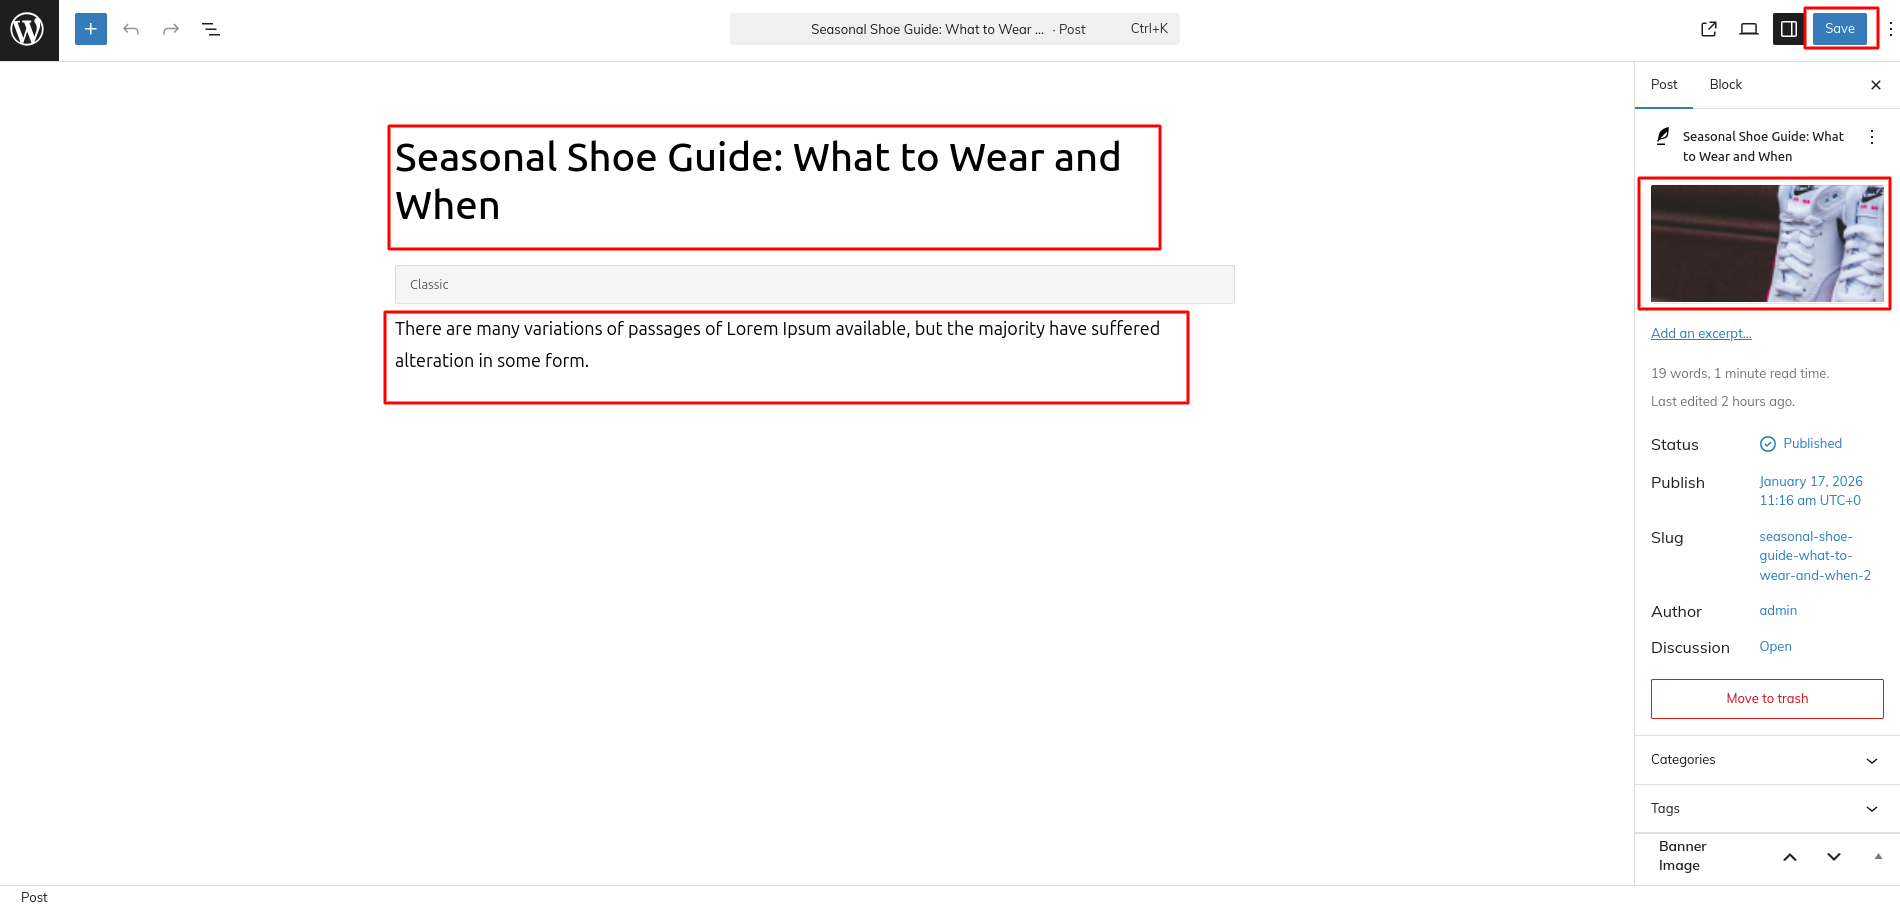
In this section the content is taken by the Post type named as "Posts" for any changes of
content you'll have to do following steps:
-> Go to Dashboard
-> Then Select "Posts" Post Type
-> And there you can edit and add content manually according to your preference and then do
publish
Go to Appearance >> Customize >> Theme Settings >> Our Blog to access the Social Icons settings.
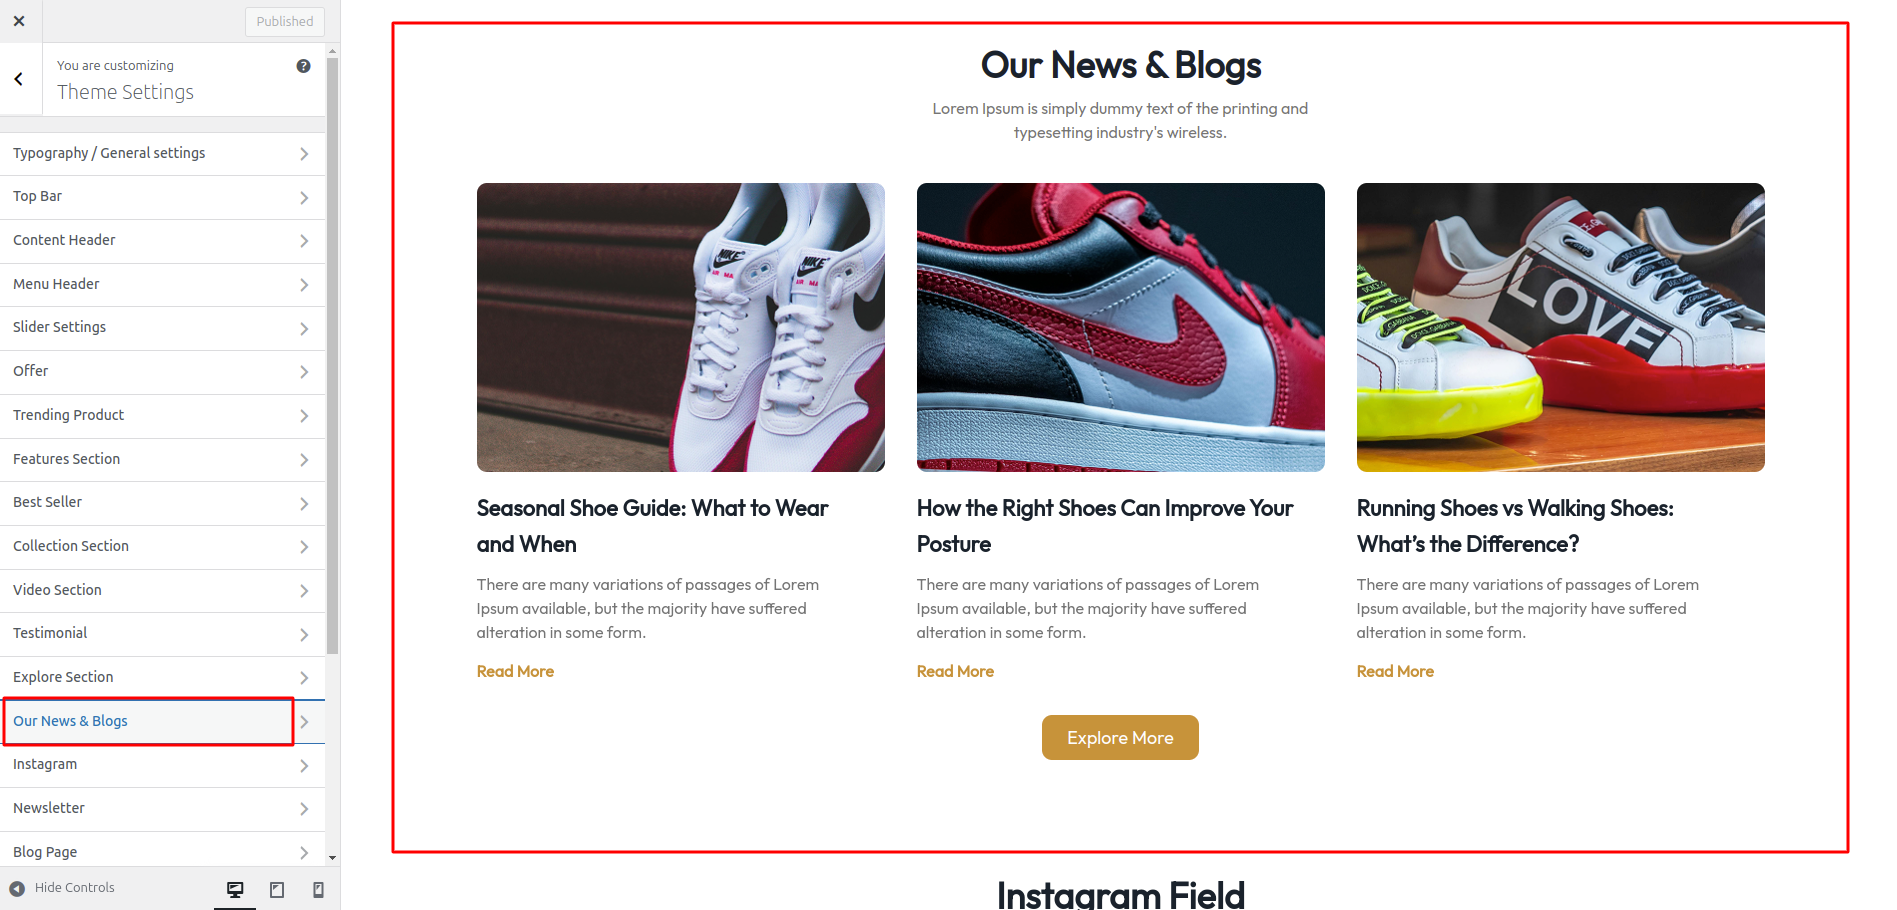
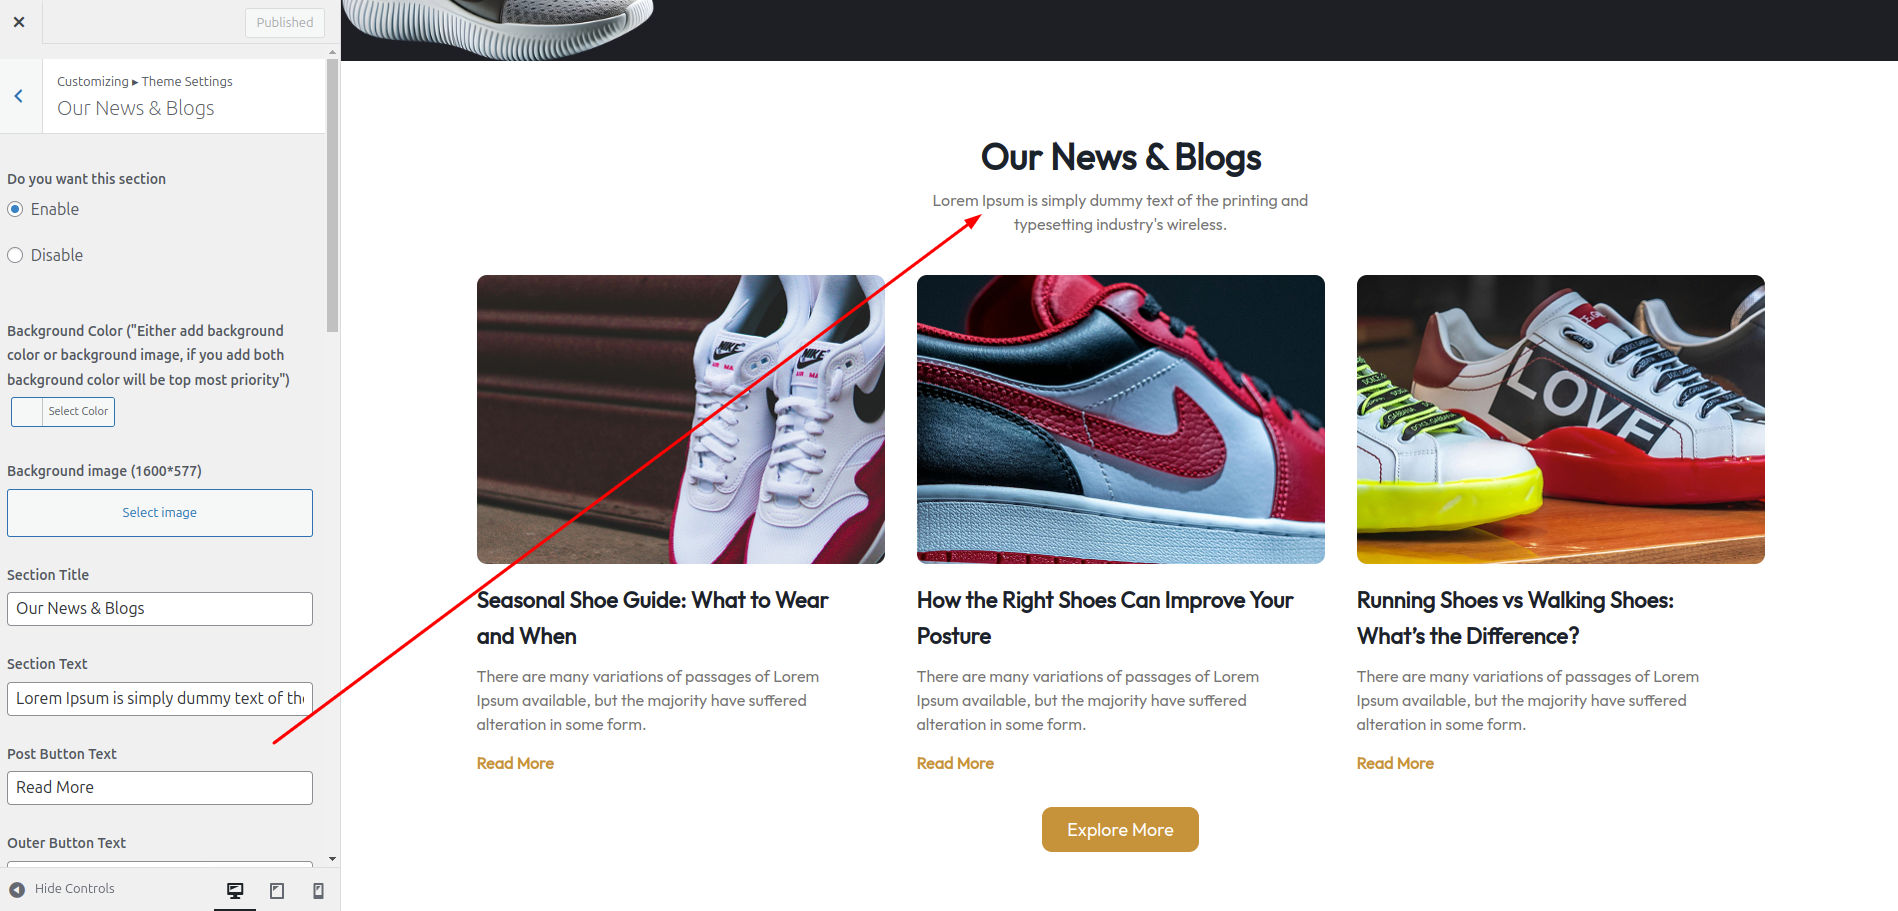
The following sections are included in the Social Icons customization:
- Section marked "Enable/Disable"
- Background Color / Background Image
- Dynamic Images
- Dynamic Content
- Depending on the content, different font settings.
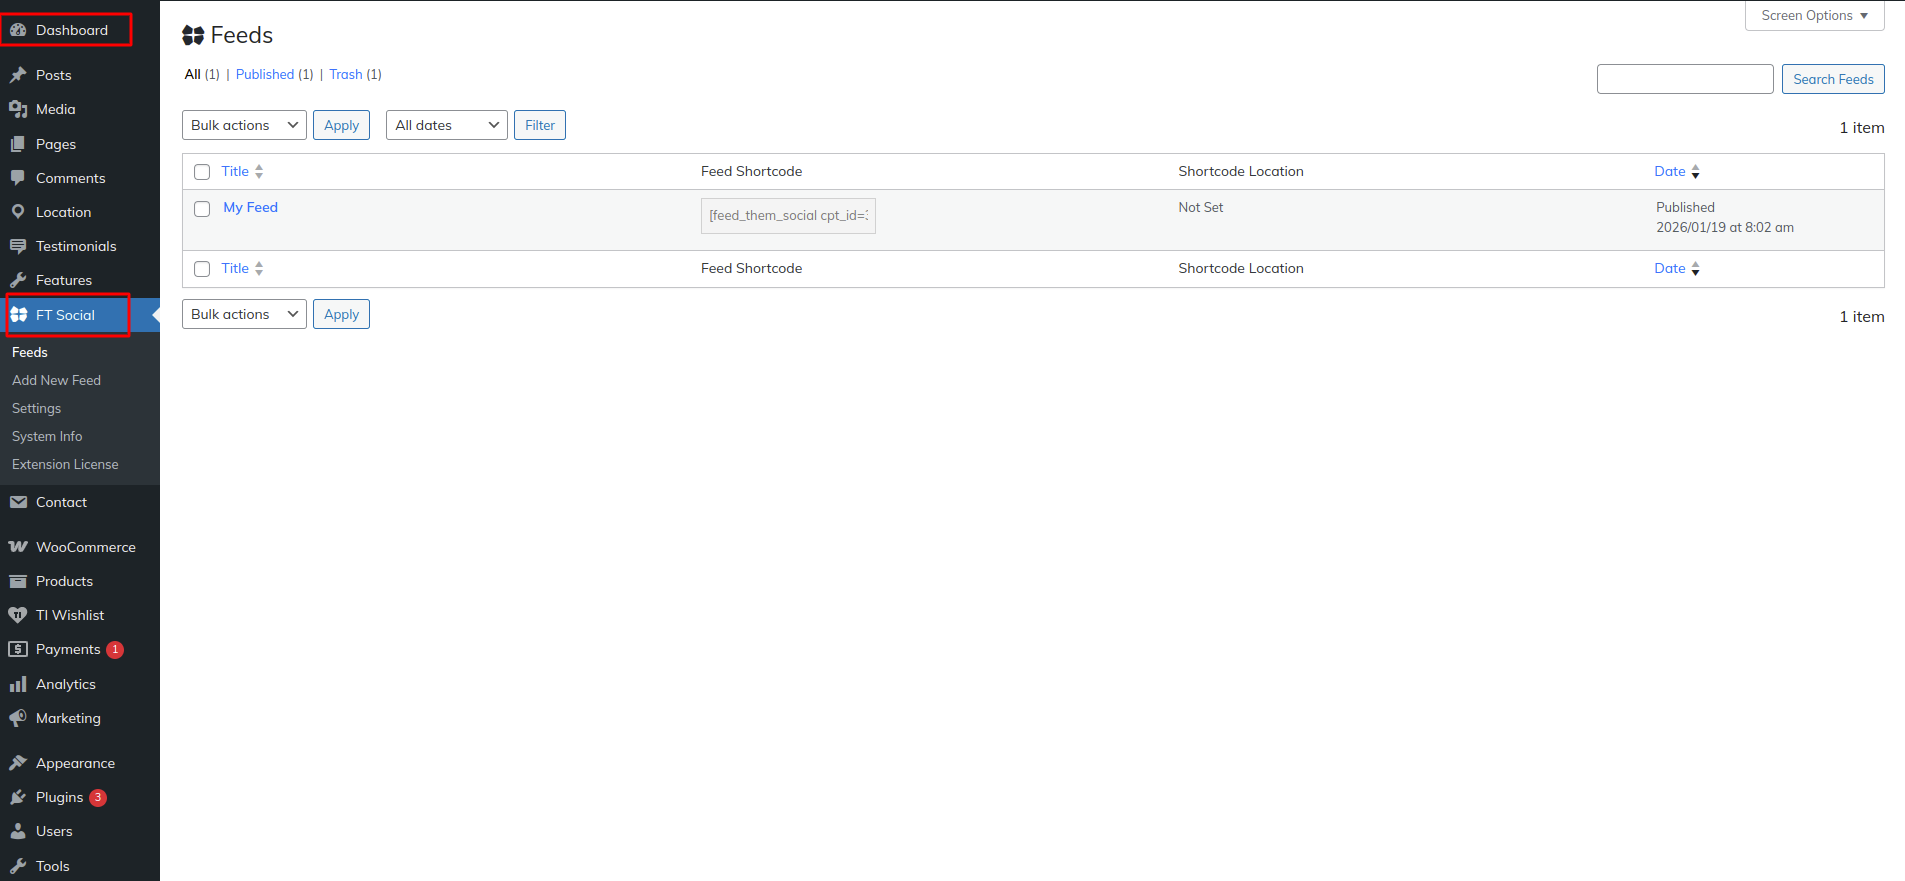
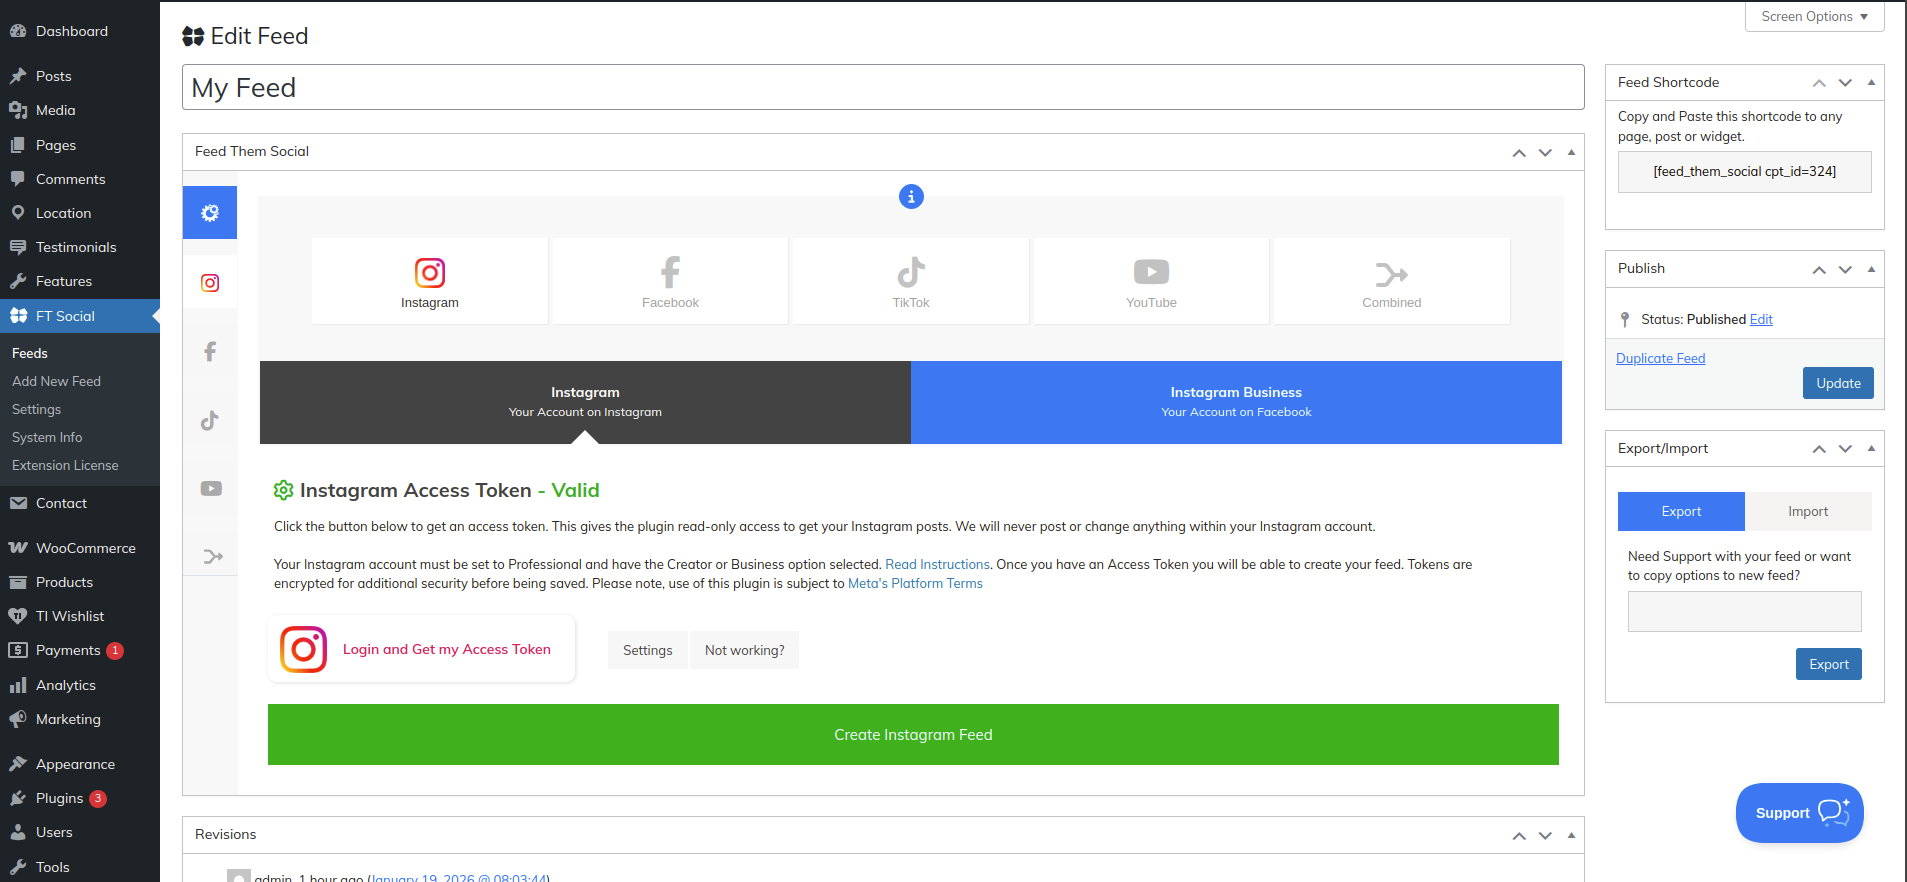
Install FT Social plugin and login instagram and add feeds.
In this section the content is taken by the Post type named as "FT Social" for any changes of
content you'll have to do following steps:
-> Go to Dashboard
-> Then Select "FT Social" Post Type
-> And there you can edit and add content manually according to your preference and then do
publish
Go to Appearance >> Customize >> Theme Settings >> Instagram to access the Instagram Section settings.
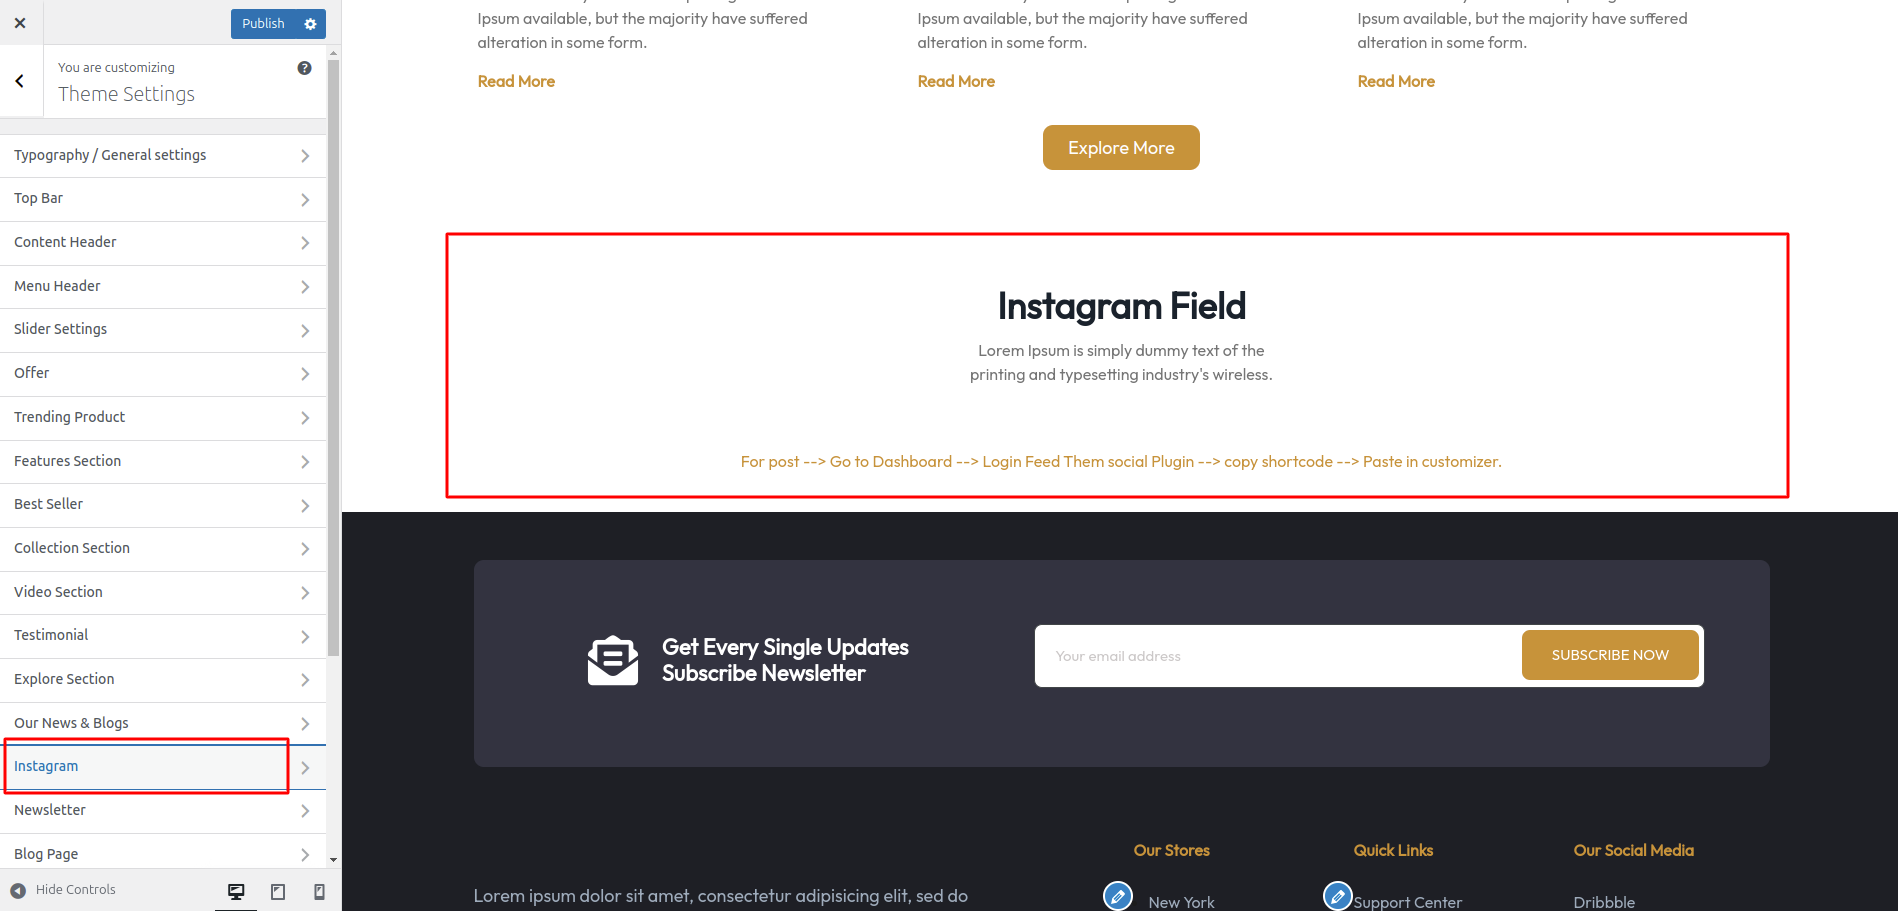
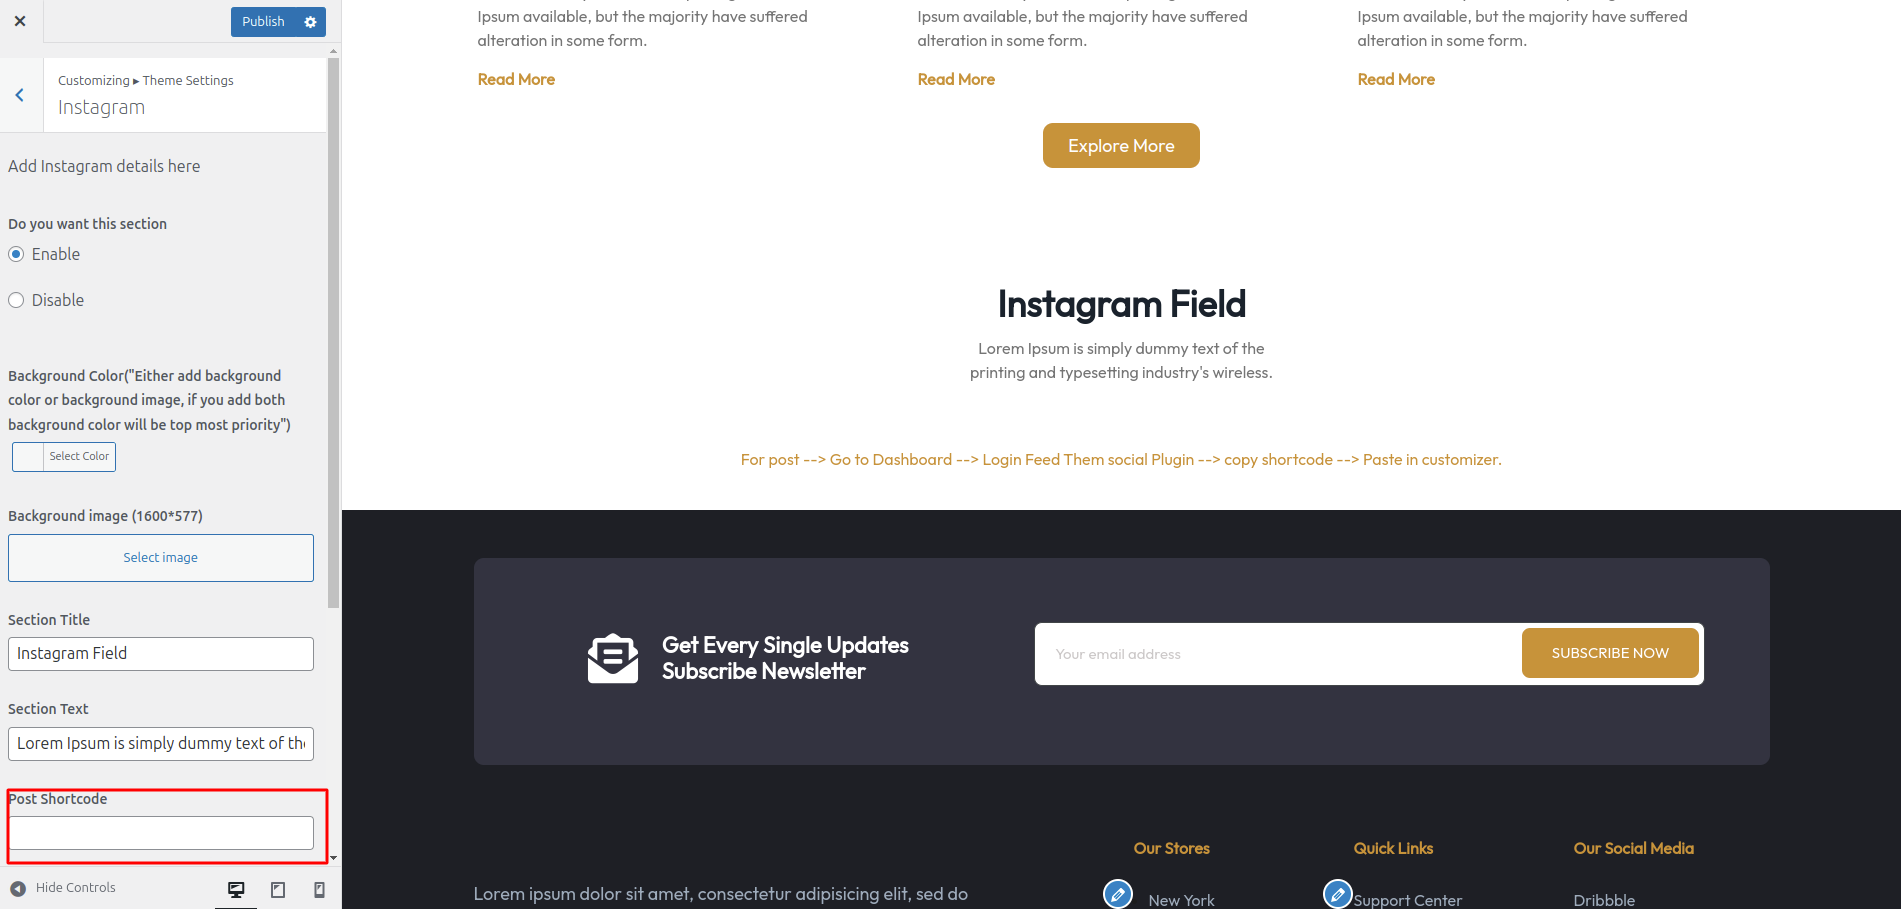
The following sections are included in the Instagram Field Section customization:
- Section marked "Enable/Disable"
- Background Color / Background Image
- Dynamic Images
- Dynamic Content
- Depending on the content, different font settings.
- Also given font settings and color settings for After Active Also.
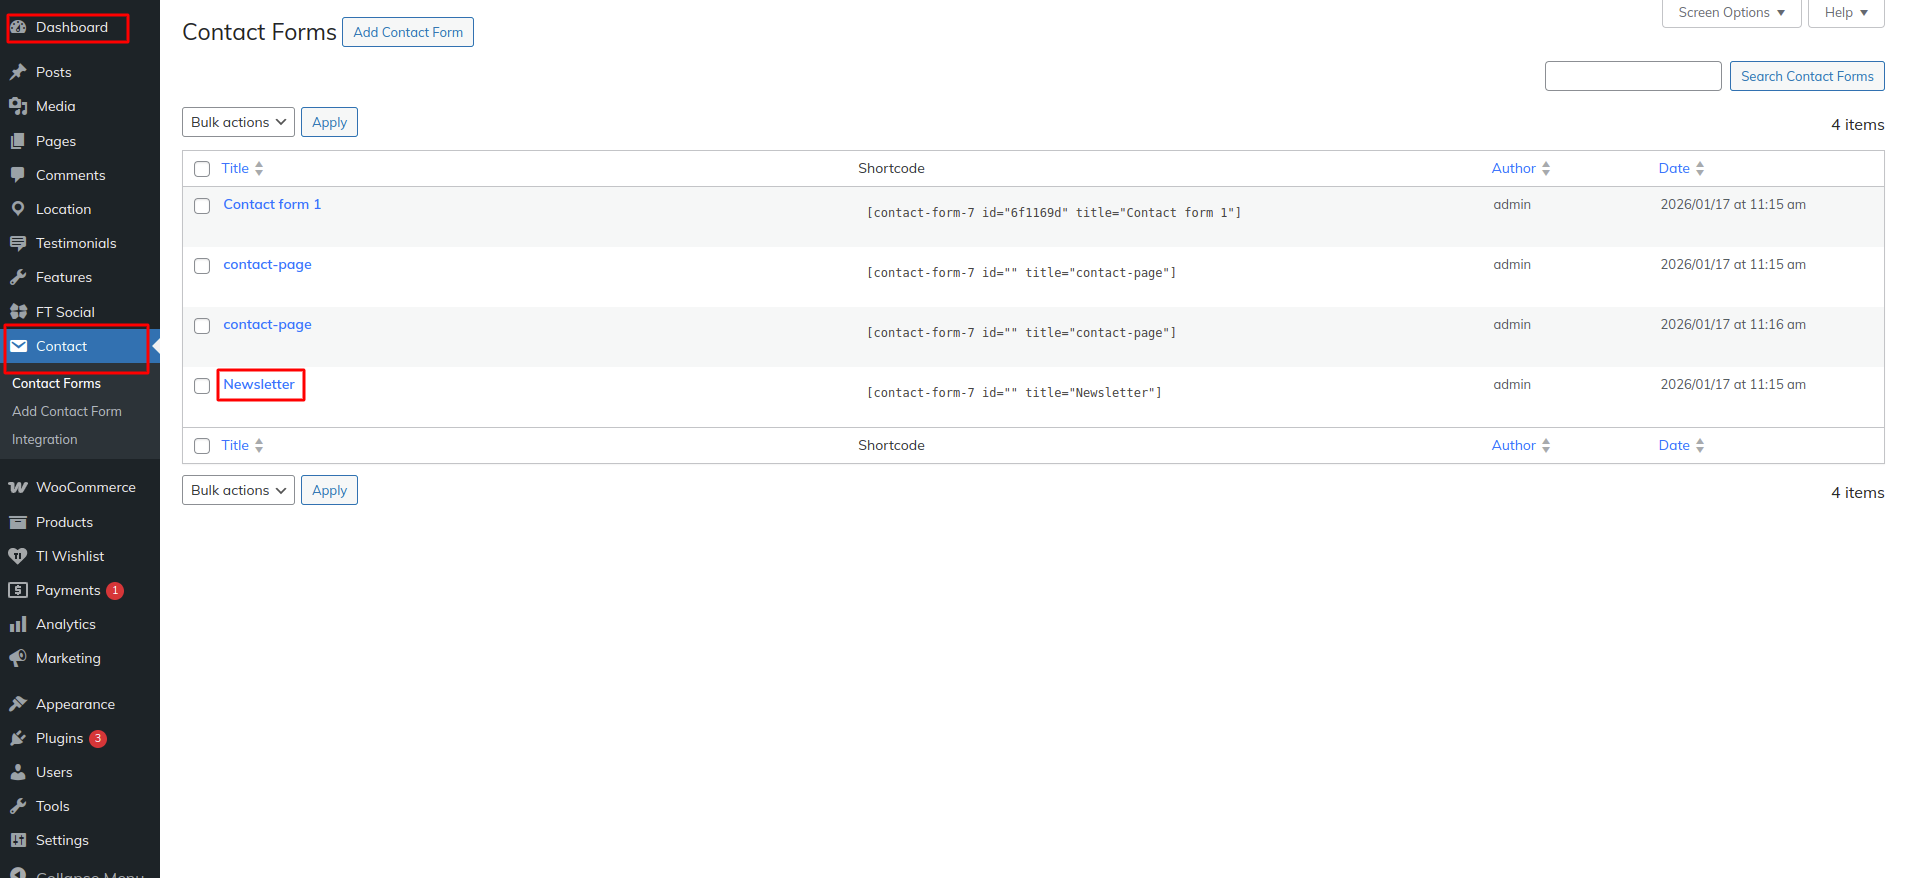
In this section the content is taken by the Post type named as "Contact" for any changes of
content you'll have to do following steps:
-> Go to Dashboard
-> Then Select "Contact" Post Type
-> And there you can edit and add content manually according to your preference and then do
publish
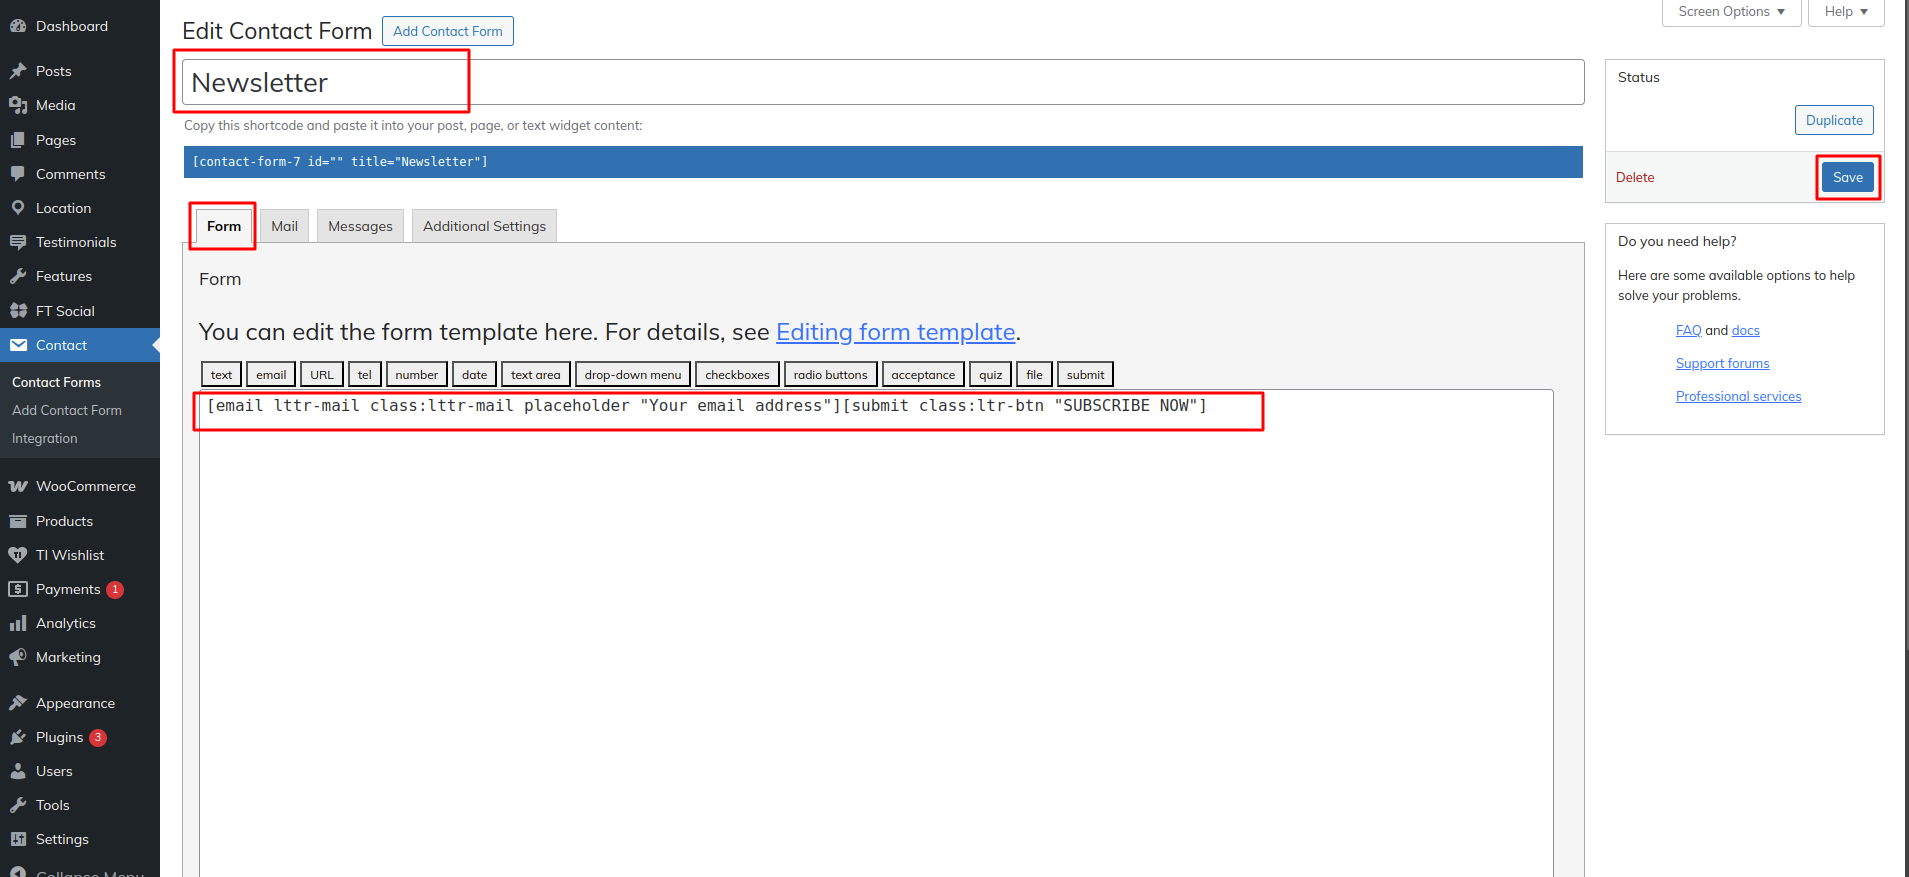
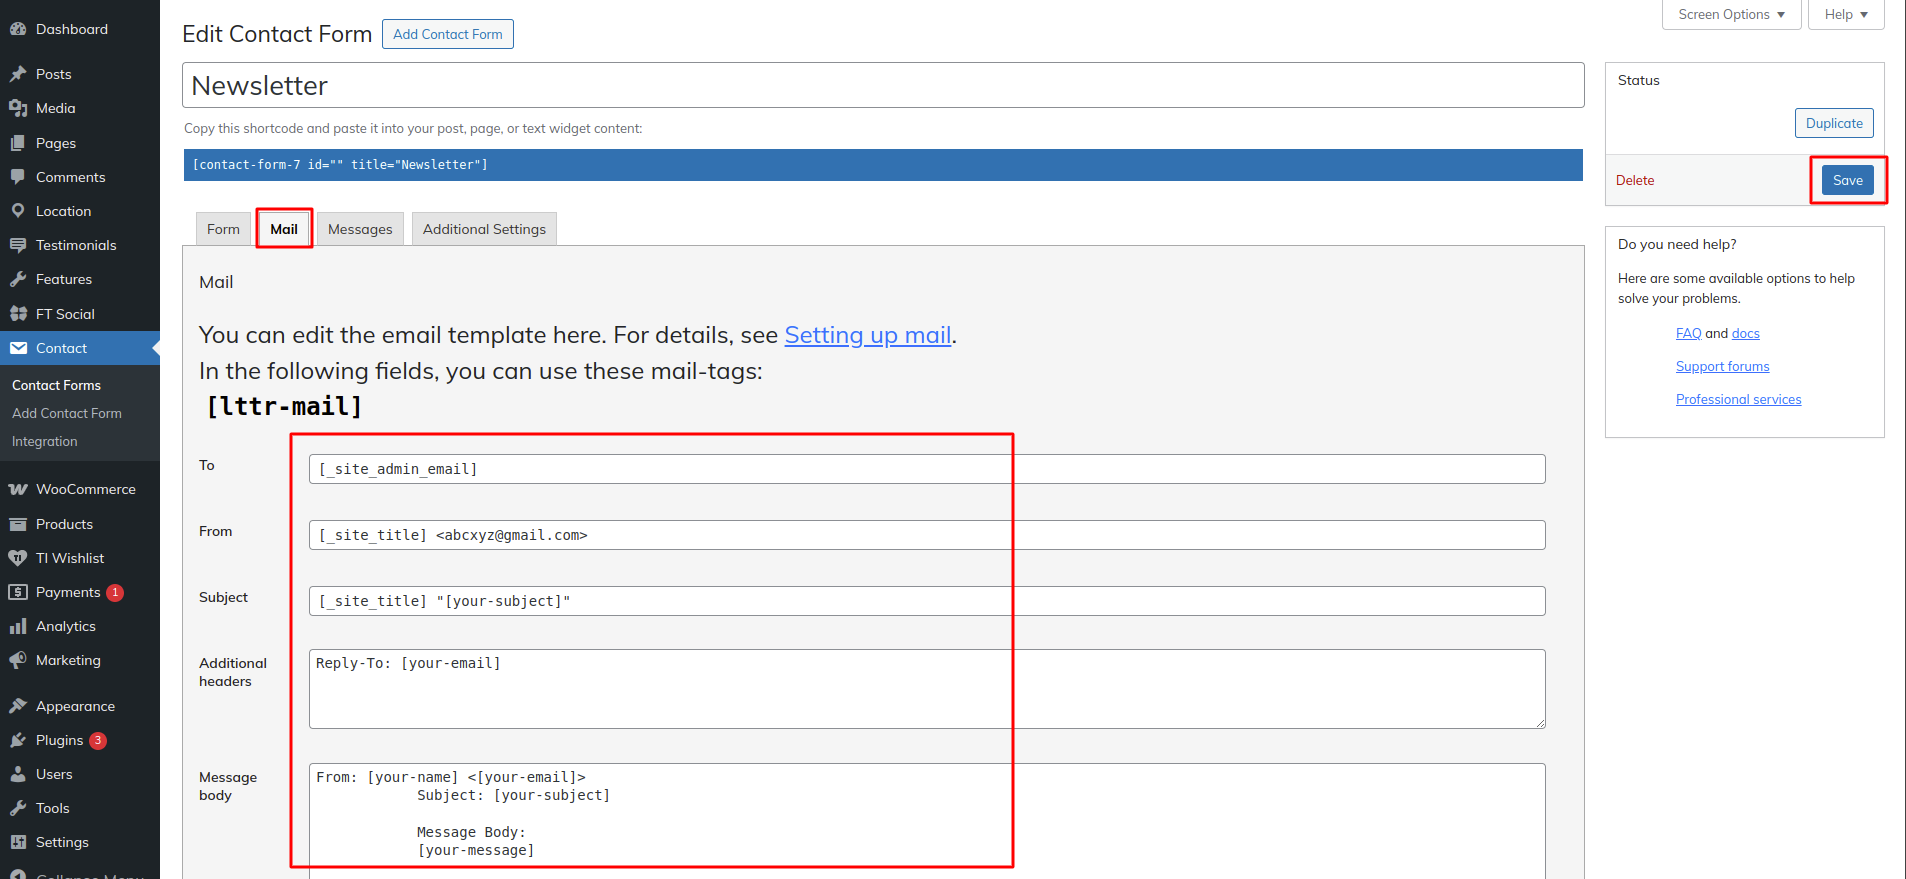
Go to Appearance >> Customize >> Theme Settings >> Newsletter to access the Newsletter settings.
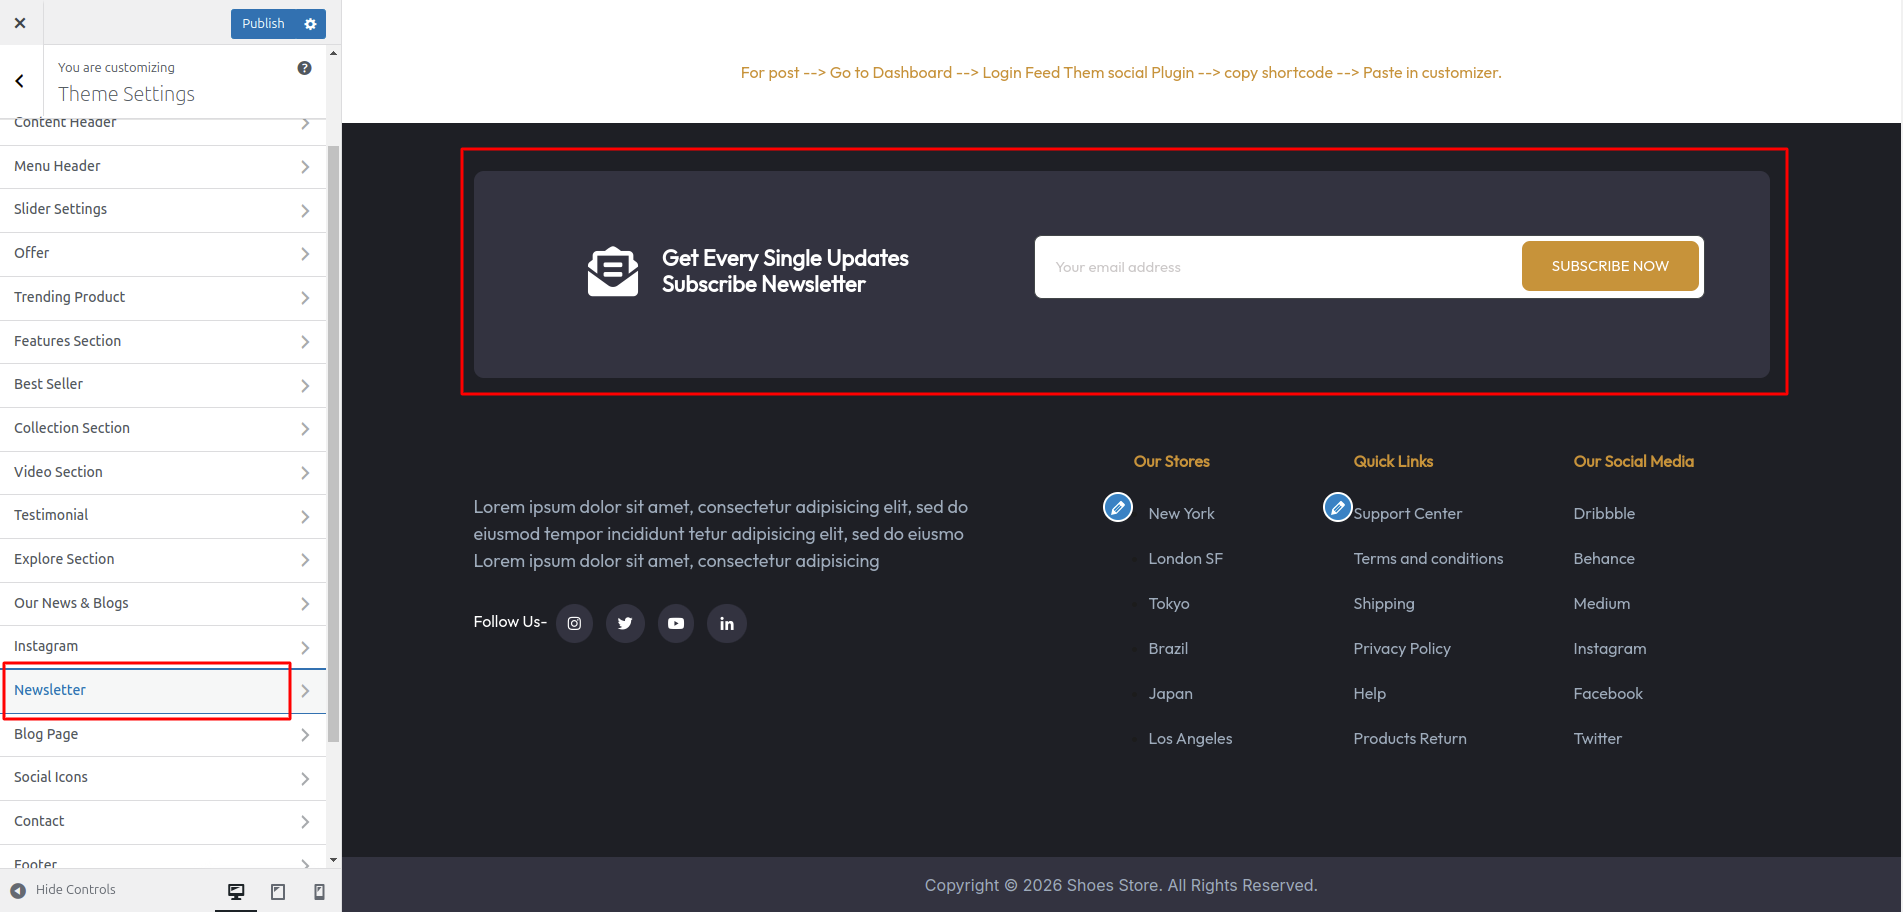
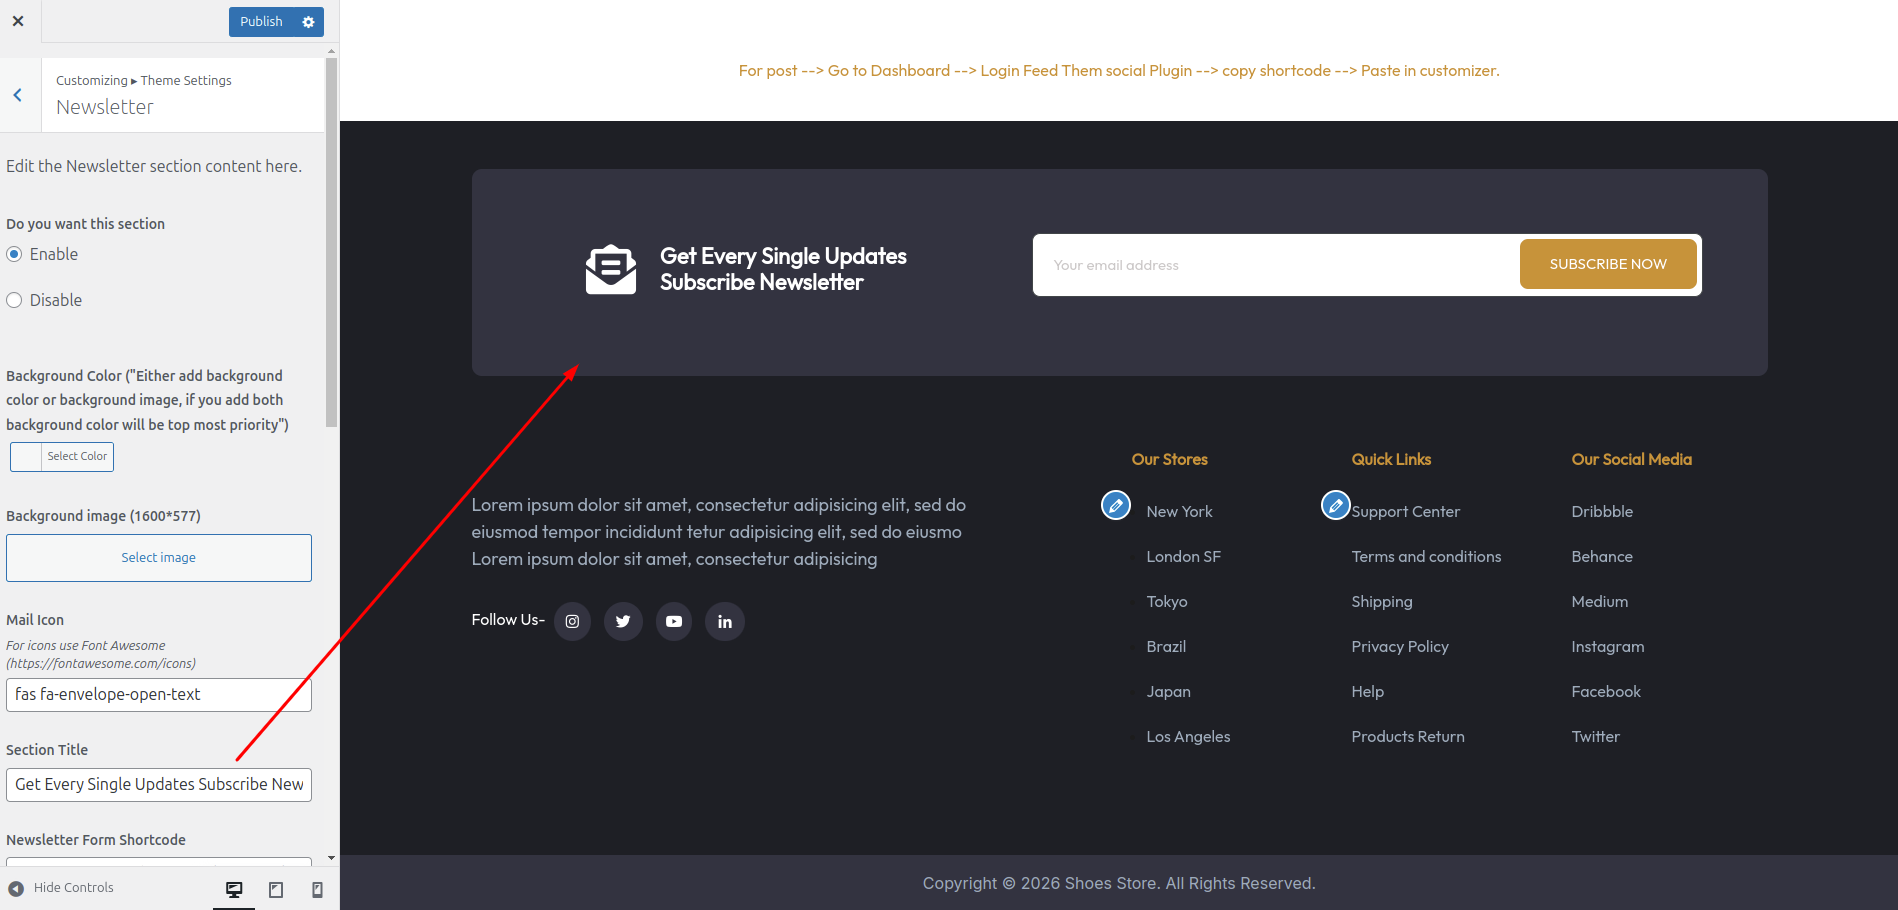
The following sections are included in the Newsletter customization:
- Section marked "Enable/Disable"
- Background Color / Background Image
- Dynamic Images
- Dynamic Content
- Depending on the content, different font settings.
- Also settings are given for navigation arrows.
Dashboard Setup:-
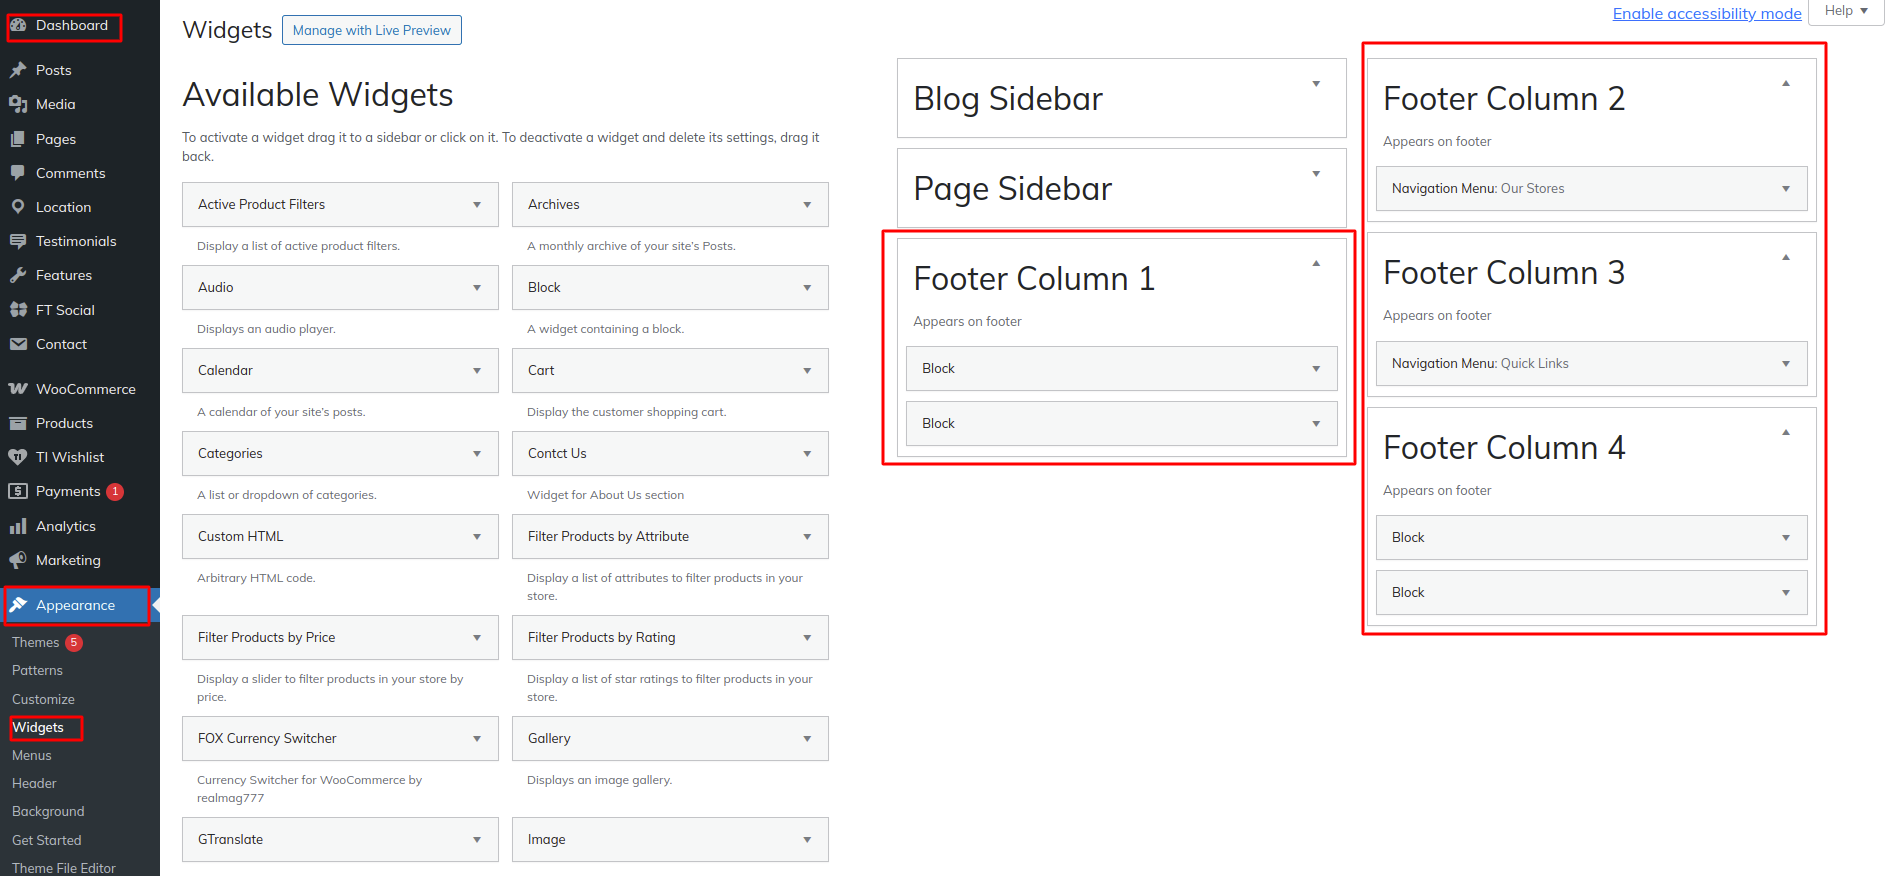
Customizer Setup:-
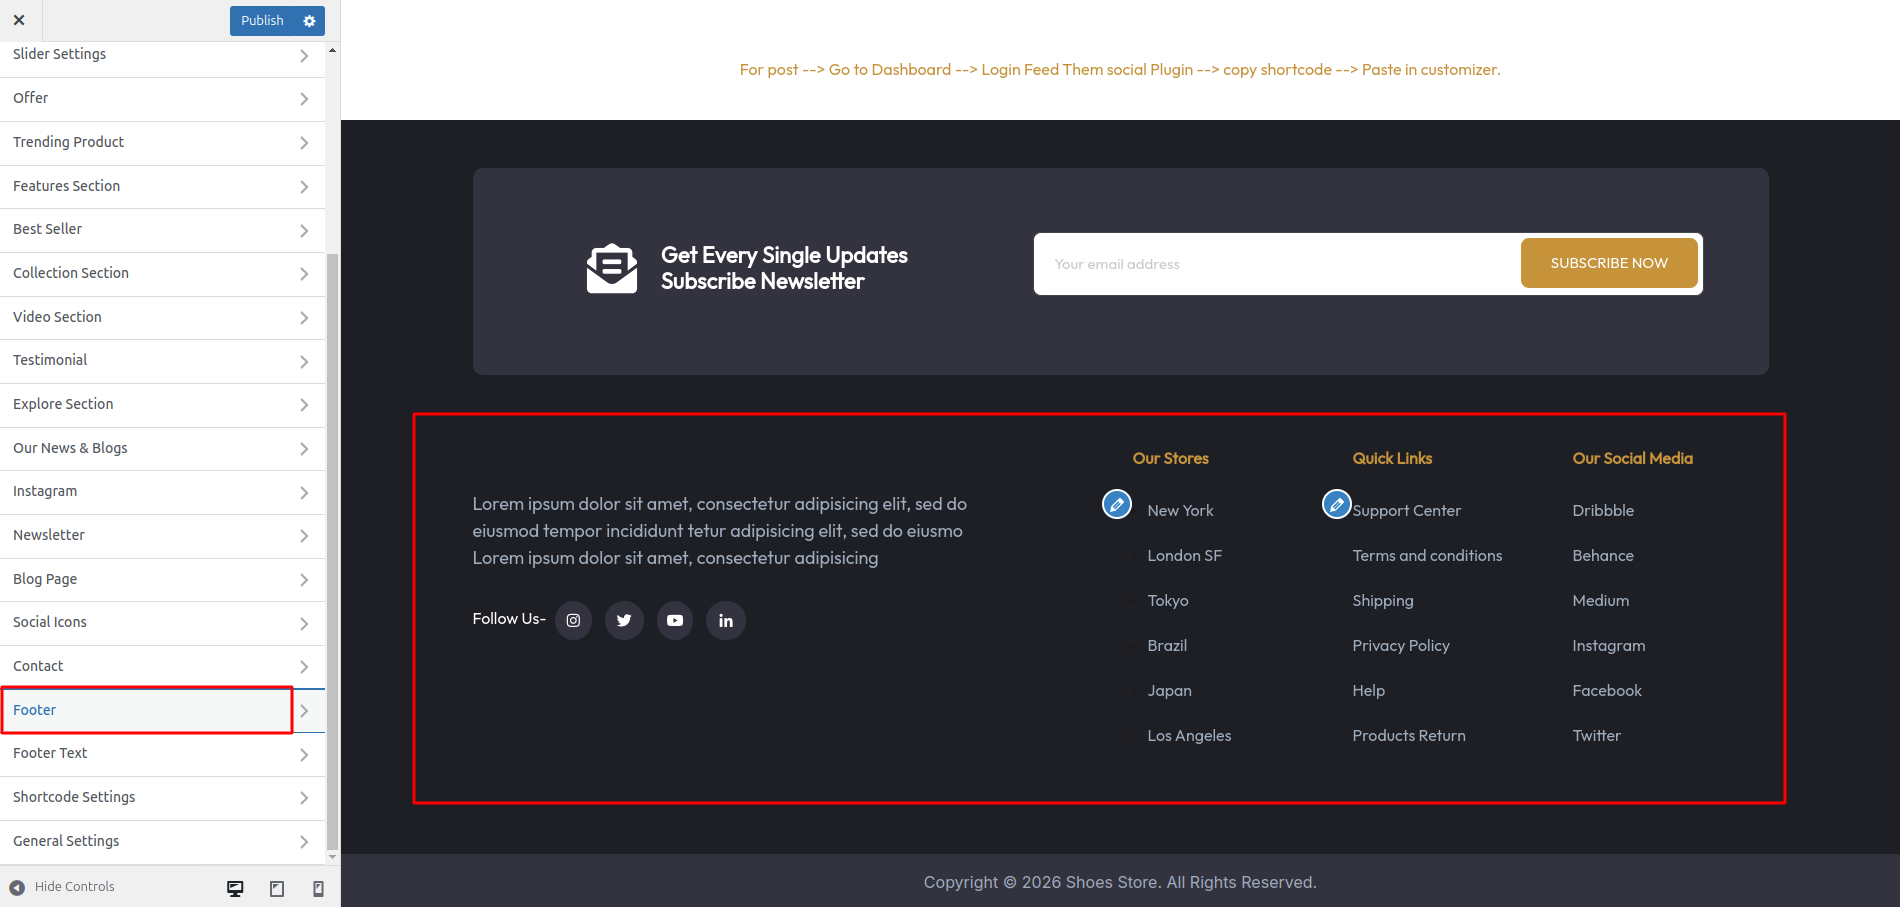
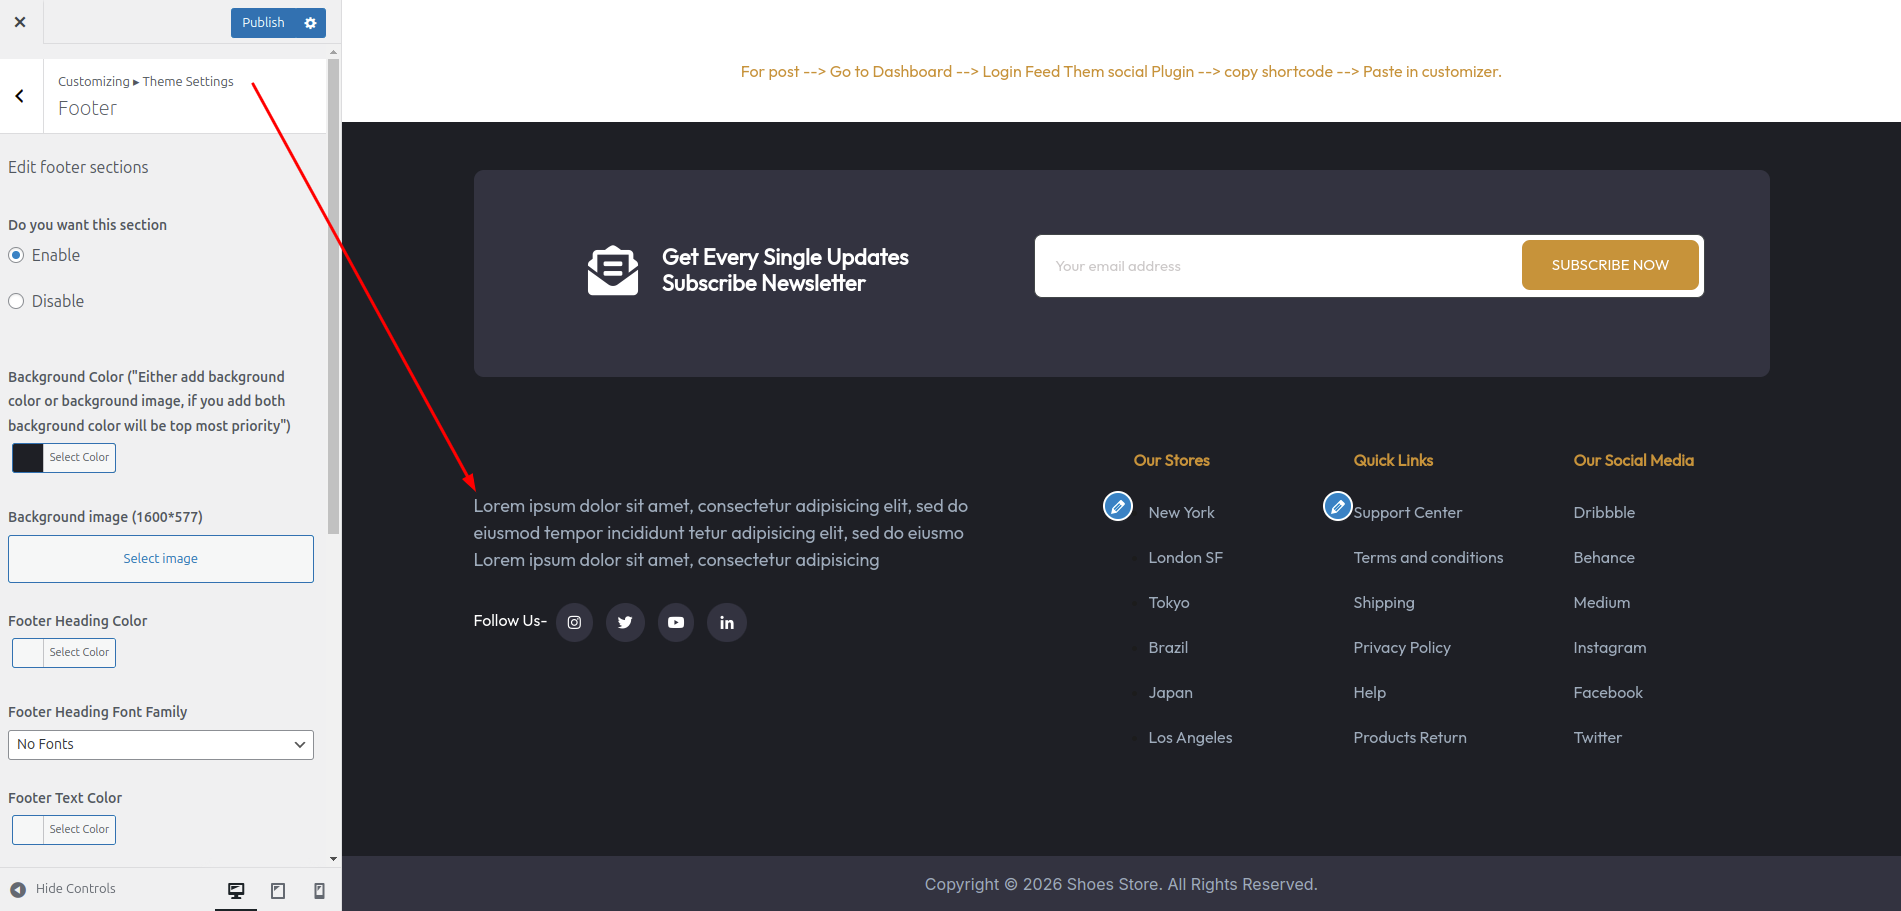
Go to Appearance >> Customize >> Theme Settings >> Footer Text Section to access the Footer Text Section settings.
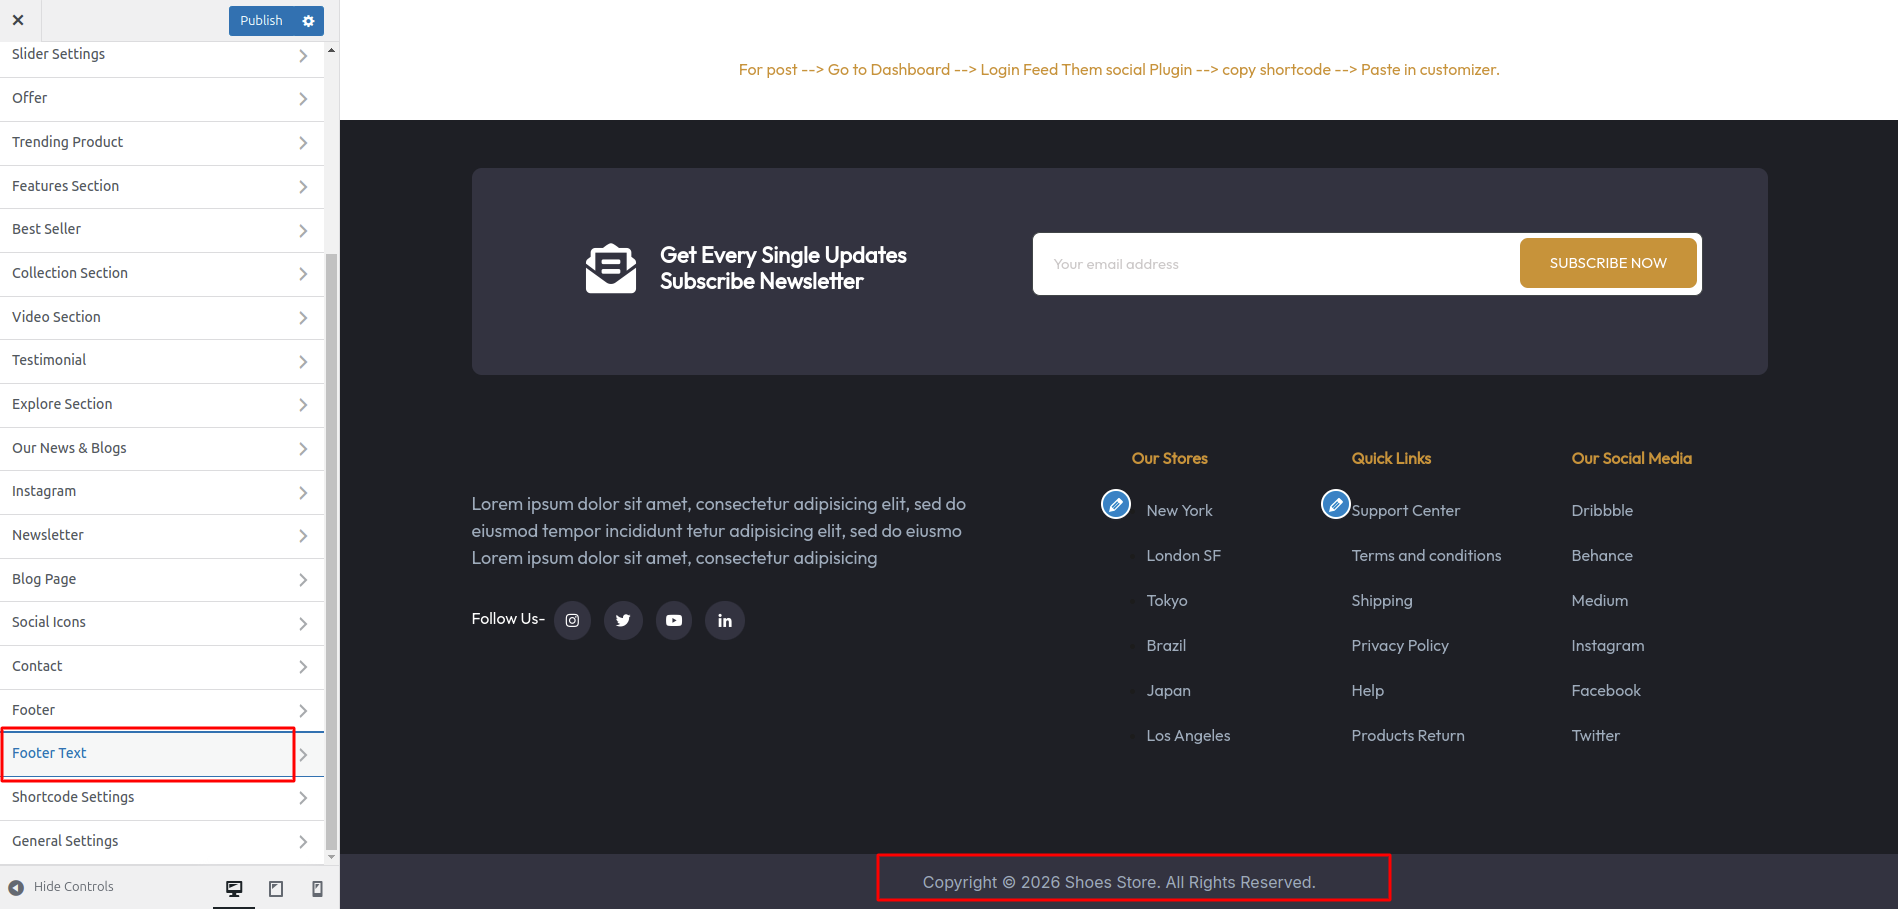
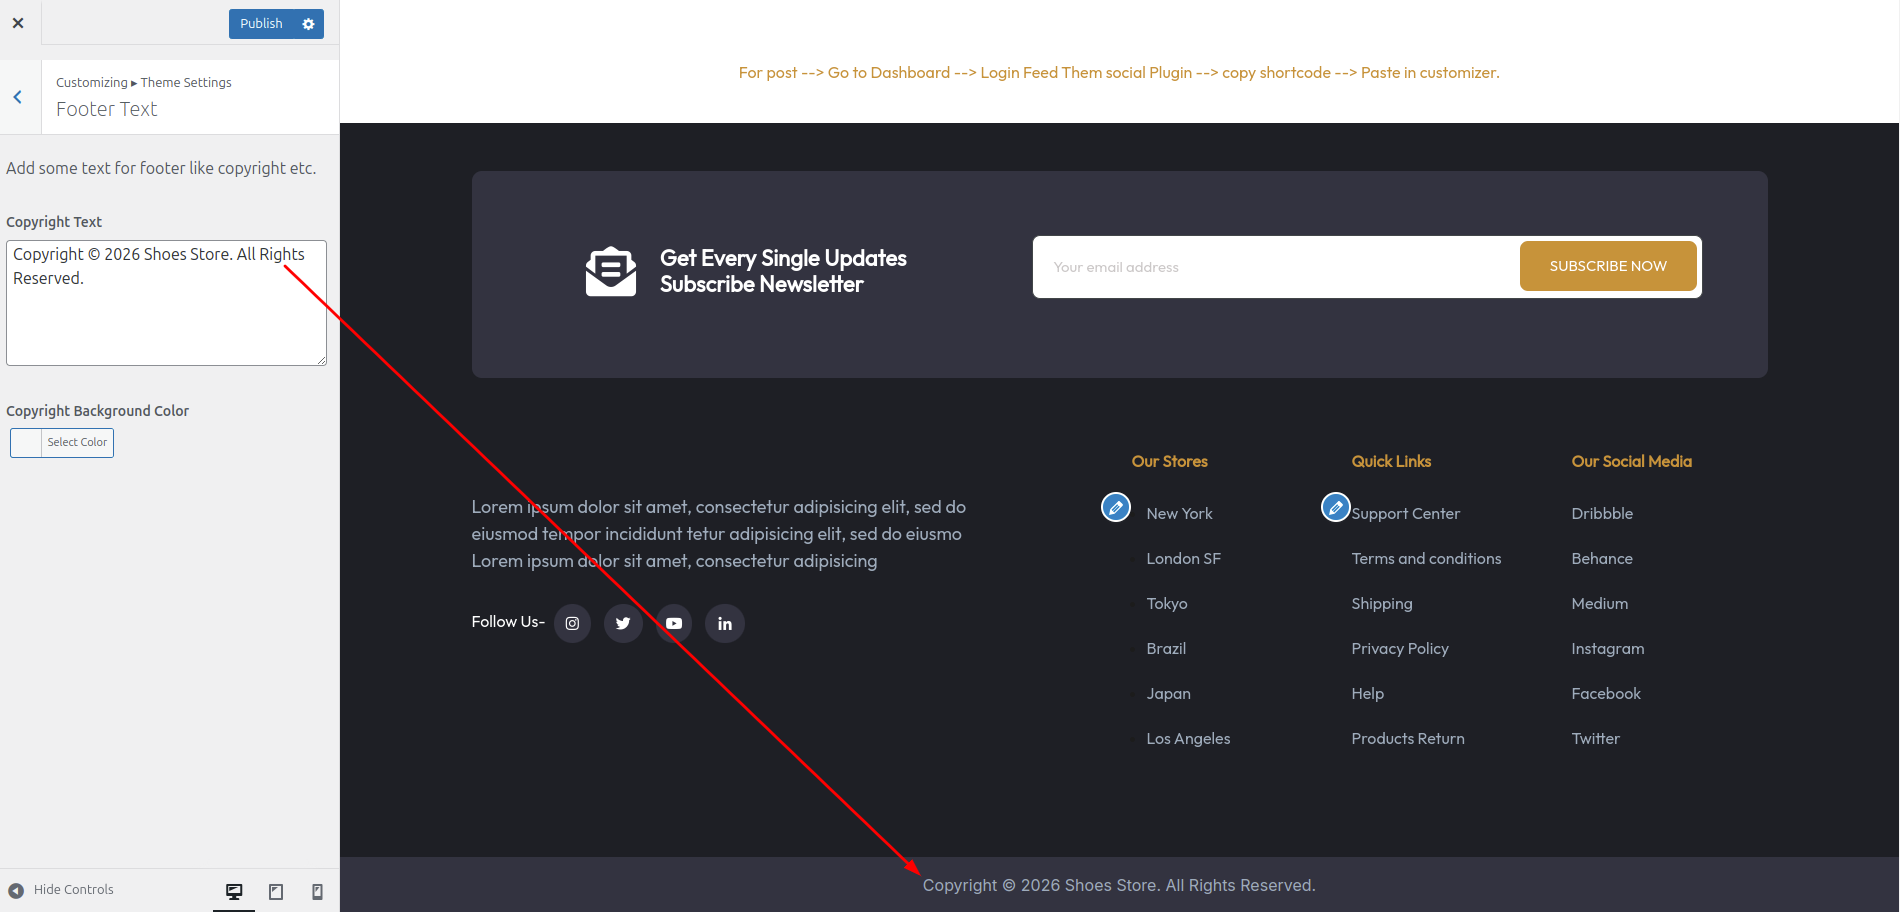
The following sections are included in the Footer Section customization:
- Section marked "Enable/Disable"
- Background Color / Background Image
- Depending on the content, different font settings.
Go to Appearance >> Customize >> Theme Settings >> Contact Page Section to access the Footer Text Section settings.
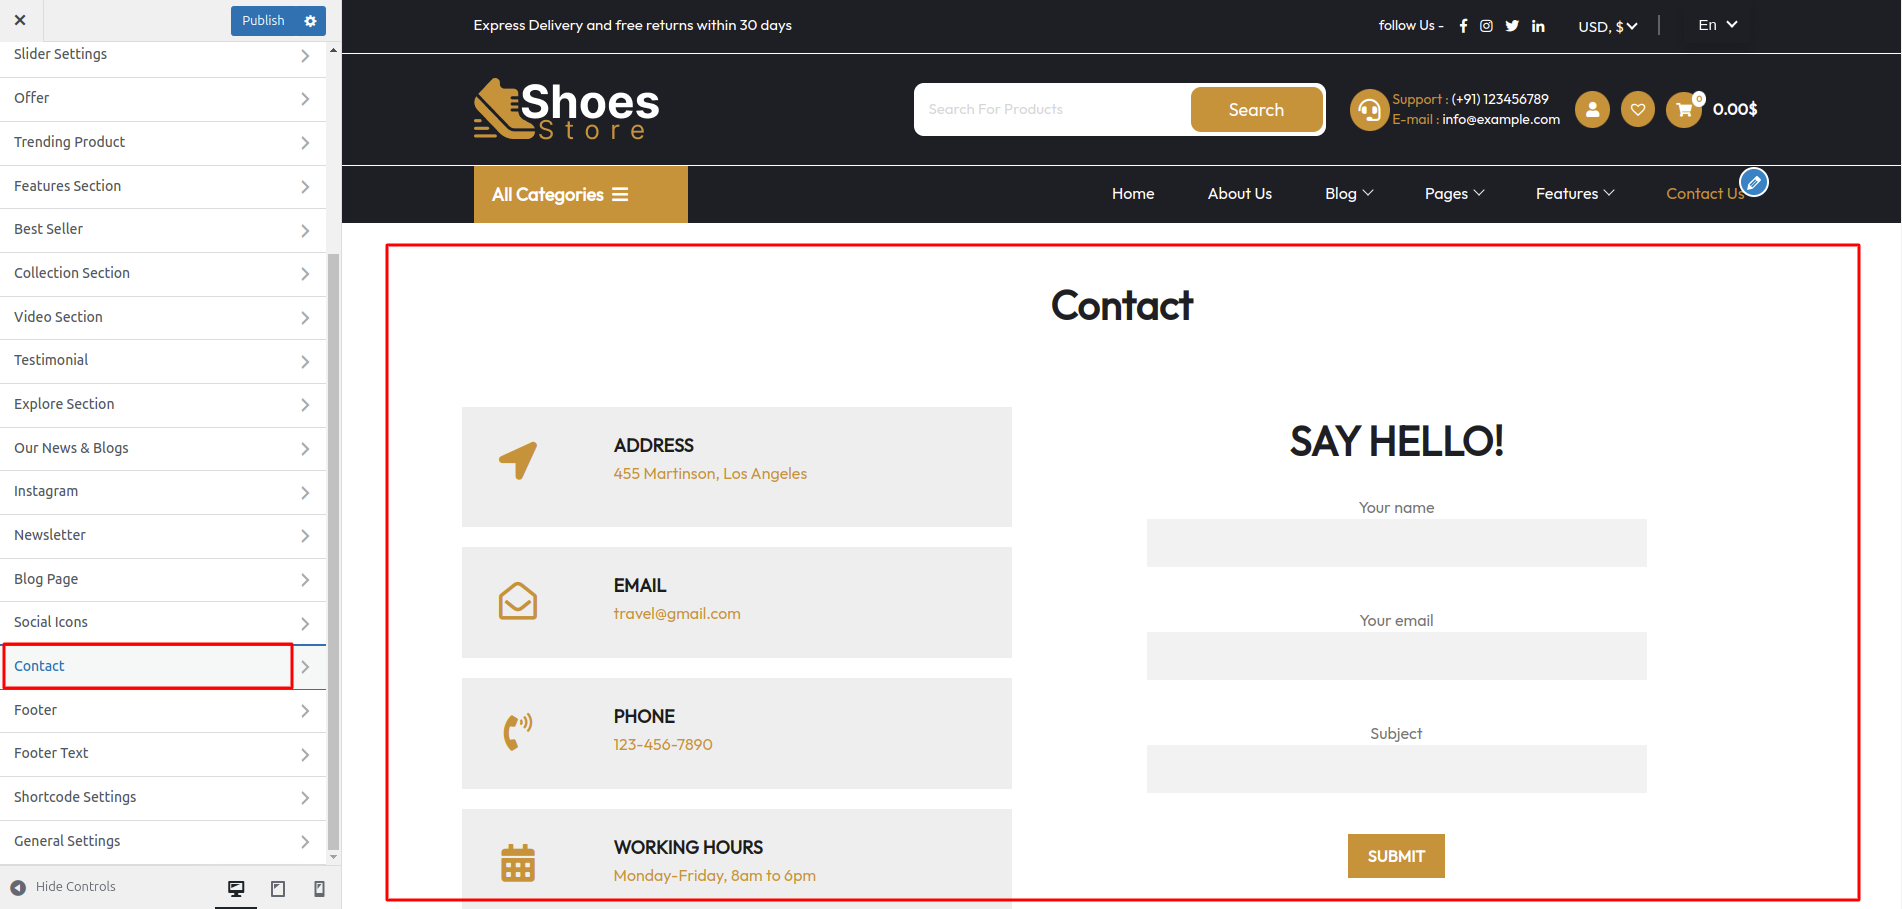
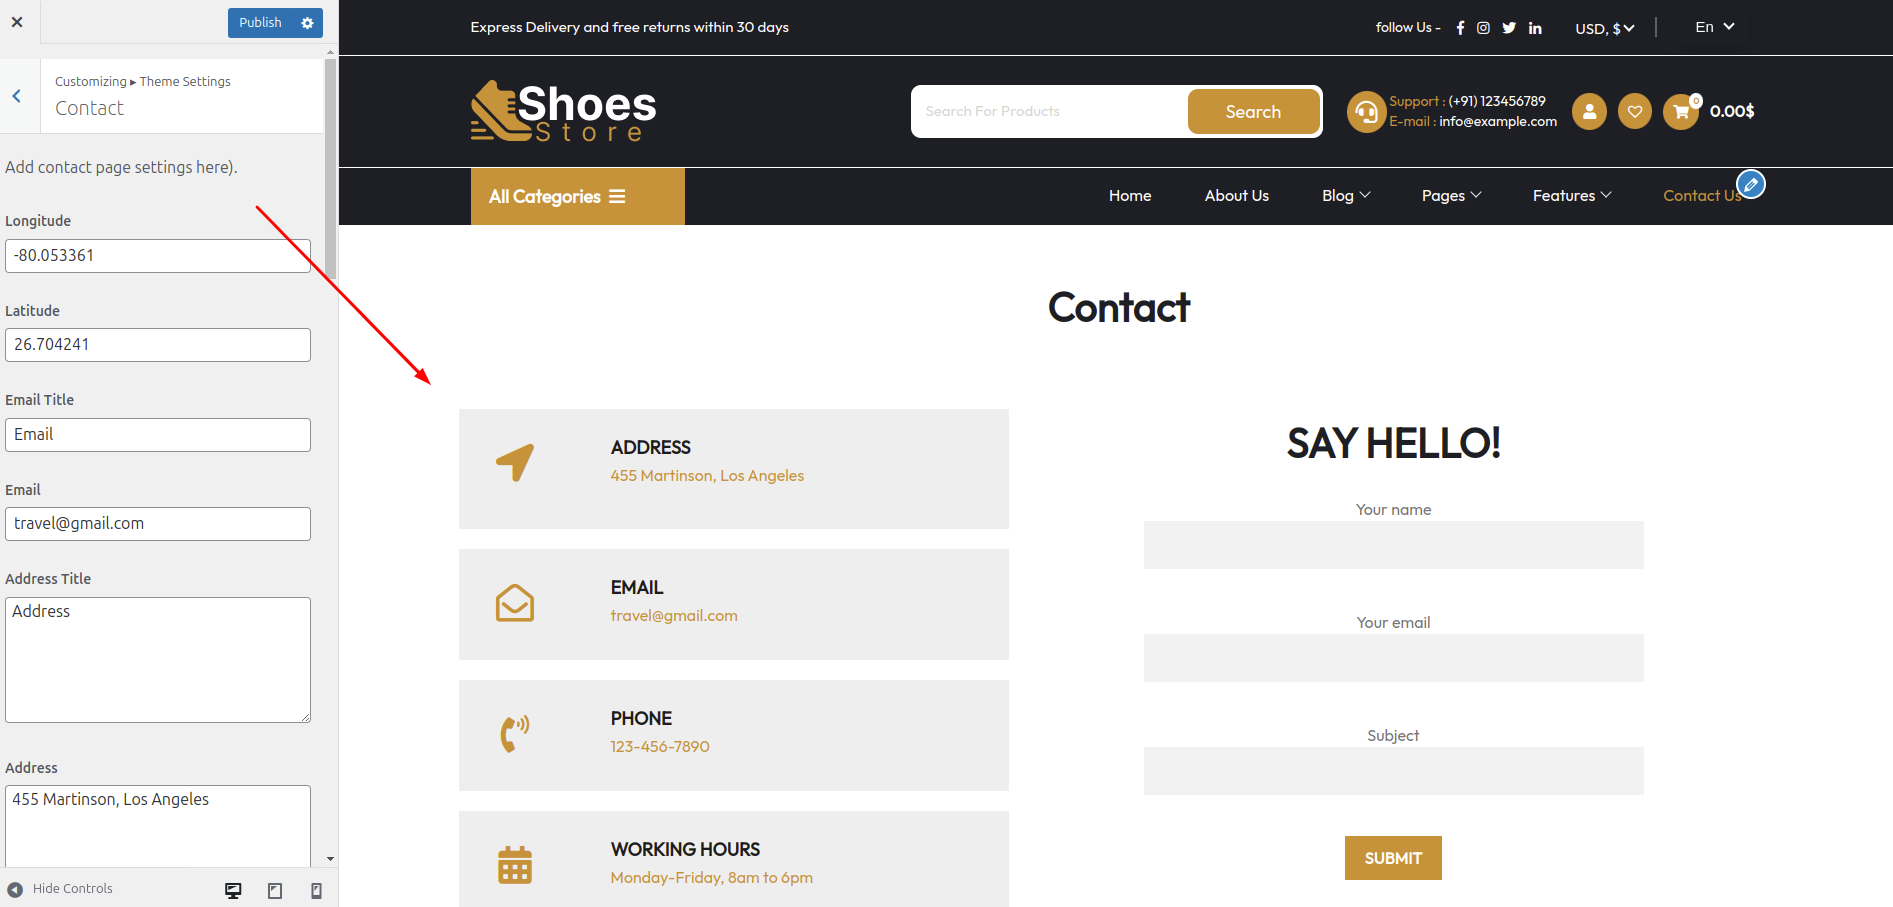
The following sections are included in the Contact Page customization:
- Section marked "Enable/Disable"
- Background Color / Background Image
- Depending on the content, different font settings.
5. Template & Sidebar Information
Page Template Options:
- Standard Template
- Default Page Template with Right Sidebar Position
- Full Width Page
- Page Template with One Column (No Sidebar)
- Left Sidebar on This Page
- Page Template with Left Sidebar Position
- Right Sidebar of the Page
- Page Template with Right Sidebar Position
Blog Options:
- Full-width Blog
- Blog Template with One Column (No Sidebar)
- Blog Template with Left Sidebar
- Blog Template with Left Sidebar Position
- Blog Template with Right Sidebar
- Blog Template with Right Sidebar Position
Contact Template
- Default Contact Template with No Sidebar Position
6.Posts Information
Adding Category
For more information on adding categories, refer to the following article:
click here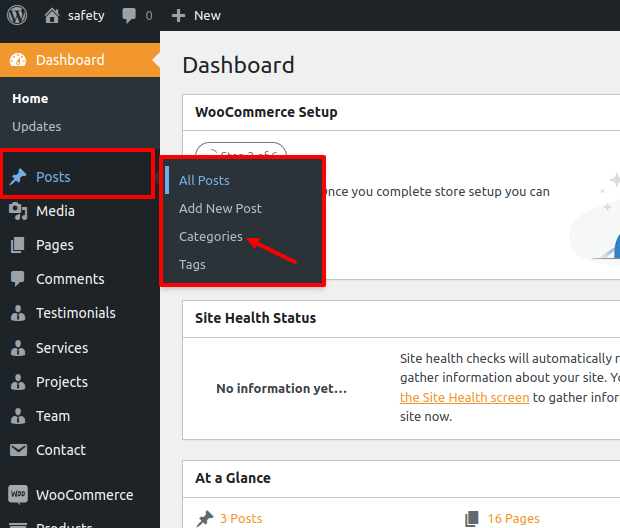
- Access your WordPress Administration Panel (Dashboard).
- Navigate to the Posts tab in your WordPress Dashboard
- After that, go to the Categories for blog entries.
- Enter the name of your new category in the field provided.
- Then, click the Add New Category option.
Select the Publish option.
Create a Blog posts
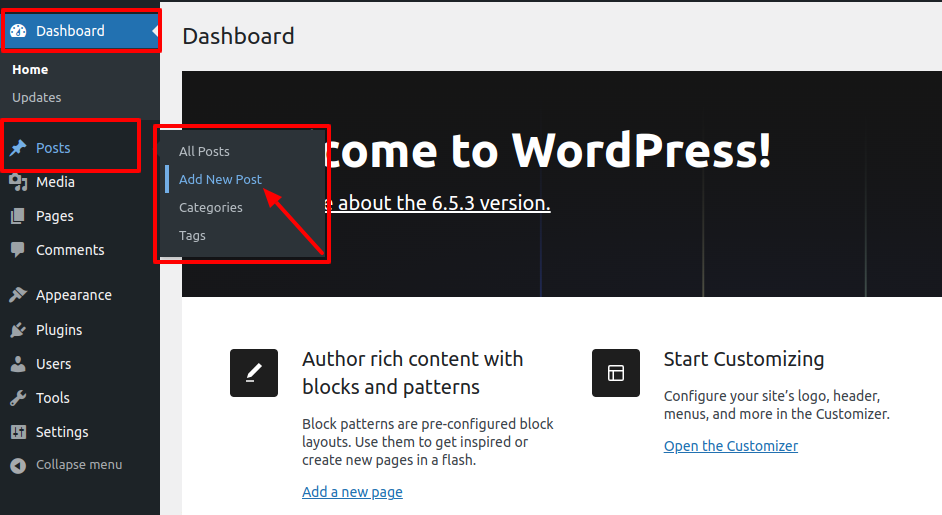
- Access the WordPress Dashboard.
- Select the Posts option.
- Select the Add New tab.
- Write in your post content. For more information on adding posts, please check the
following link
click here
7. Shortcodes
A shortcode is a powerful tool for generating content.
Shortcodes are simple to use.
For more Information refer to this link click here
First and foremost, ensure that the editing mode is ready to Visual.
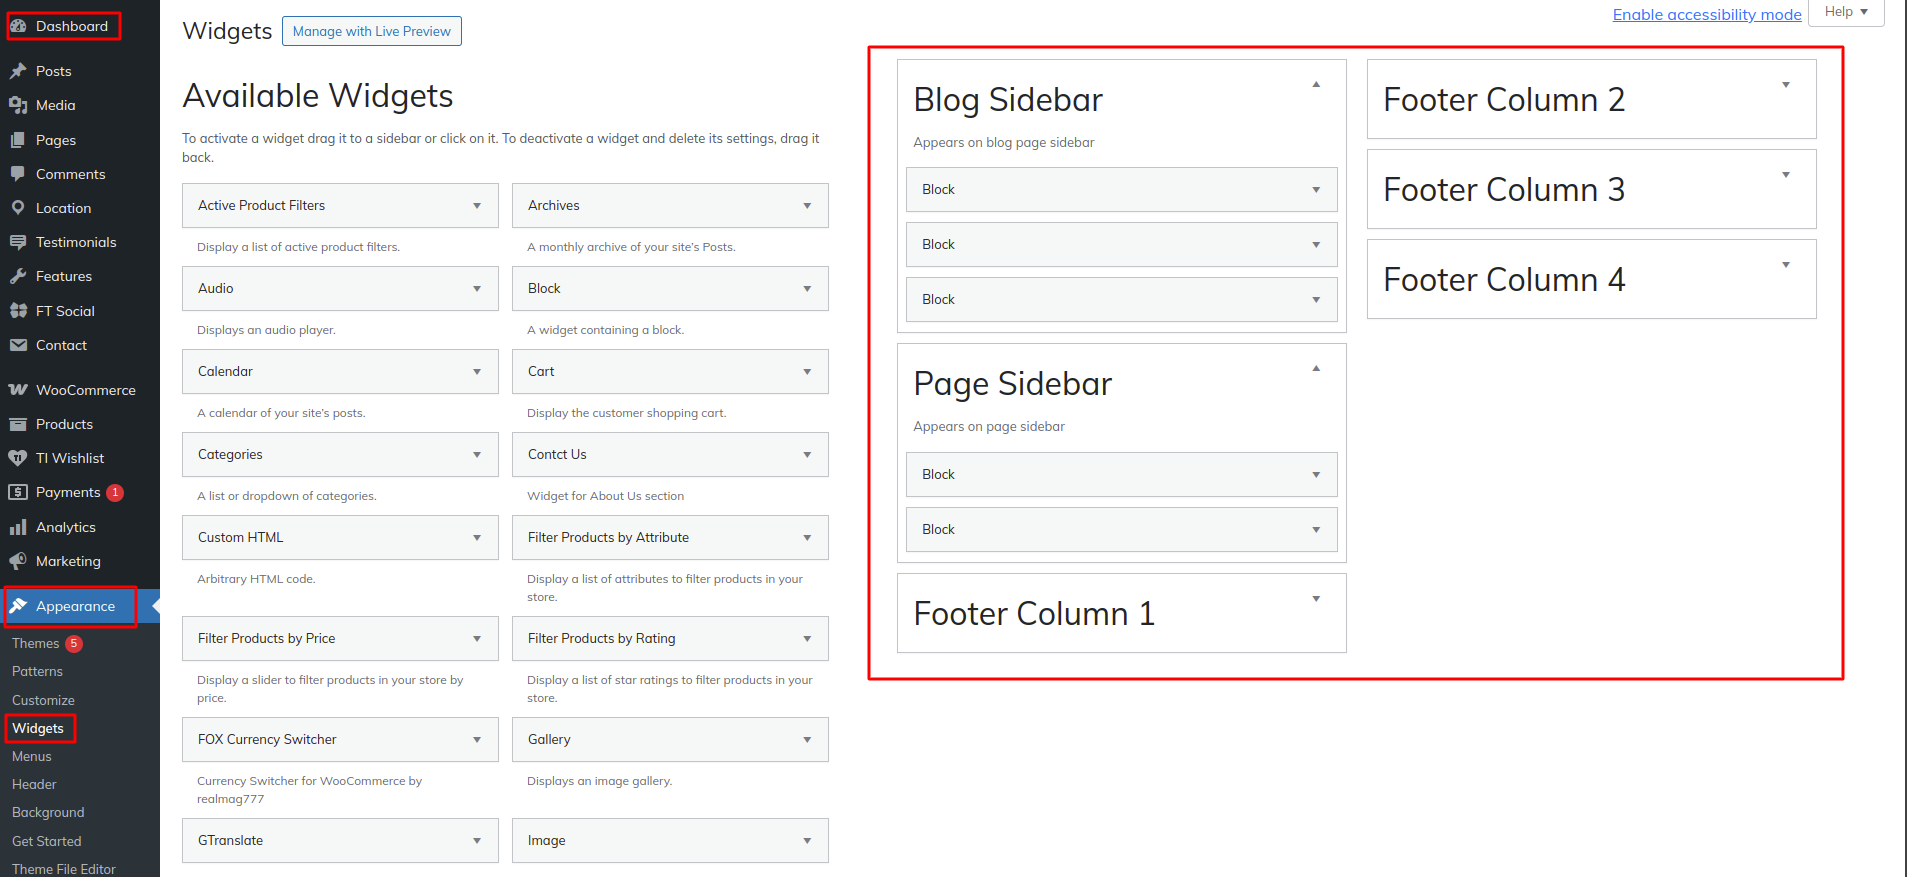
8. Custom Widgets
9. Support
Welcome to the Support Section! We are here to assist you in making the most out of our WordPress theme. Whether you're facing issues, need guidance on customization, or have general questions, we're here to help.
How to Get Support
- Documentation
Before reaching out for support, we recommend consulting our comprehensive documentation. It covers installation instructions, theme features, customization options, and troubleshooting tips. - Support Forum
If you haven't found a solution in the documentation or Knowledge Base, our support forum is the next step. You can post your questions, issues, or feature requests in the forum, and our support team, as well as the community, will assist you. Just click on the link provided below:
For Any Time Assistance / Feel Free To Ask , click here